1 Series E81 130i (N52K) 3-door

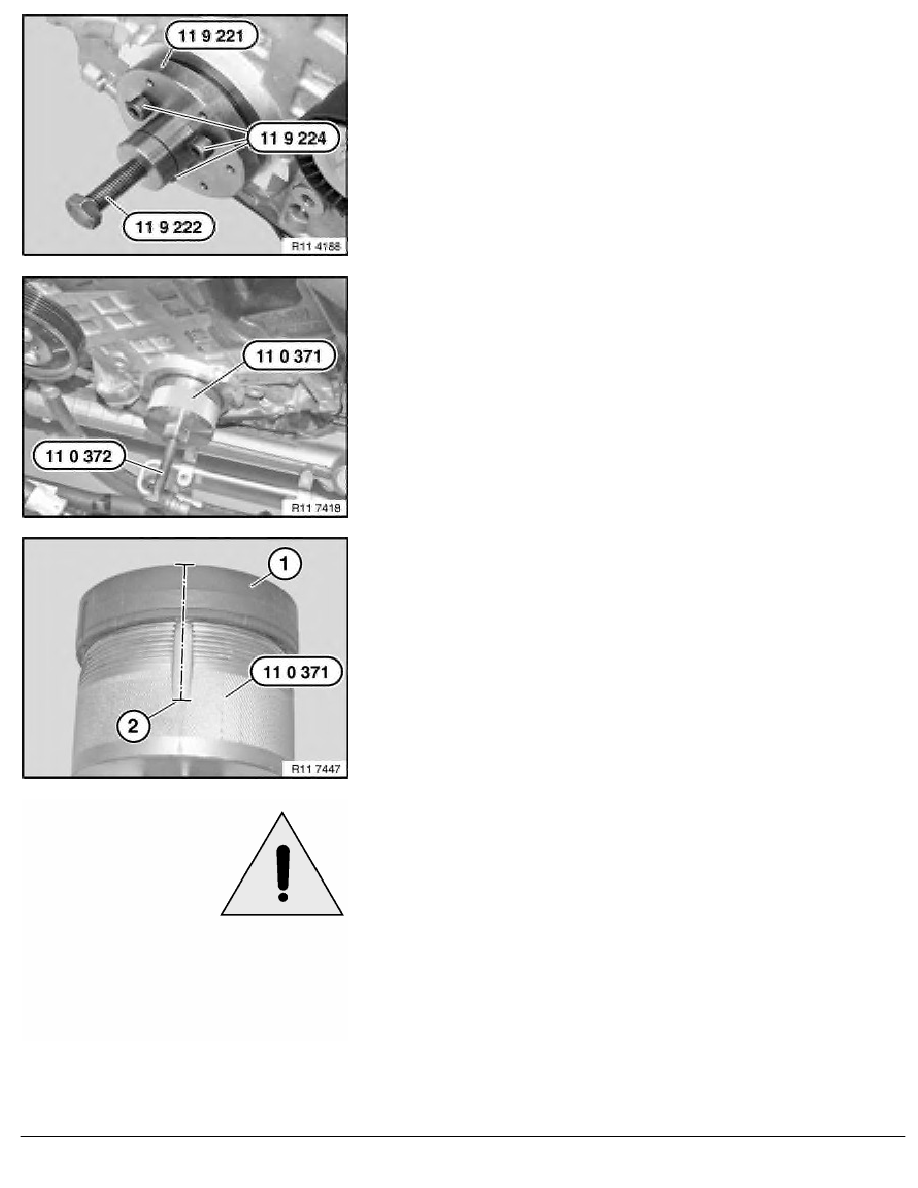
Turn back special tool 11 9 222.
Push special tool 11 9 221 onto crankshaft.
Important!
When screws are tightened down (special tool 11 9 224 ),
crankshaft seal is pressed inwards approx. 1 mm and thus
slackened for subsequent removal.
Insert screws (special tool 11 9 224 ) and tighten down to
approx. 20 Nm.
Screw special tool 11 0 371 to 80 Nm into crankshaft seal.
Screw in spindle 11 0 372 .
Release crankshaft seal from housing.
Repeat the operation several times if necessary.
Carefully saw open crankshaft seal (1) at cutting line (2).
Remove crankshaft seal (1) from special tool 11 0 371 .
Important!
The following text describes installation and sealing between
the engine block and crankshaft seal.
The engine block will not be leakproof at the outside of the
crankshaft seal if you fail to comply with the individual work
steps and the work sequence.
RA Replacing front crankshaft seal (N52K)
BMW AG - TIS
22.01.2013 03:20
Issue status (12/2007) Valid only until next DVD is issued
Copyright
Page - 2 -
