
1 Series E81 130i (N52K) 3-door
Possible classification: rbbrrb
Cylinder 1: Classification Red / Red
Cylinder 2: Classification Blue / Blue
Cylinder 3: Classification Blue / Blue
Cylinder 4: Classification Red / Red
Cylinder 5: Classification Red / Red
Cylinder 6: Classification Blue / Blue
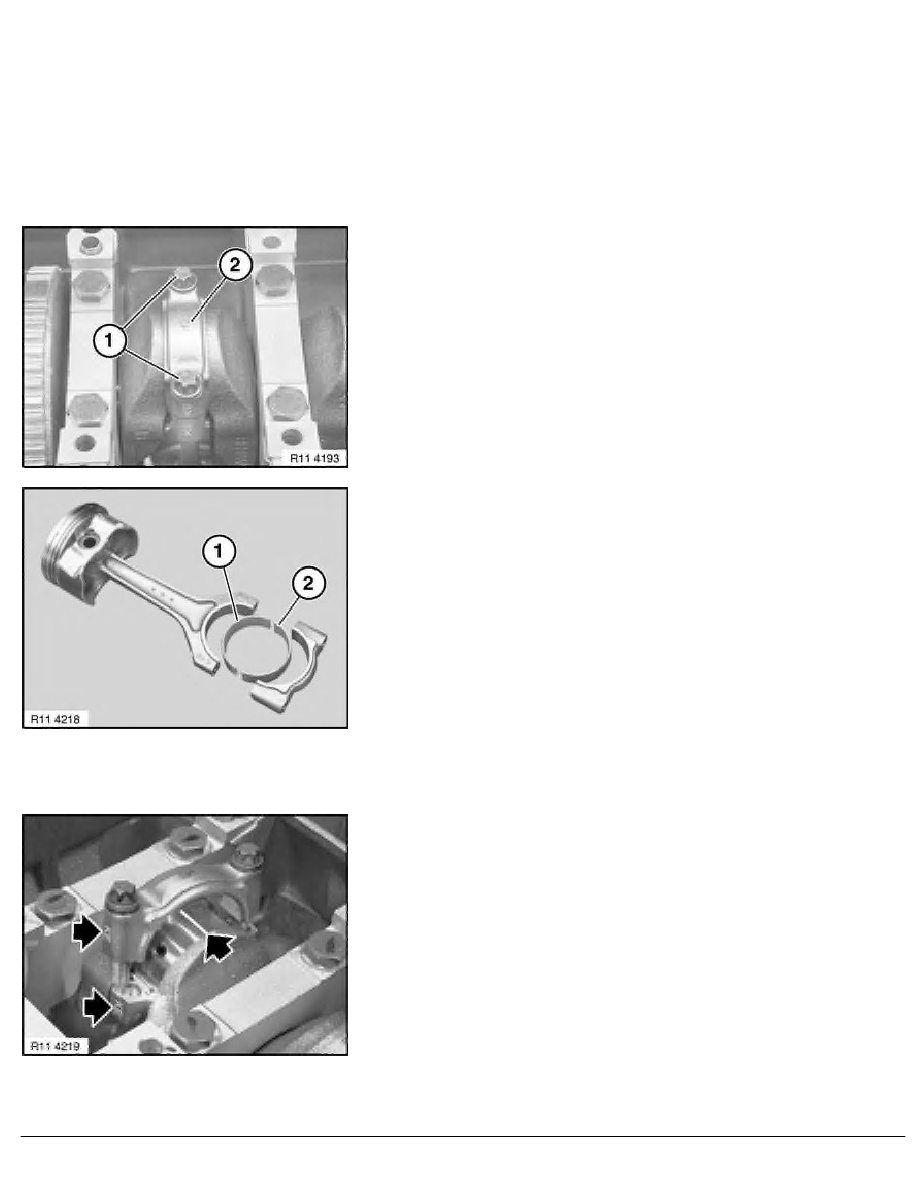
Release conrod bolts (1).
Remove connecting rod bearing cap (2).
Important!
Risk of damage to cylinder wall and to crankshaft.
Gently release connecting rod from crankshaft.
Remove connecting rod bearing shells (1 and 2).
Install new conrod bearing shells.
Installation:
Pay attention to guide lugs during installation.
Important!
All crankshaft crank pins are classified.
In each case insert only one colour of connecting rod bearing
shell (1 and 2) for each connecting rod.
Check conrod bearing clearance.
Piston in BDC position.
To determine the connecting rod bearing play, make sure that the
bearing points are clean and free from oil and grease.
Fit special tool 00 2 590 (Plastigage Type PG 1) to the oil-free
crankshaft.
Fit conrod bearing cap so that pairing letters match up.
RA Replacing all connecting rod bearing shells (N52K)
BMW AG - TIS
22.01.2013 03:23
Issue status (12/2007) Valid only until next DVD is issued
Copyright
Page - 2 -