1 Series 123d (N47S) Coupe

Important!
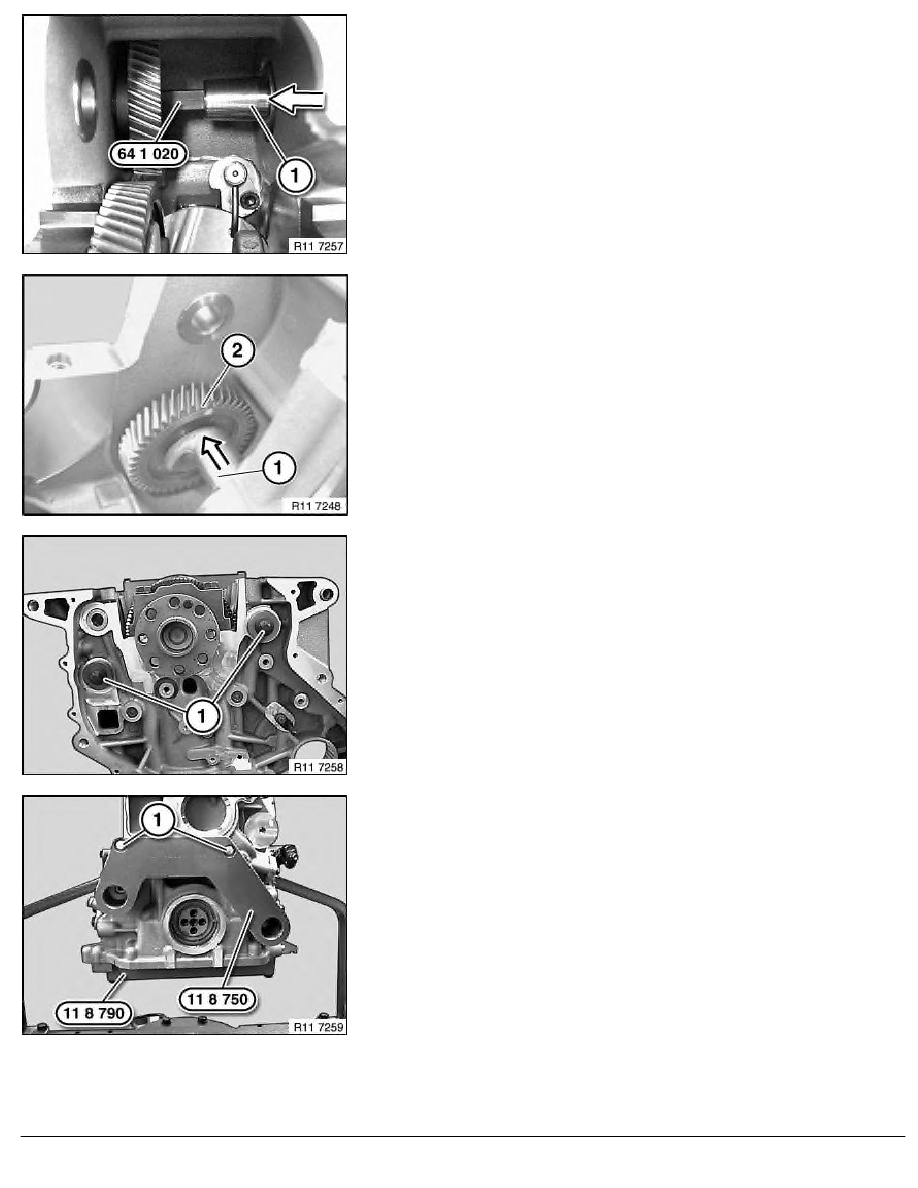
Do not drop counterbalance shafts into the bearings.
Insert special tool 64 1 020 through the gearwheel into the
counterbalance shaft.
Carefully insert counterbalance shaft (1) in gearwheel in direction
of arrow.
Position counterbalance shaft (1) in direction of arrow in
gearwheel (2).
Note:
Shown with crankshaft removed for clearer illustration.
Screw both bolts (1) into the counterbalance shafts on the left
and right.
Do not tighten both bolts otherwise the counterbalance shafts may
jam and it will no longer be possible to position them in the next
operation.
Position both counterbalance shafts.
The balance weights of the counterbalance shafts must face
towards the oil pan. For this purpose, the engine must be moved
into the normal position with special tool 00 2 300 .
Both counterbalance shafts together with the balance weights
must now face downwards towards the oil pan.
Secure special tool 11 8 750 to the crankcase using the screws
(1) for the coolant pump.
RA Replacing crankshaft (N47, N47S)
BMW AG - TIS
16.01.2013 01:31
Issue status (12/2007) Valid only until next DVD is issued
Copyright
Page - 7 -
