
1 Series 123d (N47S) Coupe
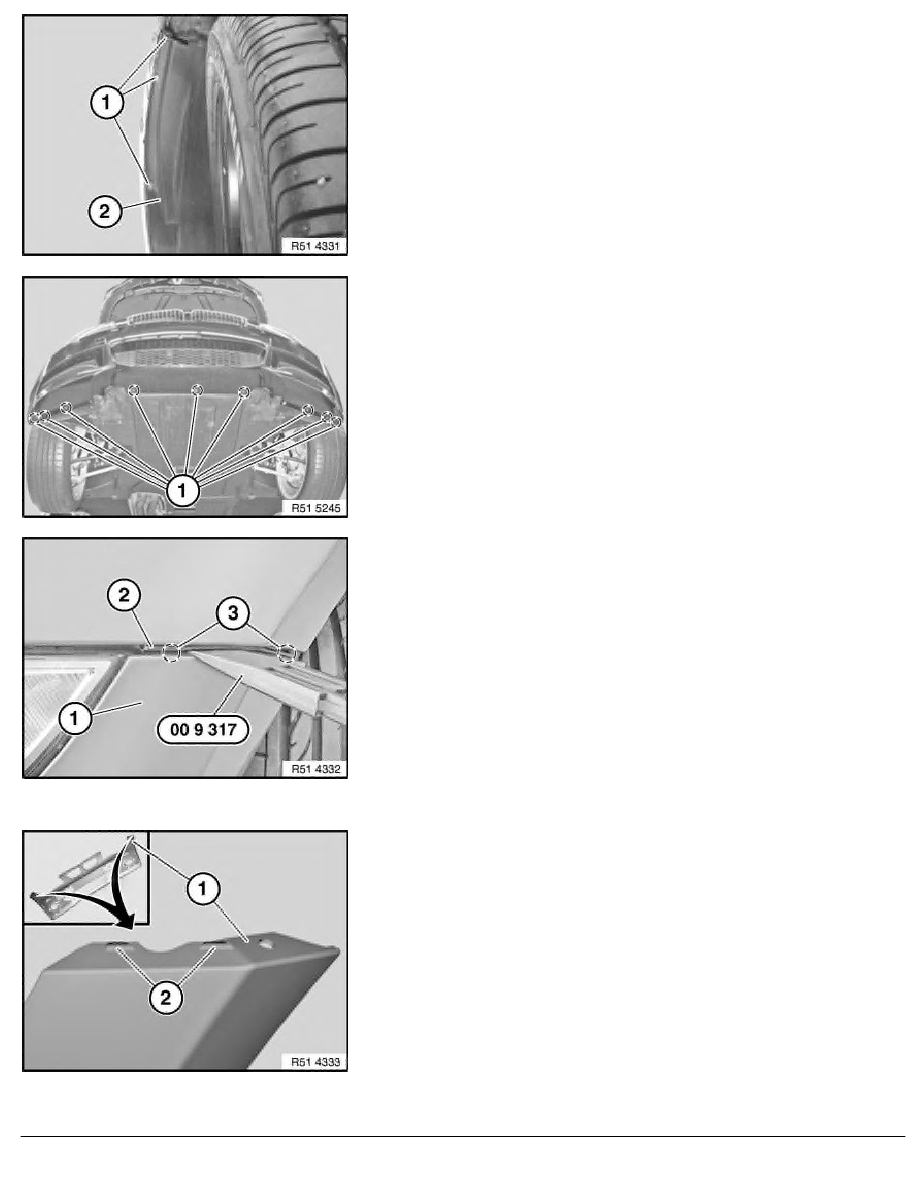
Release screws (1) on wheel arch trim (2) on both sides.
Lift out wheel arch trim (2) at side.
Installation:
Make sure wheel arch trim (2) is in correct position.
Release screws (1).
Important!
Do not damage bumper trim when pulling off.
Slide special tool 00 9 317 between bumper trim (1) and
bracket (2).
Release catches in area (3) and lever out bumper trim (1) in
outward direction.
Pull bumper trim (1) forwards a little.
If necessary, disconnect plug connections on ultrasonic
sensors/front fog lamps.
Remove bumper trim (1) towards front with aid of a 2nd person.
Installation:
Catches (2) of bumper trim (1) must not be damaged.
If necessary, carry out height adjustment, refer to Gap
dimensions, body.
RA Removing and installing/replacing front bumper trim (M Technic aerodynamic kit)
BMW AG - TIS
16.01.2013 07:56
Issue status (12/2007) Valid only until next DVD is issued
Copyright
Page - 2 -