
1 Series E87 116i (N45T) 5-door
Note:
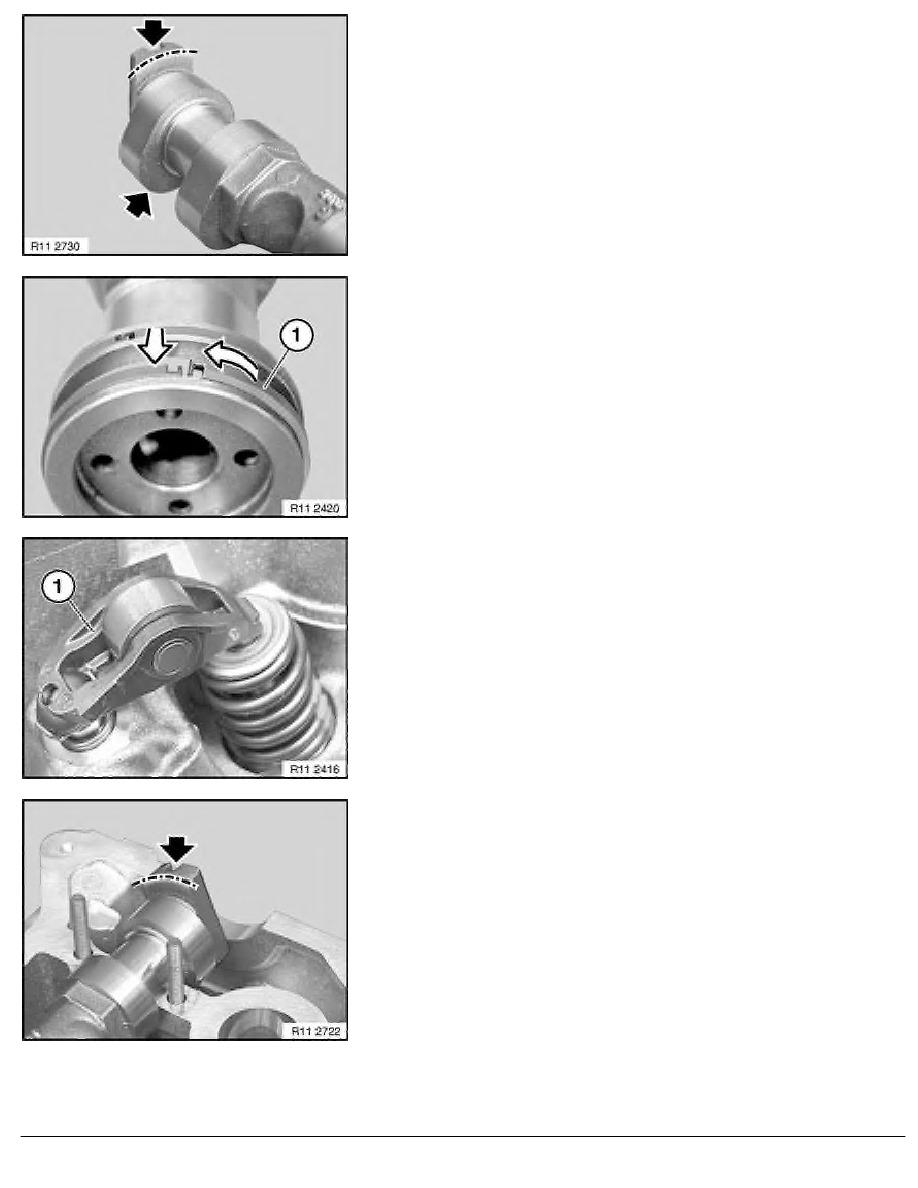
Identifying feature of exhaust camshaft:
The rounded area on the twin surface points upwards, the cams at
cylinder 4 positioned as illustrated at an angle downwards to the
exhaust side.
Installation:
Clean all bearings and cams of exhaust camshaft and lubricate
with engine oil.
Installing plain compression rings (1):
Important!
Plain compression rings (1) can easily break.
Carefully pull compression ring (1) apart and install from front.
Press compression ring (1) on one side into groove, hook in
catch on other side.
Important!
Rocker arms (1) slip slightly when exhaust camshaft is fitted.
Make sure rocker arms (1) are secured as illustrated on
hydraulic valve clearance compensating elements and on
valves.
Used rocker arms (1) may only be reused in the same position.
Align rockers (1) straight.
Insert exhaust camshaft (1) as illustrated.
Rounded area on twin surface points upwards.
RA Removing and installing/replacing exhaust camshaft (N45T)
BMW AG - TIS
17.01.2013 15:32
Issue status (12/2007) Valid only until next DVD is issued
Copyright
Page - 4 -