
1 Series E87 120i (N43) 5-door
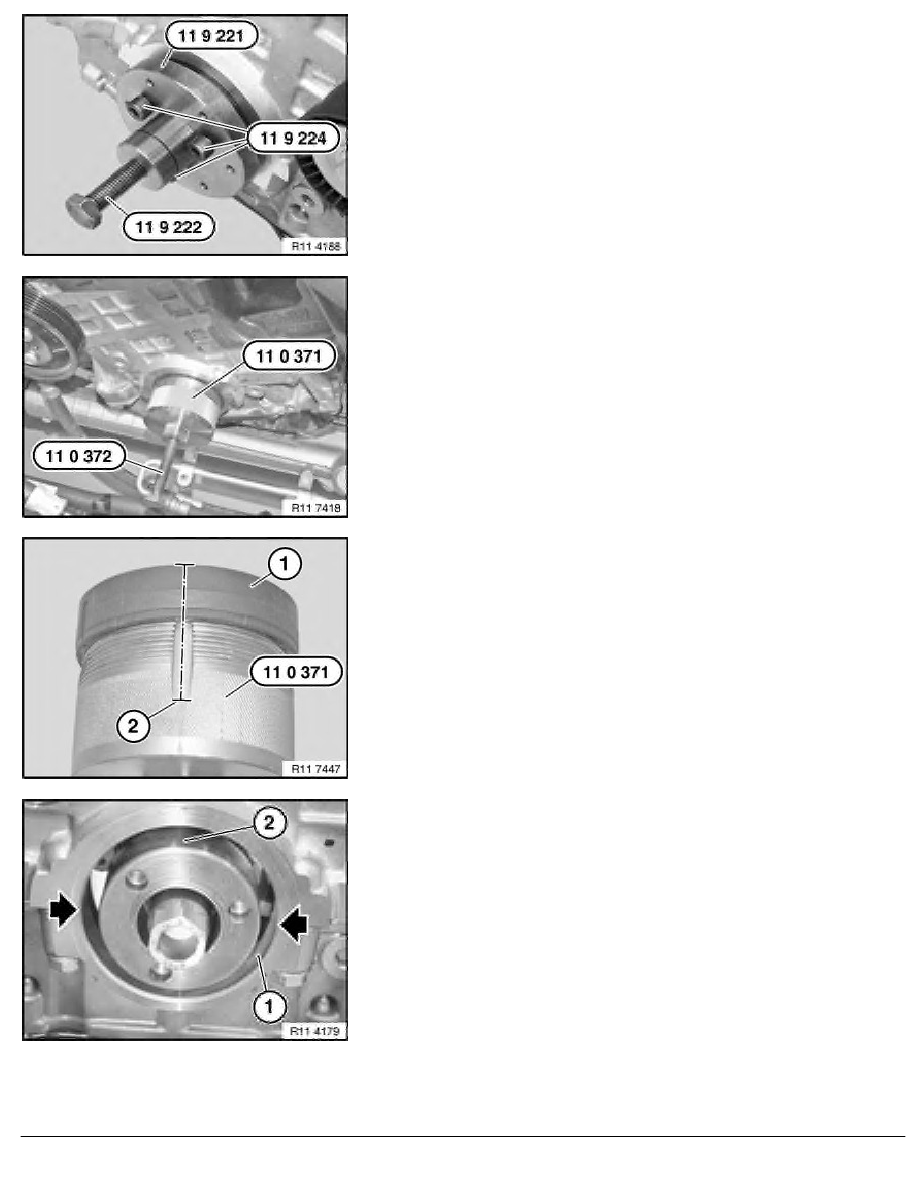
Turn back special tool 11 9 222.
Push special tool 11 9 221 onto crankshaft.
Important!
When screws are tightened down (special tool 11 9 224 ),
crankshaft seal is pressed inwards approx. 1 mm and thus
slackened for subsequent removal.
Insert screws (special tool 11 9 224 ) and tighten down to
approx. 20 Nm.
Screw special tool 11 0 371 to 80 Nm into crankshaft seal.
Screw in spindle 11 0 372 .
Release crankshaft seal from housing.
Repeat the operation several times if necessary.
Carefully saw open crankshaft seal (1) at cutting line (2).
Remove crankshaft seal (1) from special tool 11 0 371 .
Installation:
Clean sealing surface (1) and degrease thoroughly in area of
housing partition.
Apply a light coat of oil to running surface (2) of crankshaft seal.
Illustration N42.
RA Replacing front crankshaft seal (N43)
BMW AG - TIS
23.01.2013 06:41
Issue status (12/2007) Valid only until next DVD is issued
Copyright
Page - 2 -