
1 Series E87 120i (N43) 5-door
Connect pressure line (1), tightening nuts hand-tight only in the
process.
Important!
Connect pressure line (1) without tension only.
In order to ensure that the pressure line is connected without
tension, it must be possible to screw on the nuts easily by
hand!
If the nuts cannot be screwed on easily by hand, the injector
must if necessary be turned a little.
Turn injector (2) if necessary in direction of arrow until nuts on
pressure line can be easily screwed on by hand.
Tighten nuts on pressure line hand-tight.
Then tighten down screw for holding-down element (1).
Tightening torque 13 53 1AZ
.
Adhere to tightening sequence:
•
First tighten down nut (1) on injector. Tightening torque
13 53 2AZ
.
•
Then tighten down nut (2) on high-pressure rail. Tightening
torque 13 53 3AZ
.
When tightening nut (1) on injector, grip hexagon head of injector
with wrench (3).
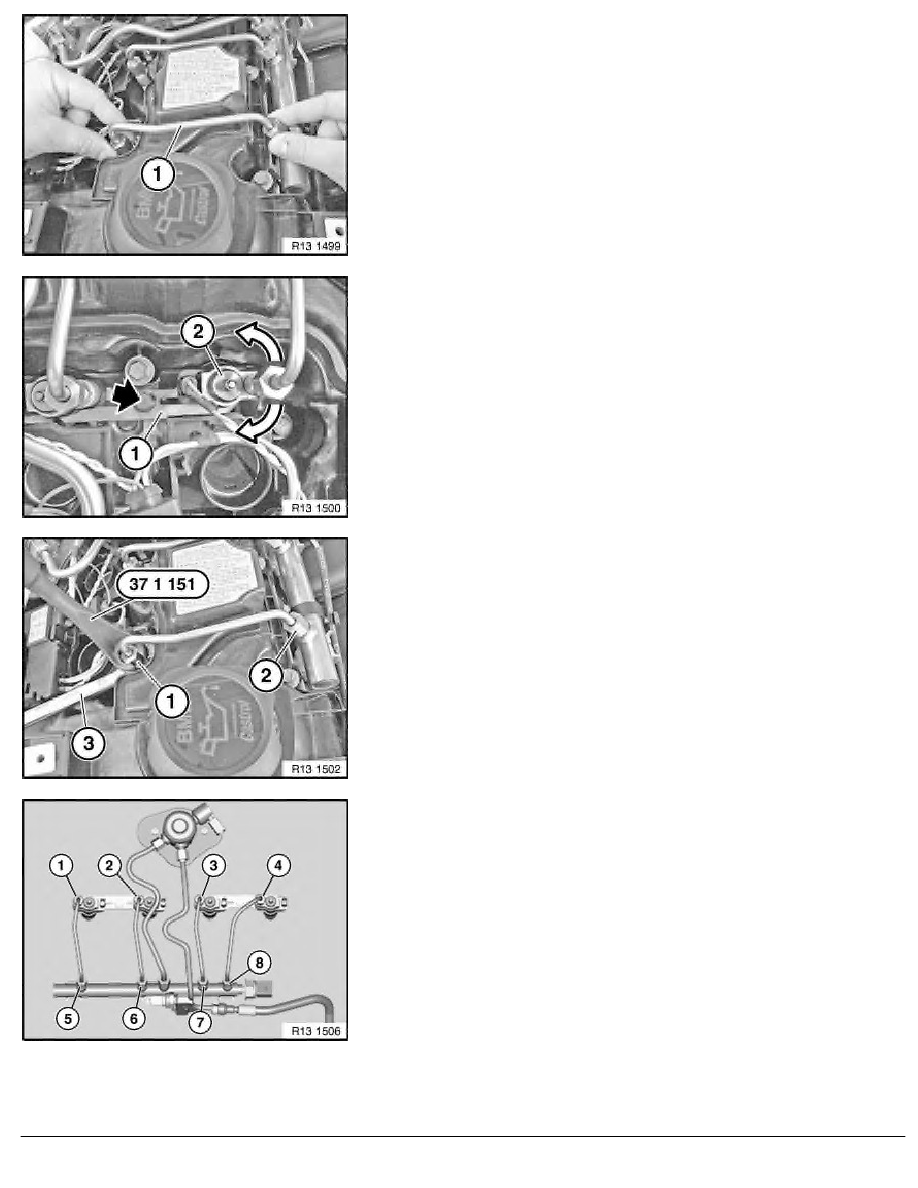
Tighten down nuts with special tool 37 1 151 .
Note:
When all the pressure lines have been removed, the nuts must be
tightened in the order shown.
Tightening torque 1 to 4:
13 53 2AZ
Tightening torque 5 to 8:
13 53 3AZ
RA Removing and installing or replacing a fuel injector (N43)
BMW AG - TIS
23.01.2013 07:18
Issue status (12/2007) Valid only until next DVD is issued
Copyright
Page - 7 -