
3 Series E36 316i (M43) TOUR
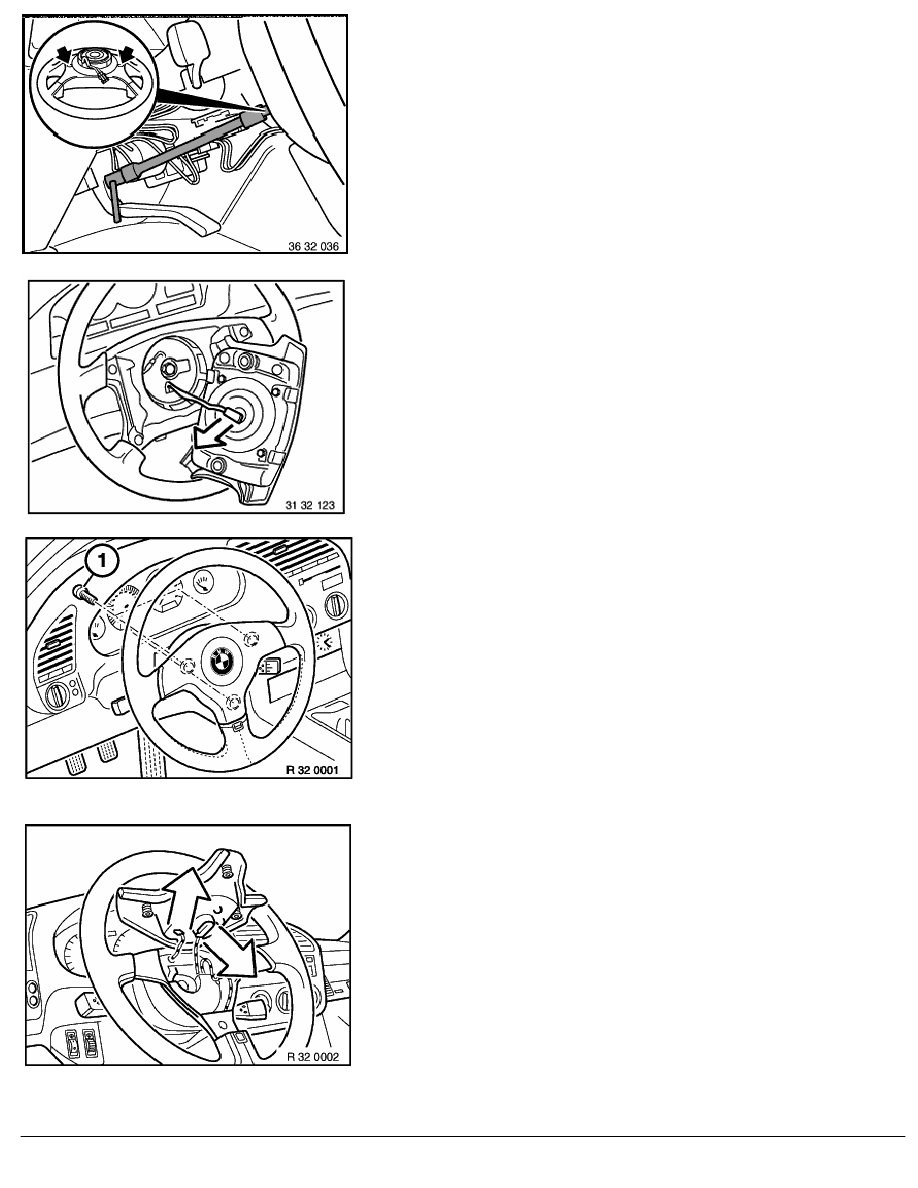
Release screws (Torx socket T 30).
Installation:
First tighten screws on right-hand side in forward direction.
Do not pinch wires.
Tightening torque,
refer to Technical Data 32 34 1AZ .
Pull off connector and remove airbag unit.
Important!
Lay airbag unit with impact pad facing upwards (luggage
compartment) only.
Airbag II:
Important!
If a fault has been detected in the airbag system (airbag
indicator light illuminates), a 10-minute waiting period must be
observed after disconnecting the battery. Capacitor in control
unit is discharged and a trigger pulse cannot be generated
inadvertently.
Loosen screws (1).
Installation:
Tightening torque: 2 Nm.
Pull off connector and remove airbag unit.
Installation:
Secure airbag unit in steering wheel. Do not pinch wires.
RA Removing and installing or replacing airbag unit
BMW AG - TIS
20.01.2013 13:50
Issue status (12/2007) Valid only until next DVD is issued
Copyright
Page - 2 -