
3 Series E36 318i (M43) CONVER
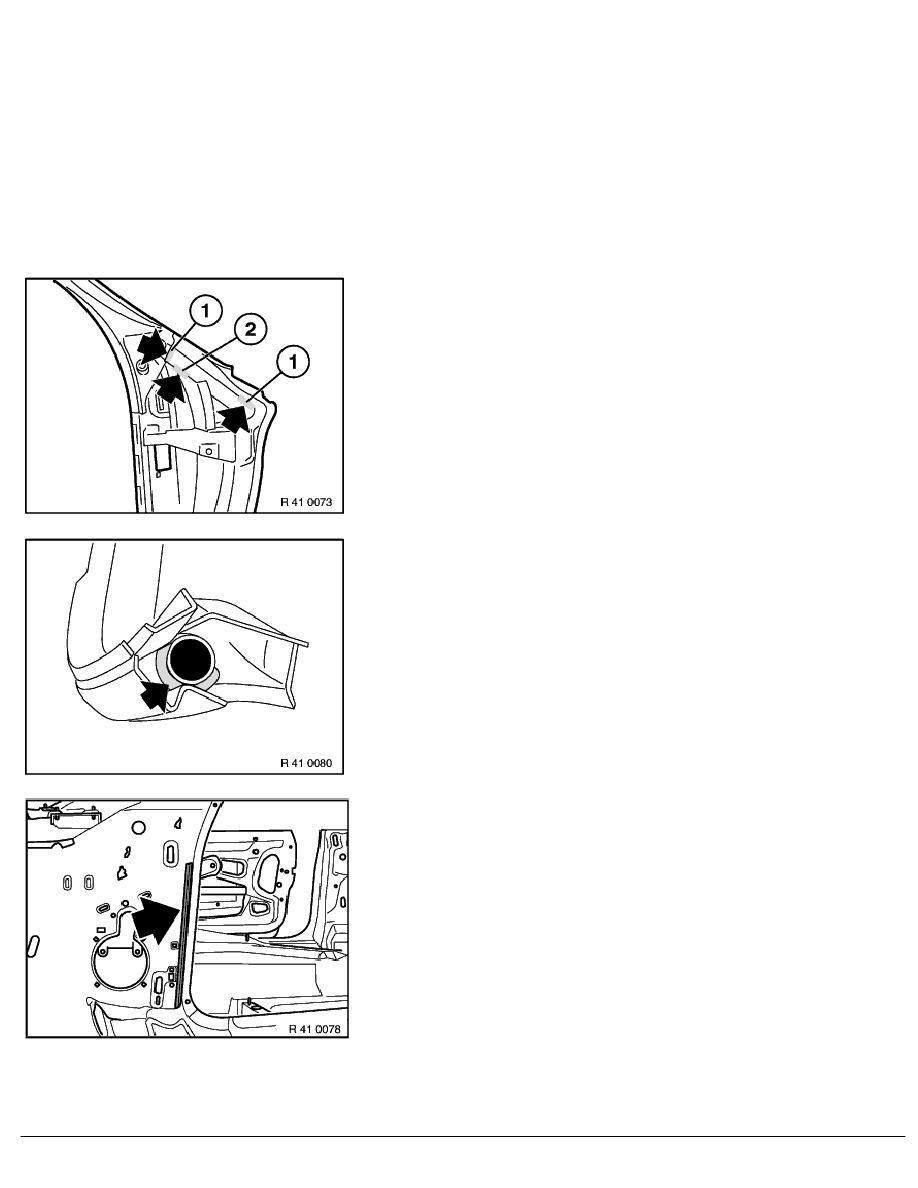
Complete assembly of door pillar with internal windshield (incl.
reinforcing pipe) and weld together.
(1)
Connection between reinforcement plate and door stop
(2)
Connection between reinforcement inside windshield / door
pillar
(3)
Connection inside windshield / door pillar
(4)
Connection inside windshield / door pillar windshield frame
Weld together door pillar with internal windshield (incl.
reinforcement pipe)
(1)
Connection, reinforcement tube / reinforcement inside
windshield and connection between tube / door pillar
(2)
Connection between tube / door stop reinforcement
Weld top edge of reinforcement pipe with internal windshield and
all round door pillar.
Grind welding spots until smooth.
Caution!
Do not grind plates on connection points down too thin!
Note:
Figure shows plan view of leading edge of reinforcement pipe.
Fit square-section reinforcement pipe to support carrier and spot-
weld but do not weld completely at this stage.
Adapt door pillar and check position of square-section
reinforcement pipe, correcting if necessary.
RA Replacing front left or right door pillar (cover for side member removed)
BMW AG - TIS
24.01.2013 12:16
Issue status (12/2007) Valid only until next DVD is issued
Copyright
Page - 5 -