
3 Series E36 318is (M44) COUPE
Installation:
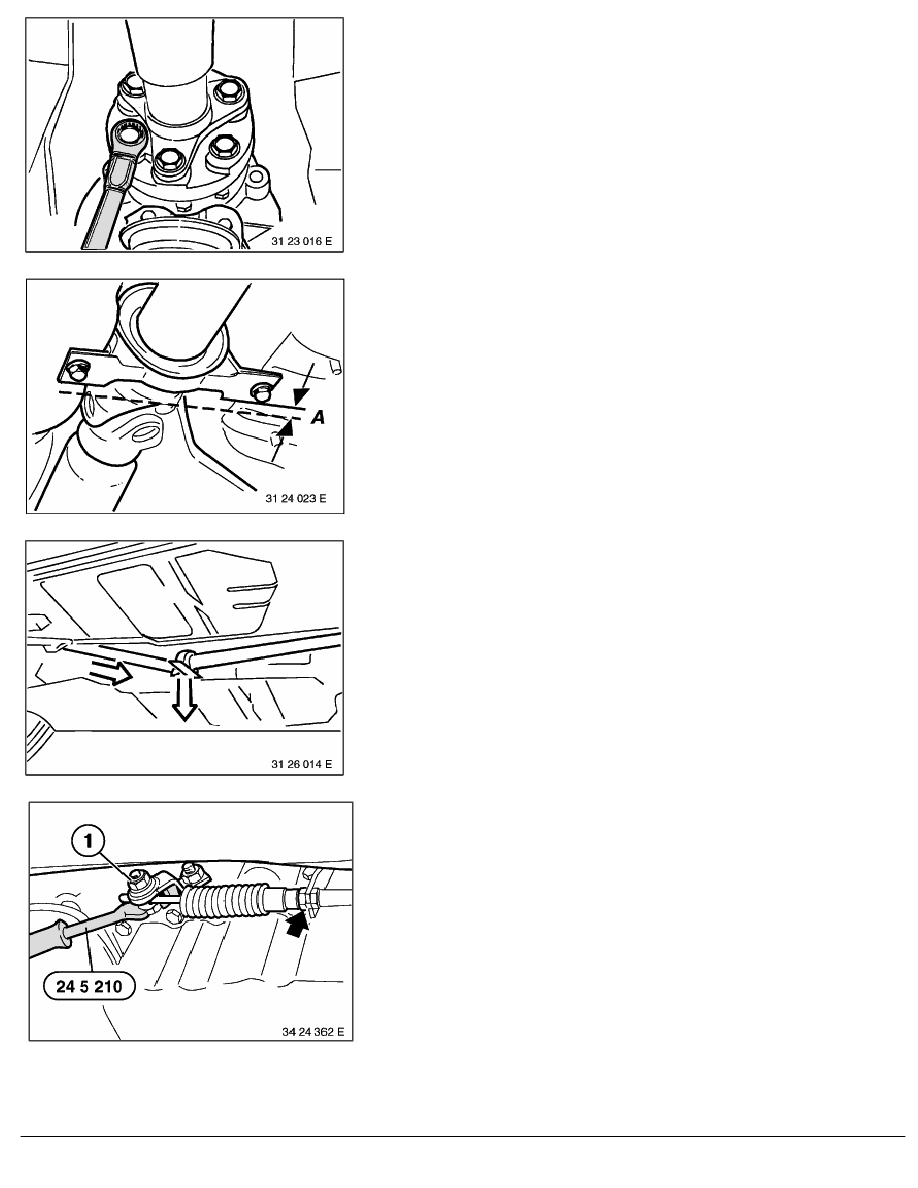
Replace stop nuts.
Tightening torque,
refer to Technical Data 26 11 1AZ.
To prevent torsion stress on the joint disc, only turn the nuts or
bolts on the flange side - if possible.
Unscrew centre mount.
Installation:
Preload center mount in forward direction (A) 4 ... 6 mm.
Tightening torque,
refer to Technical Data 26 11 6AZ.
Pull the propeller shaft downward at the centre bearing, pulling it
off the centring pin on the manual transmission.
Caution!
Do not let propeller shaft fall into joints. This would squash the
rubber gaiter, especially on the constant velocity joint.
Unfasten nut (1) in setting "P".
Caution!
Always brace bolt with special tool 24 5 210 to avoid
deformation of the cable.
Special tool 24 5 210 can only be fitted in position "P".
Tightening torque,
refer to Technical Data 25 16 2AZ.
Unscrew cable from holder.
Pull out cable.
Tightening torque,
refer to Technical Data 25 16 1AZ.
Installation:
RA Removing and installing automatic transmission (A4S 270R/ 310R)
BMW AG - TIS
05.02.2013 07:55
Issue status (12/2007) Valid only until next DVD is issued
Copyright
Page - 3 -