
3 Series E36 318tds (M41) SAL
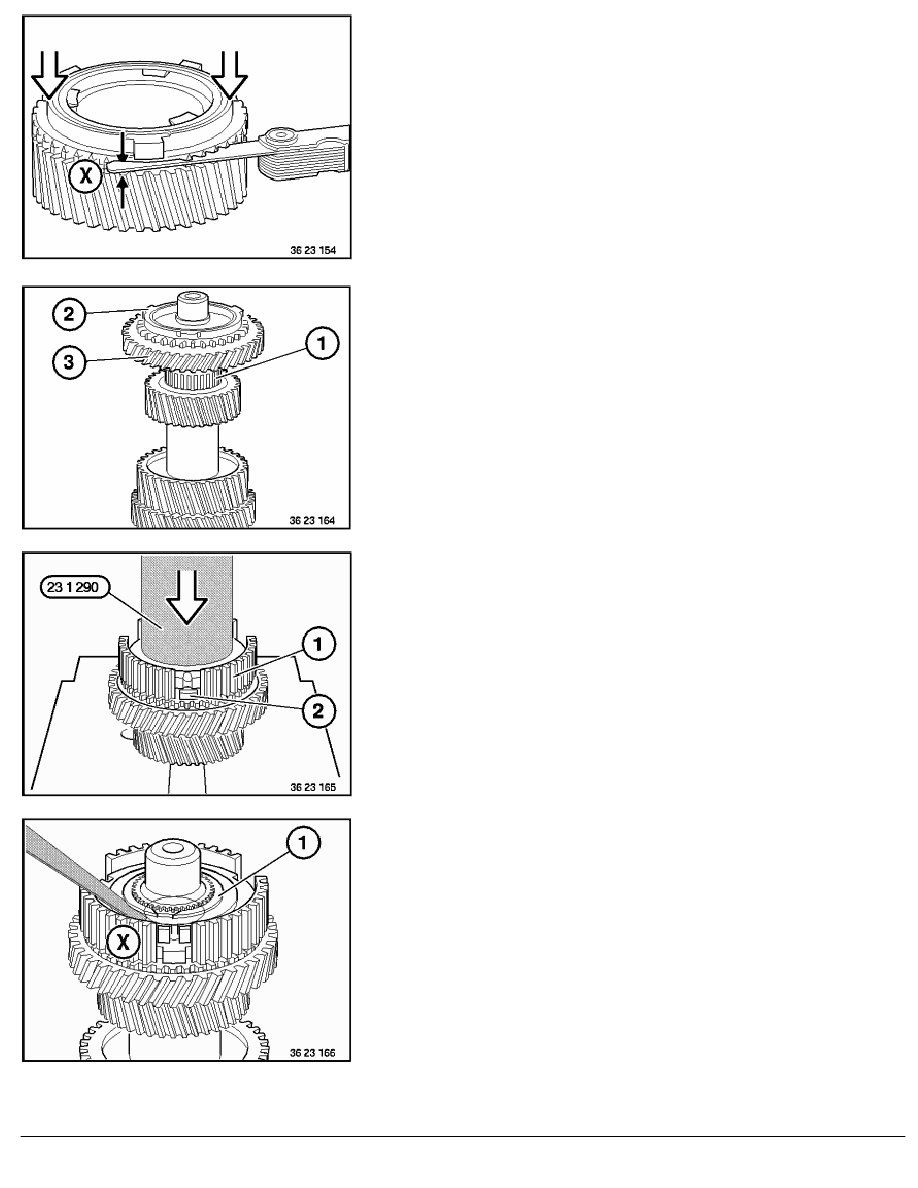
Check all synchronizer units for wear. For this purpose, determine
gap measurement X between synchronizer ring and the
corresponding gears.
Measure near the detent lugs. Uniformly press synchronizer ring in
direction of taper.
Gap measurements of the individual gear wheels,
refer to Technical Data.
Note:
If the gap dimension (x) is too tight, synchronizer ring, friction
ring and taper ring must be replaced.
Assemble output shaft:
Note:
Apply light coat of ATF oil to needle bearing (1) and
synchronizer ring (2) to the bearing races.
Fit needle bearing (1), reverse gear (3) and synchronizer ring (2)
to the output shaft.
Caution!
When press-fitting the guide sleeve, ensure that the detent
lugs (2) of the synchronizer ringes engage in the recesses in
the guide sleeve.
Heat guide sleeve for 5th/Reverse gears (1) to approx. 120
°
C (hot
air blower) and fit on output shaft, if necessary pressing firmly
home using special tool 23 1 290.
Install new retaining ring (1) and determine end float (X) with a
feeler gauge.
Permitted end float (X) max. 0.04 mm.
Note:
Circlips are available in Parts Service from 2.0 ... 2.3 mm in
increments of 0.05 mm.
RA Dismantling and assembling all synchronizer units (S5D 200G/ E36 M41)
BMW AG - TIS
06.02.2013 22:37
Issue status (12/2007) Valid only until next DVD is issued
Copyright
Page - 5 -