
3 Series E36 318tds (M41) SAL
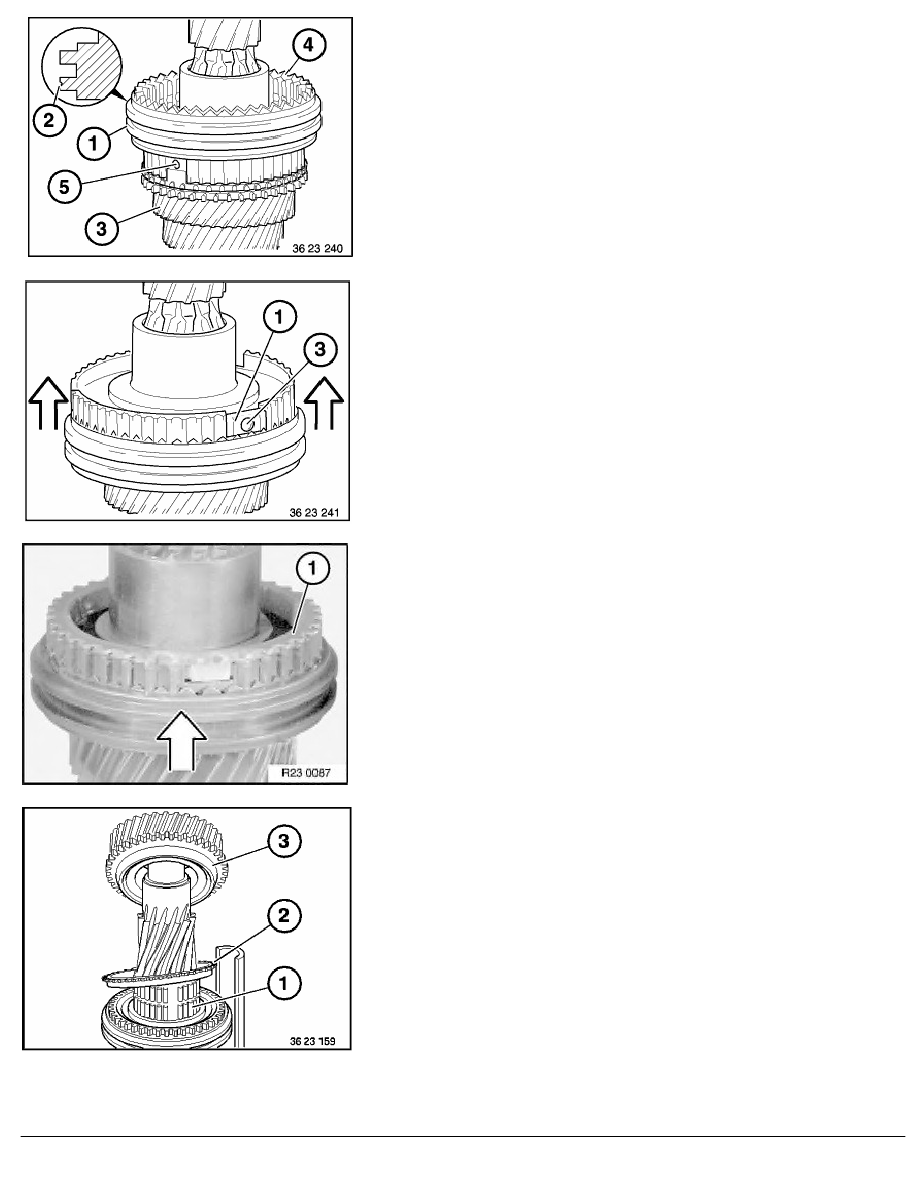
Fit sliding sleeve (1) with designation groove (2) facing 3rd gear
(3).
Install ball stops (3 off):
Tilt pressure piece (1) out of sliding sleeve until the ball stop (3)
can just be fitted to the compression spring.
Press ball stop (3) into pressure piece (1) and, at the same time,
push the pressure piece (1) into the sliding sleeve.
Insert synchronizer ring for 3rd gear (1) into the guide sleeve.
Press synchronizer ring into the guide sleeve and evenly pull
sliding sleeve upwards to its limit position (neutral position).
Note:
Coat needle bearing and synchronizer ring on bearing
surfaces with ATF-oil.
Fit needle bearing (1), synchronizer ring (2) and 4th gear (3) to the
countershaft.
RA Dismantling and assembling all synchronizer units (S5D 200G/ E36 M41)
BMW AG - TIS
06.02.2013 22:37
Issue status (12/2007) Valid only until next DVD is issued
Copyright
Page - 13 -