3 Series E36 323ti (M52) COMP

Other vehicle parts located in the repair zone or subject to
damage from heat, sparks or dust, must be removed or covered.
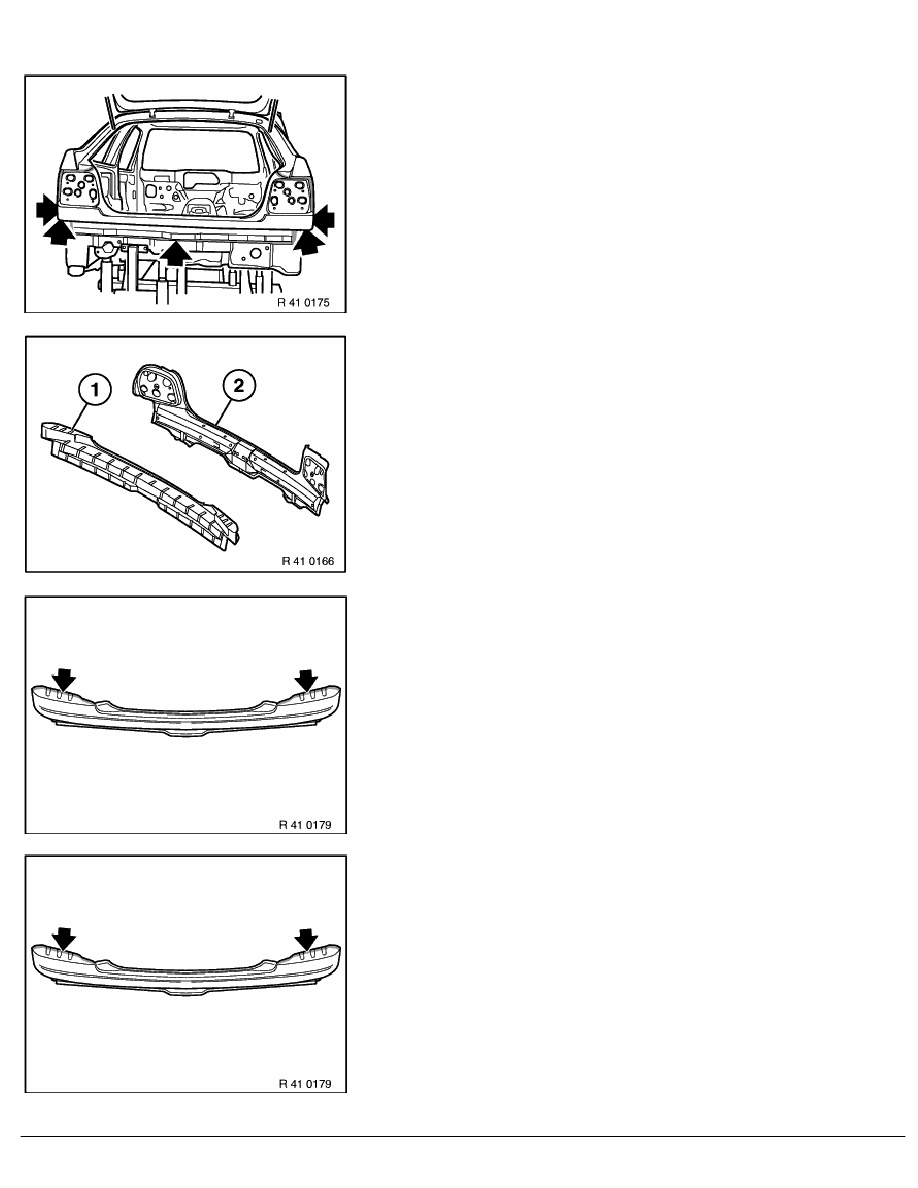
Expose connecting points on outer section of rear apron and open
up welding points:
-
Side panel
-
Water drain
-
Wheel housing extension
-
Trunk cover plate
Remove tail panel.
Straighten and grind joint surfaces.
Install spare inner section (2) of rear apron in vehicle, then install
spare outer section (1) of rear apron.
Adjust both parts to fit.
Mark out holes for plug welding connection point between lower
lamp carriers on spare outer section of rear apron.
Remove outer section of rear apron, then remove inner section of
rear apron.
Drill out holes for plug-welding connection point for lower lamp
carrier in spare outer section of rear apron.
Coat all connecting faces of spare parts and body with zinc dust
paint.
Install and secure spare inner section (2) of rear apron in vehicle,
then install and secure spare outer section (1) of rear apron.
RA Replacing rear apron (complete, i.e. outer and inner sections) (compact)
BMW AG - TIS
08.02.2013 14:05
Issue status (12/2007) Valid only until next DVD is issued
Copyright
Page - 2 -
