
3 Series E36 328i (M52) TOUR
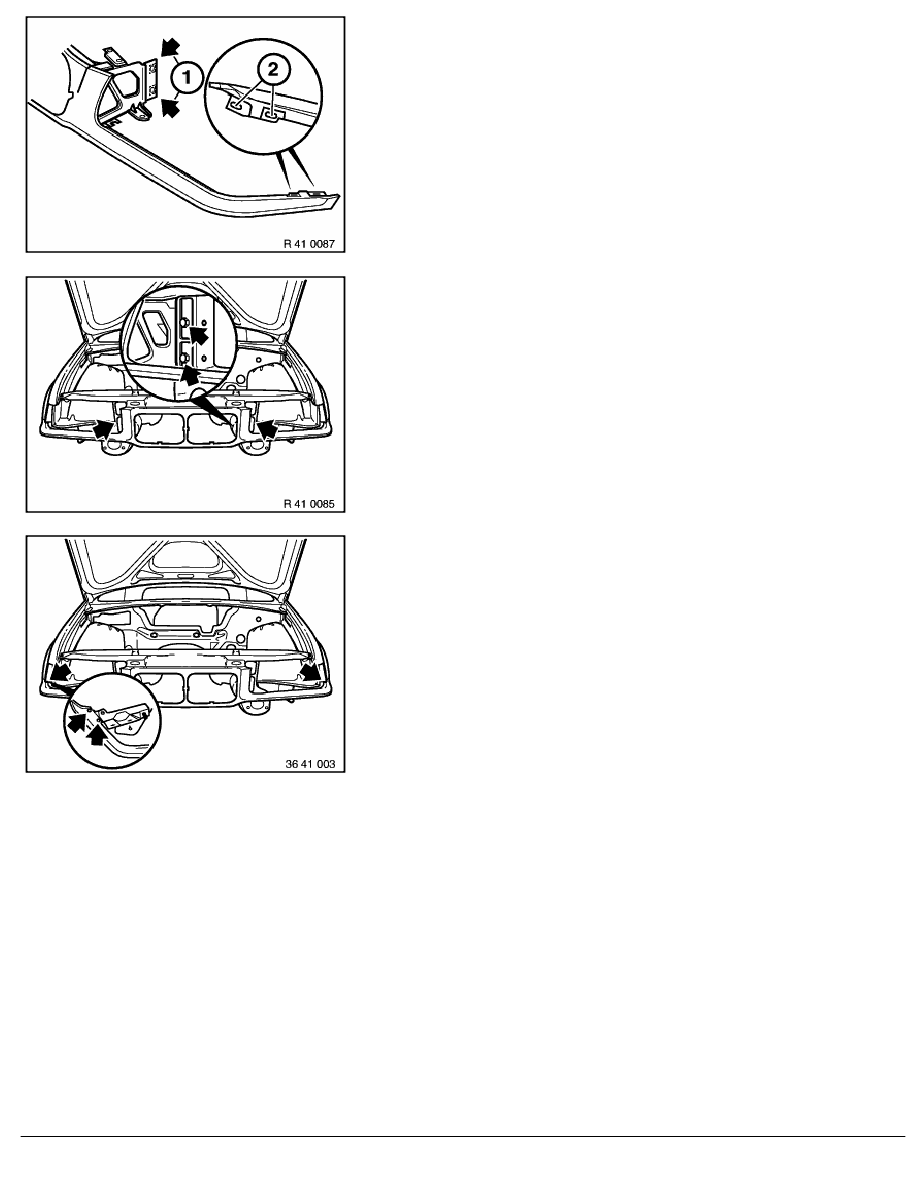
(1)= Bores with speed nuts for securing the front trim
(2)= Long bores for securing the side wall
Release screws on left and right front wall brackets.
Accessible from engine compartment.
Remove screws on left and right side panels.
Take off front panel.
If the previous version of front trim is replaced with the new
version of front trim, and if the front panel remains in the vehicles,
the following procedure applies:
RA Replacing front panel
BMW AG - TIS
09.02.2013 21:32
Issue status (12/2007) Valid only until next DVD is issued
Copyright
Page - 3 -