
3 Series E36 M coupe (S50) COUPE
Intake side:
Coat sealing rings, cables and cable grommet with a suitable
antiseize agent (e.g. talcum powder or rubber protection coating
agent).
Important!
Note cable guide.
Avoid damage to p.c.b. connections, solenoid valve wiring and
cable grommet at all costs.
B32 only:
Installation:
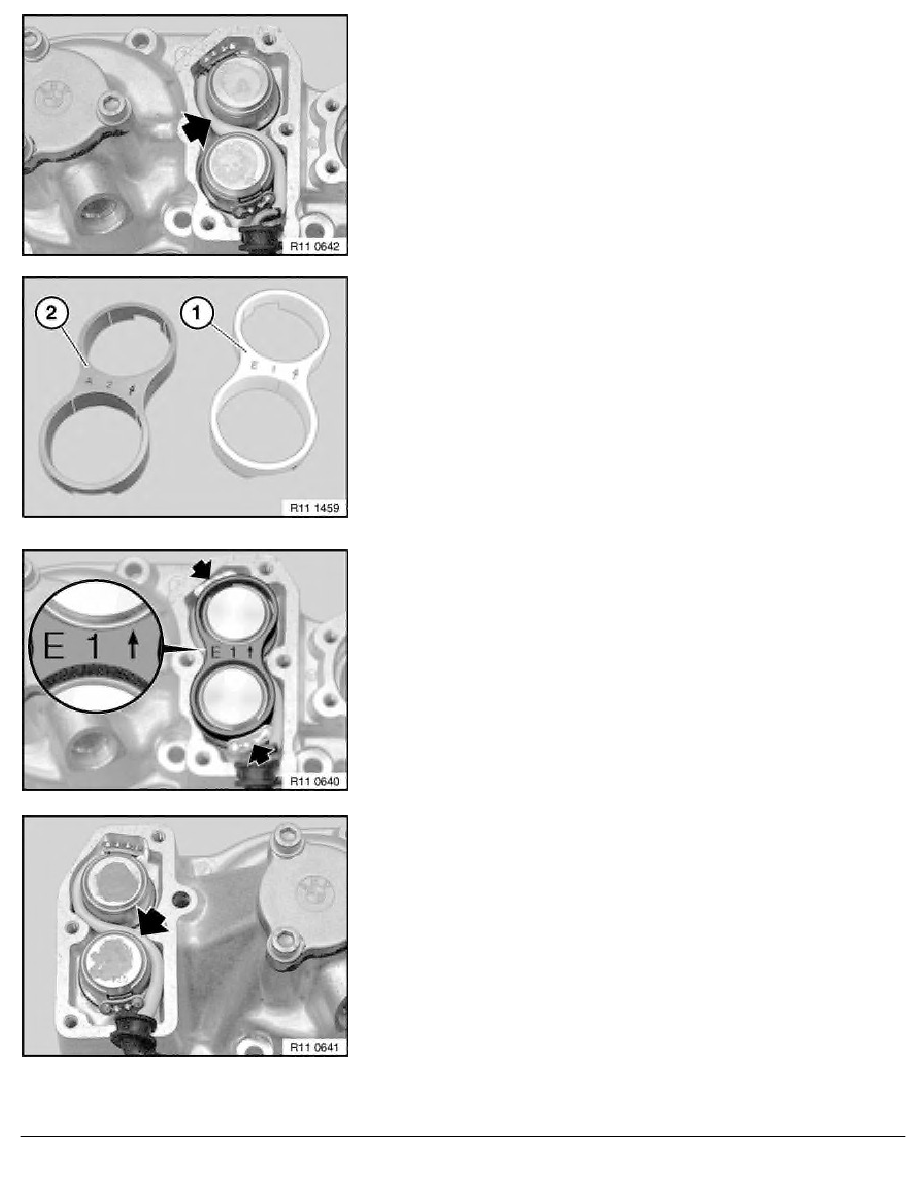
Solenoid valves must be aligned with an installation gauge.
The installation gauges are supplied by the Parts Service
when the solenoid valves are replaced.
1.
Installation gauge for inlet side
2.
Installation gauge for exhaust side
Note:
B30 not necessary.
Intake side:
Fit assembly gauge to intake end as illustrated in diagram.Align
solenoid valves with the help of this assembly gauge. The
recesses in the assembly gauge must slide over the board
connections of the solenoid valves.
Important!
Solenoid valves which have not been aligned tend to protrude:
this means they may become defective within a short period
of time.
Press solenoid valves firmly home, then remove assembly gauge.
Exhaust side:
Coat sealing rings, cables and cable grommet with a suitable
antiseize agent (e.g. talcum powder or rubber protection coating
agent).
Important!
Note cable guide.
Avoid damage to p.c.b. connections, solenoid valve wiring and
cable grommet at all costs.
RA Replacing solenoid valve for exhaust or intake side on VANOS adjustment unit (S5
BMW AG - TIS
09.02.2013 15:00
Issue status (12/2007) Valid only until next DVD is issued
Copyright
Page - 2 -