
3 Series E36 M coupe (S50) COUPE
Exhaust side:
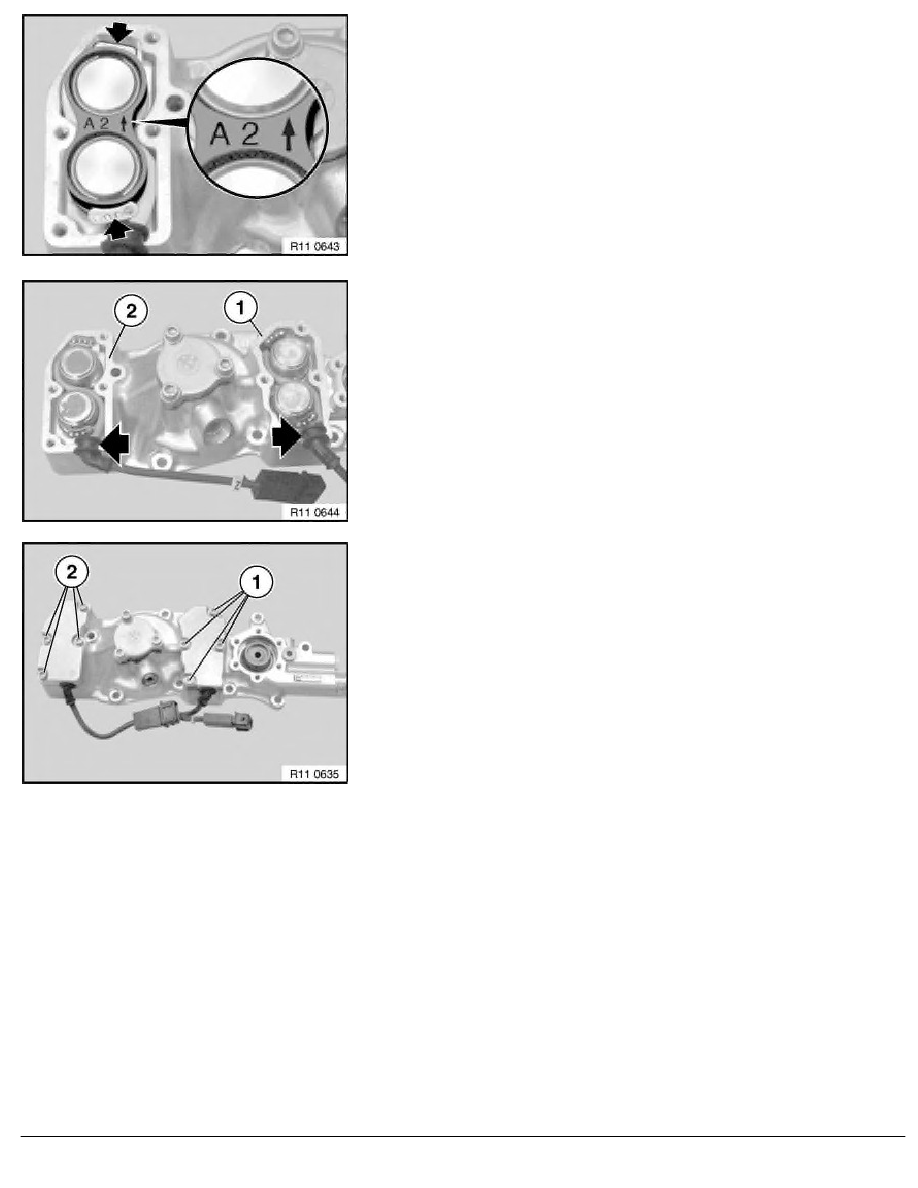
Fit assembly gauge to exhaust end as illustrated in this diagram.
Align solenoid valves with the help of this assembly gauge. The
recesses in the assembly gauge must slide over the board
connections of the solenoid valves.
Important!
Solenoid valves which have not been aligned tend to protrude:
this means they may become defective within a short period
of time.
Press solenoid valves firmly home, then remove assembly gauge.
Sealing surfaces (1 and 2) must be clean and free of oil.
Replace seals.
Insert wiring grommet in housing recess. Fit cover for intake and
exhaust solenoid valves.
Insert screws (1 and 2) and tighten down.
Tightening torque,
refer to Technical Data 11 36 10AZ .
RA Replacing solenoid valve for exhaust or intake side on VANOS adjustment unit (S5
BMW AG - TIS
09.02.2013 15:00
Issue status (12/2007) Valid only until next DVD is issued
Copyright
Page - 3 -