
3 Series E36 Z3 coupe (M52) COUPE
1
Glue bead
C1
29
-2
mm (width of primer trace)
2
Ceramic layer
C2
15
-2
mm (width of primer trace)
3
Primer coat
C3
15
-2
mm (width of primer trace)
4
Application point of glue bead
D1
63
±
1 mm (distance from (1) to window edge)
5
Seal
D2
1.5 mm (distance from (1) to (5)
D3
16
±
1 mm (distance from (1) to window edge)
A
7 mm (width of adhesive bead)
R1
approx. 10 mm
B
11
-1
mm (height of adhesive bead)
R 2
approx. 8 mm
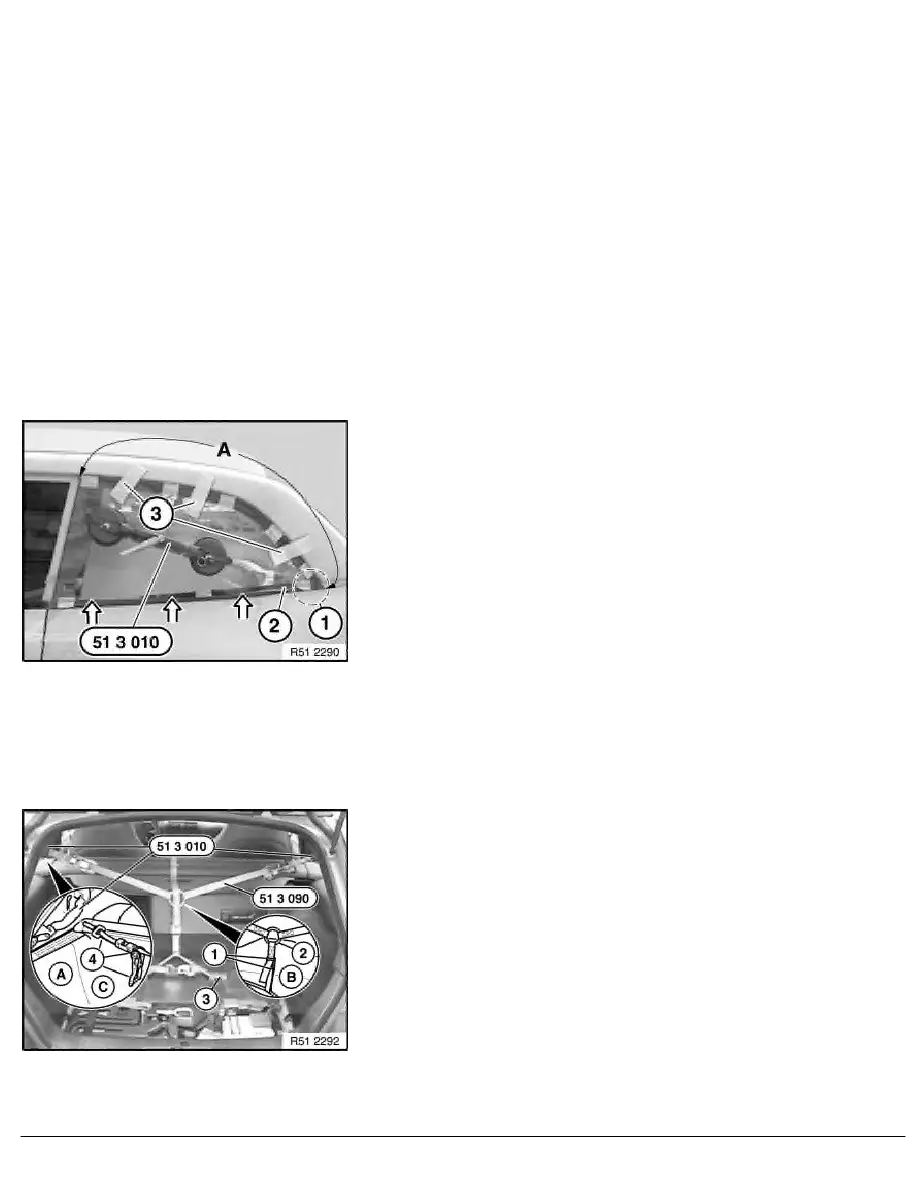
Attach special tool 51 3 010 to tool trolley twice. Moisten suction surfaces and secure side window from outside.
Secure special tool 51 3 010 without attachment joint to inner side.
When reusing old side window, remove residual adhesive to 0.5 mm.
The almost vertical part (B) of the adhesive bead (1) must face the seal (5).
Spread adhesive bead (4) with special tool 00 9 322 .
Note:
A second person will be needed to help feed in the lower seal.
The adhesive bead must not touch the vehicle body during
feeding in.
-
Fit side window with special tool 51 3 010 at bottom.
-
Attach seal (2) to body flange in corner area (1).
-
Adjust length so that seal (2) at rear/top rests against radius.
-
Fold out side window at top.
-
Check length adjustment.
-
If necessary, move side window so that seal (2) rests without
play in area (A).
-
Fix side window with yellow plastic adhesive tape (3)
(sourcing reference: BMW Parts Service) .
-
Attach seal (2) at bottom completely to body flange.
A
Attach special tool 51 3 090 (tensioning strap) at top to
special tool 51 3 010 (without joint).
B
Tension belt tensioner (1), center, until eye (2) is approx.
300 mm over mounts (3).
C
Tension belt tensioner (4), top, until eye (2) can be pulled
back approx. 20 mm.
RA Removing and installing side window glass, rear left or right (Z3 Coupé, M Coupé
BMW AG - TIS
11.02.2013 10:22
Issue status (12/2007) Valid only until next DVD is issued
Copyright
Page - 4 -