
3 Series E36 Z3 (M52TU) ROADST
Note:
The adhesive area for the plastic adhesive tapes (sourcing
reference: BMW Parts Service) must be free of grease and
dust.
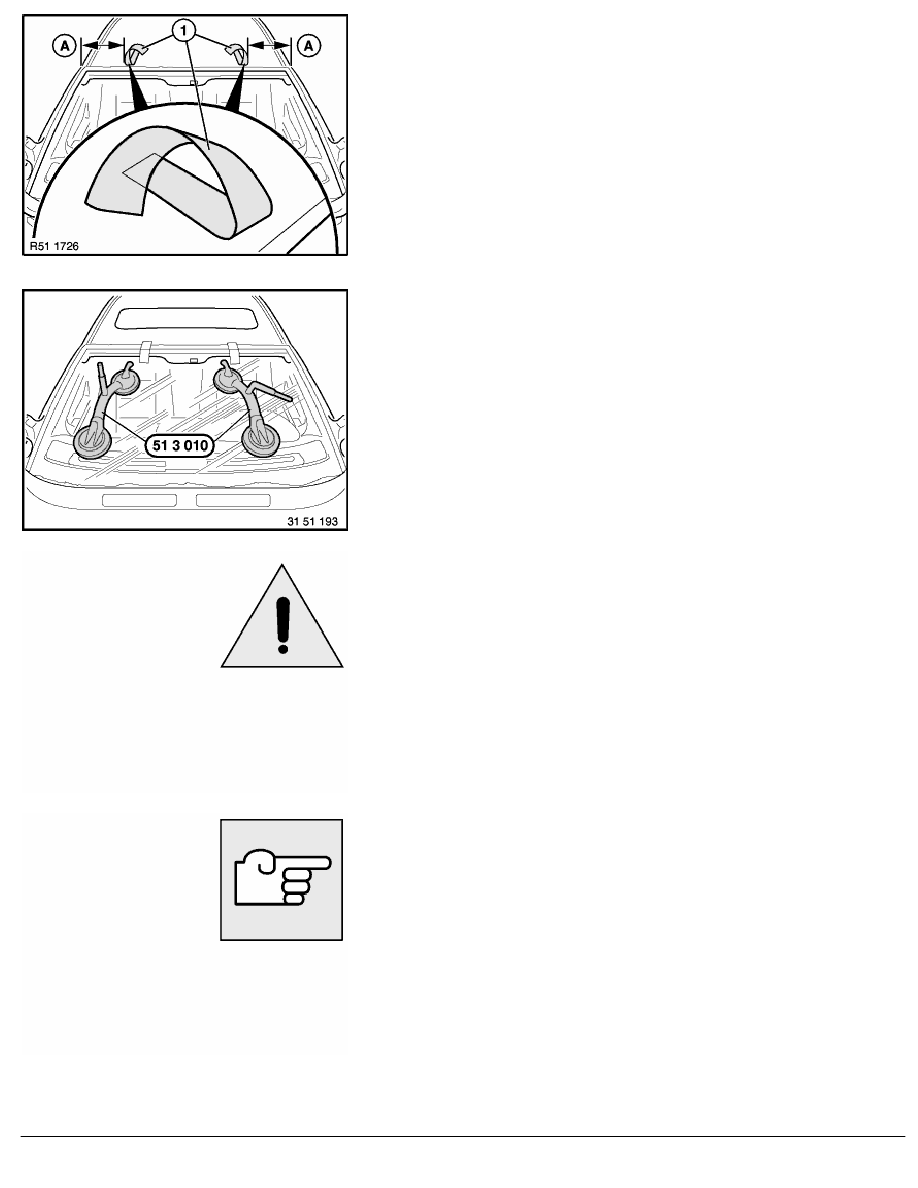
Attach two yellow plastic adhesive tapes (1) (sourcing
reference: BMW Parts Service)
to roof at distance (A) from outer corners.
Length:
500 mm
Width: 50 mm
(A) 250 mm
Using special tool 51 3 010,
first position windshield at top,
align sides,
then install at bottom and press into place.
Press windshield upwards until seal rests uniformly on roof.
Fix windshield in this location at top with two yellow plastic
adhesive tapes (sourcing reference: BMW Parts Service).
If necessary, support windshield glass from below with wooden
wedge.
Caution!
Remove dirt from residual glue with Sika-Entferner 208
(Sourcing Reference: BMW Parts Service) before glue is
hard. Do not press out windscreen glass again for this
purpose. Hardened glue can only be removed by machine.
Assemble car.
After hardening time, remove support.
Note:
Any leakages are located by spraying water under the sealing
lips or by using an ultrasonic leak detector (sourcing
reference: BMW Parts Service) and sealed with the
appropriate nozzle.
RA Removing and installing windshield (Z3 Roadster, M Roadster, Z3 Coupé, M Coupé)
BMW AG - TIS
11.02.2013 08:48
Issue status (12/2007) Valid only until next DVD is issued
Copyright
Page - 7 -