
3 Series E36 Z3 (M52TU) ROADST
Caution!
There must be no adhesive on the connection contacts of the
rear window heater.
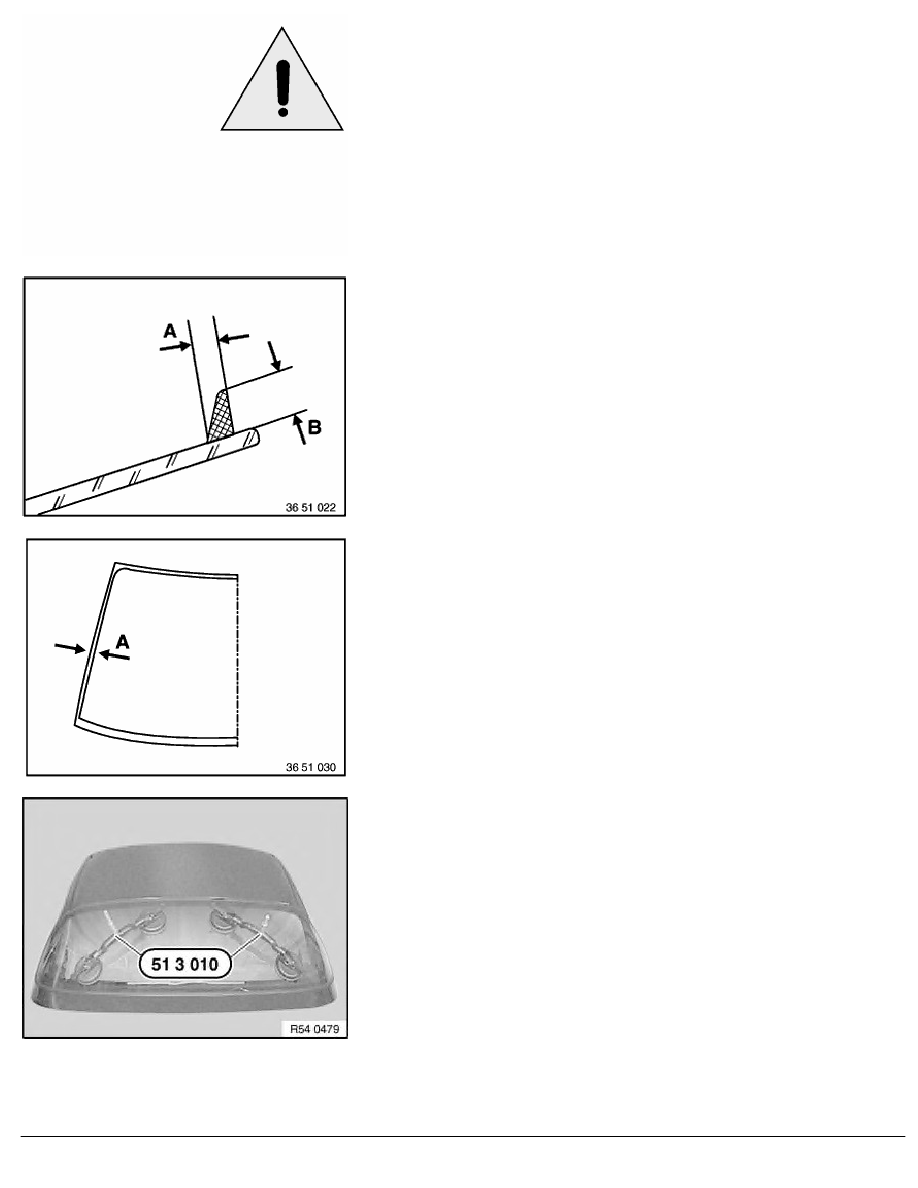
Shape of adhesive bead:
(A) = 9 mm
(B) = 6 mm
Caution!
Apply glue bead quickly and insert window. Skin formation
time of glue, maximum 10 minutes.
Maintain uniform distance (A) between glue bead and seal.
Distance (A) = 3 mm
Install rear window carefully using special tool 51 3 010. Seal
must fit uniformly on the sides. Push up rear window glass until
seal bears uniformly on the roof flange.
Align rear window to roof flange and evenly at sides. Press-fit rear
window and secure in this position with fabric adhesive tape (e.g.
Tesa).
RA Removing and installing/replacing rear window for hard top
BMW AG - TIS
11.02.2013 09:23
Issue status (12/2007) Valid only until next DVD is issued
Copyright
Page - 6 -