
3 Series E36 Z3 (M54) ROADST
Install seal from bottom left to bottom right and press on.
Caution!
The basic filler must have hardened!
Treat windshield and body around glued area with BMW-approved
materials (repair kit, Sourcing Reference: BMW Parts Service),
refer to 51 31 ...
Note:
Note ventilation time!
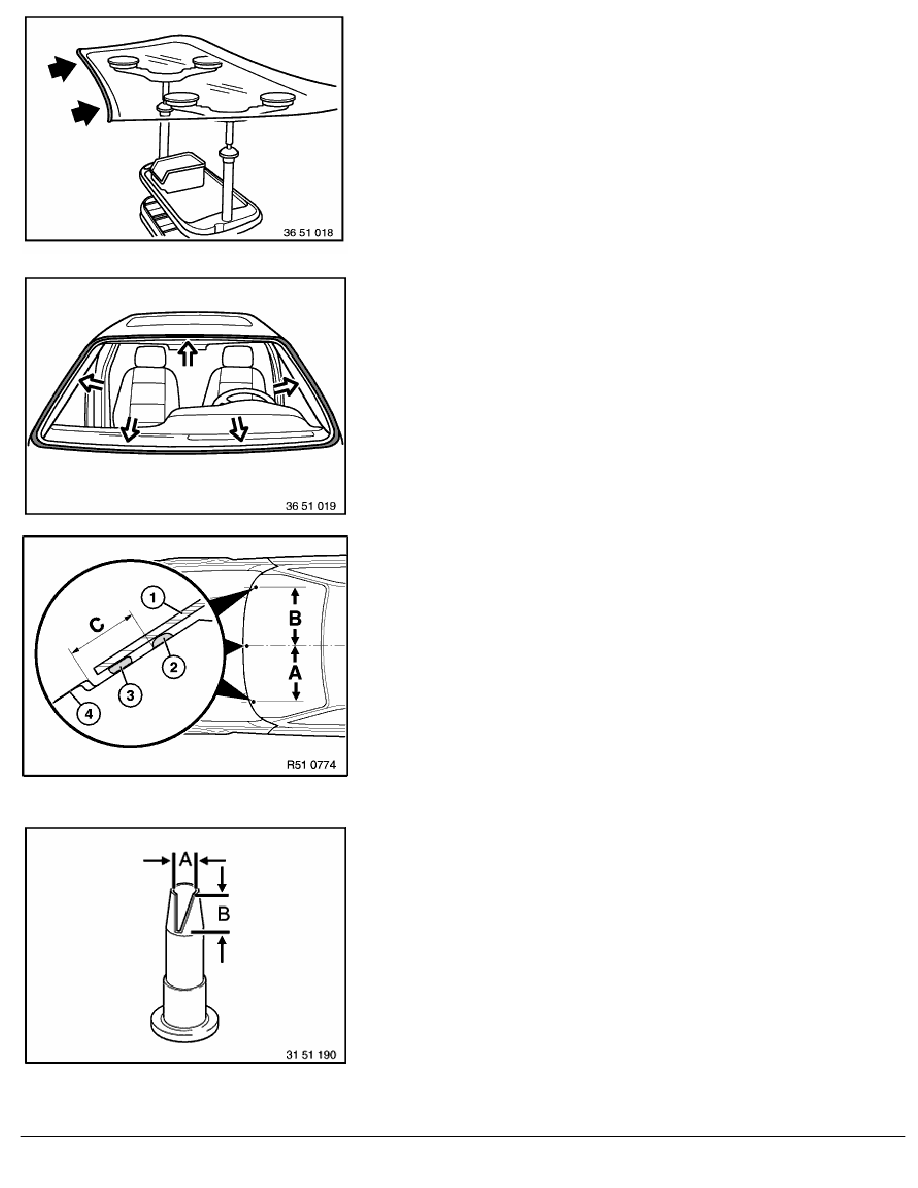
Stick on 1 spacer buffer (2) in each case in center and at
distances (A) and (B) from center of cowl panel.
Dimensions:
(A) 500 mm
(B) 500 mm
(C) 18 mm
1.
Windshield
2.
Spacer buffer
3.
Glue bead
4.
Windshield
Cut nozzle to size.
Dimensions:
(A) 8
-2
mm
(B) 11
-2
mm
Note:
For an even application of adhesive bead:
Use a cartridge gun (operated pneumatically or electrically,
sourcing reference: BMW Parts Service).
Check expiry date of glue!
RA Removing and installing windshield (Z3 Roadster, M Roadster, Z3 Coupé, M Coupé)
BMW AG - TIS
11.02.2013 09:23
Issue status (12/2007) Valid only until next DVD is issued
Copyright
Page - 5 -