
3 Series E46 318d (M47TU) SAL
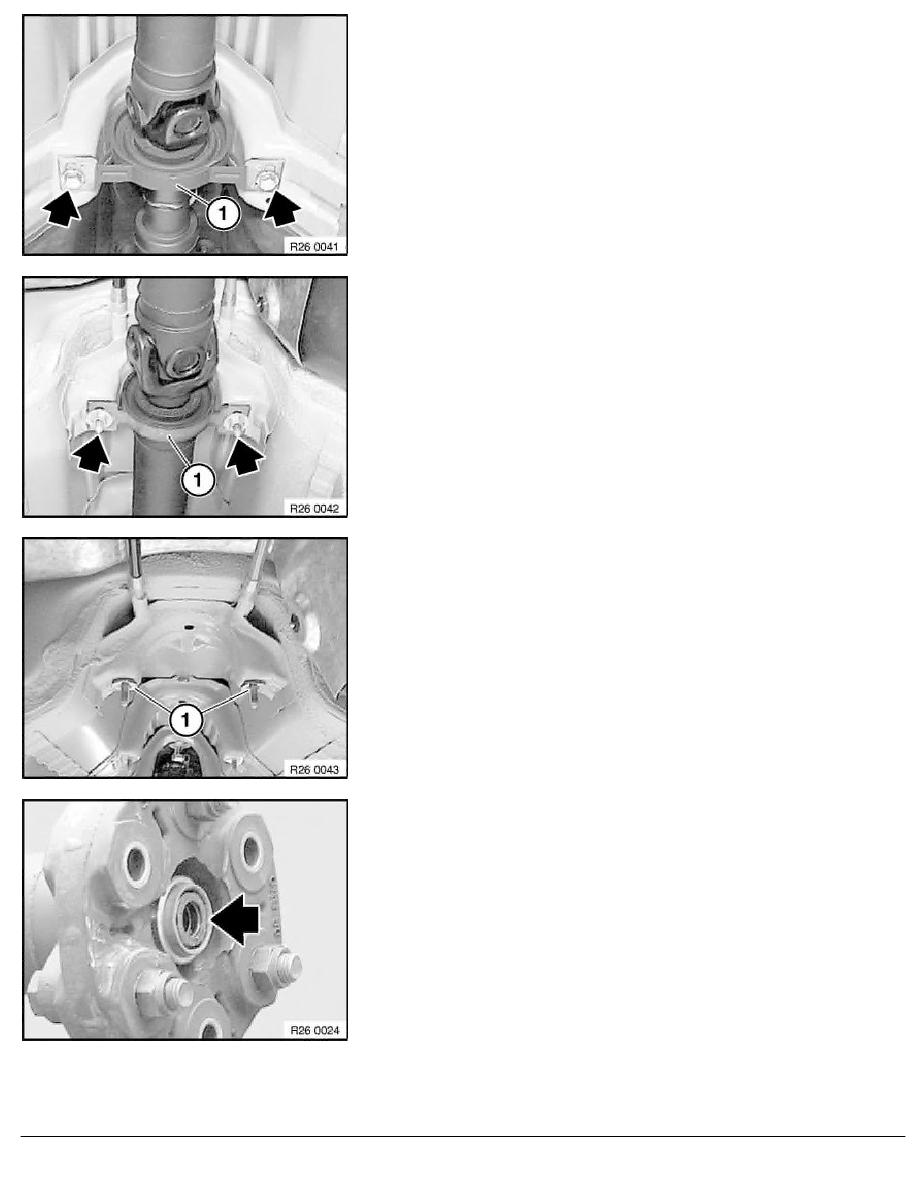
Grip propeller shaft and release screws on front center bearing
(1).
Tightening torque, 26 11 6AZ.
Release nuts on rear center bearing (1).
Tightening torque, 26 11 6AZ.
Bend propeller shaft downwards at center bearings.
Detach propeller shaft from transmission output flange and final
drive and remove towards bottom.
Installation:
The deflection angle of the rear propeller shaft was adjusted
in series-production assembly with the aid of washers (1).
The washers (1) are marked in the center with a colored
plastic insert and are secured more or less irrevocably to the
threaded pins.
When installing propeller shaft, make sure the same washers
(1) are fitted again if necessary.
Installation:
Check centering mount.
Replace damaged centering mount.
Grease centering mount.
RA Removing and installing complete propeller shaft (three-part propeller shaft)
BMW AG - TIS
11.02.2013 15:49
Issue status (12/2007) Valid only until next DVD is issued
Copyright
Page - 3 -