
3 Series E46 318i (M43TU) TOUR
Installation:
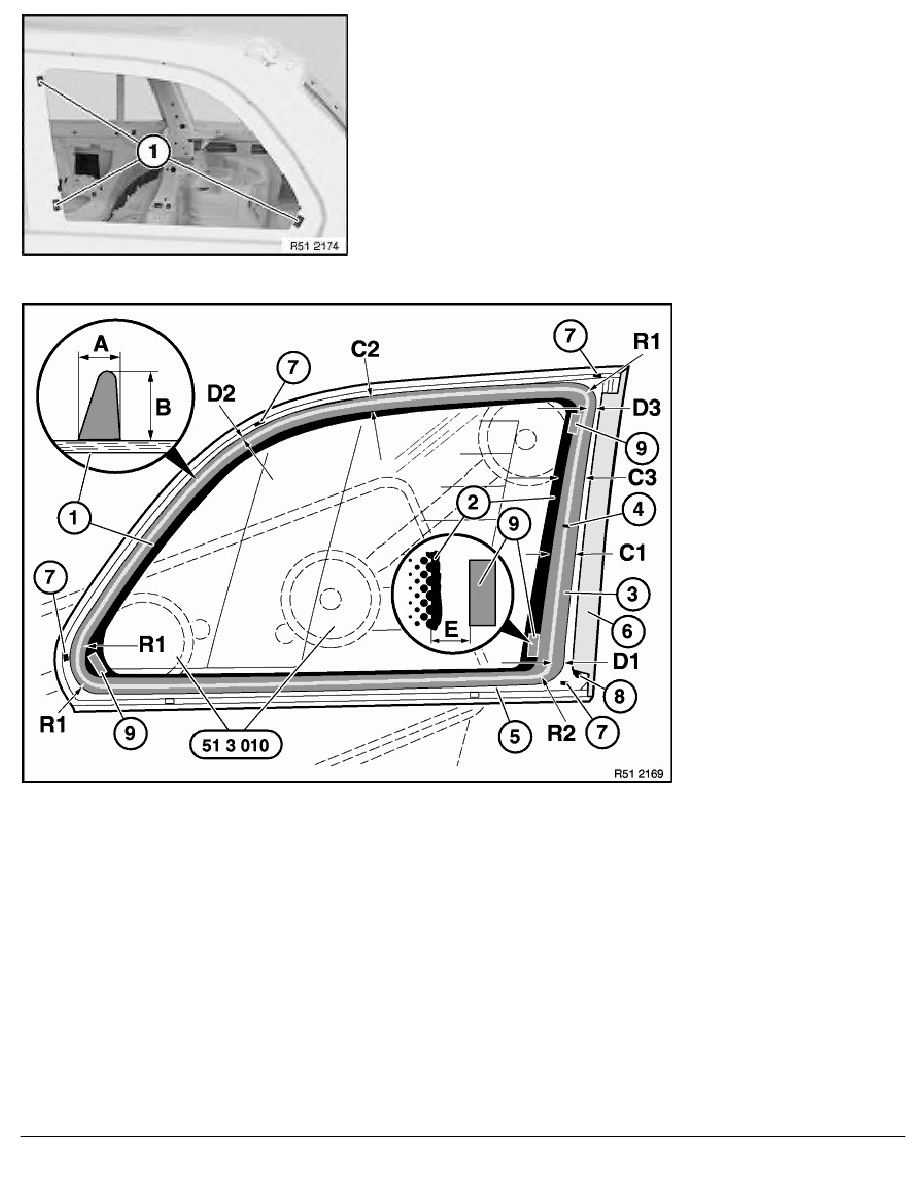
Remove rest of dual-lock tapes (1) and clean bonding area.
Stick new dual-lock tapes (1) onto raised body areas.
Dual-lock tapes on side window must match these dual-lock
tapes.
Overview for side window cementing (E46 Touring):
1
Glue bead
2
Ceramic layer
3
Primer coat
4
Application point of glue bead
5
PVC spray coating
6
Finisher on outside of C-pillar
7
Spacer nub
8
Spacer nub/height stop for (6)
9
Dual-lock tape
A
7 mm (width of adhesive bead)
B
11
-1
mm (height of adhesive bead)
C1 29
-2
mm (width of primer trace)
C2 15
-2
mm (width of primer trace)
C3 18
-2
mm (width of primer trace)
D1 16
±
1 mm (length of adhesive bead)
D2 2 mm (length of adhesive bead)
D3 4
±
1 mm (length of adhesive bead)
E
10 mm (distance from 2 to 9)
R1 approx. 25 mm
RA Removing and installing left or right rear side window (touring)
BMW AG - TIS
12.02.2013 00:49
Issue status (12/2007) Valid only until next DVD is issued
Copyright
Page - 4 -