
3 Series E46 318ti (N42) COMP
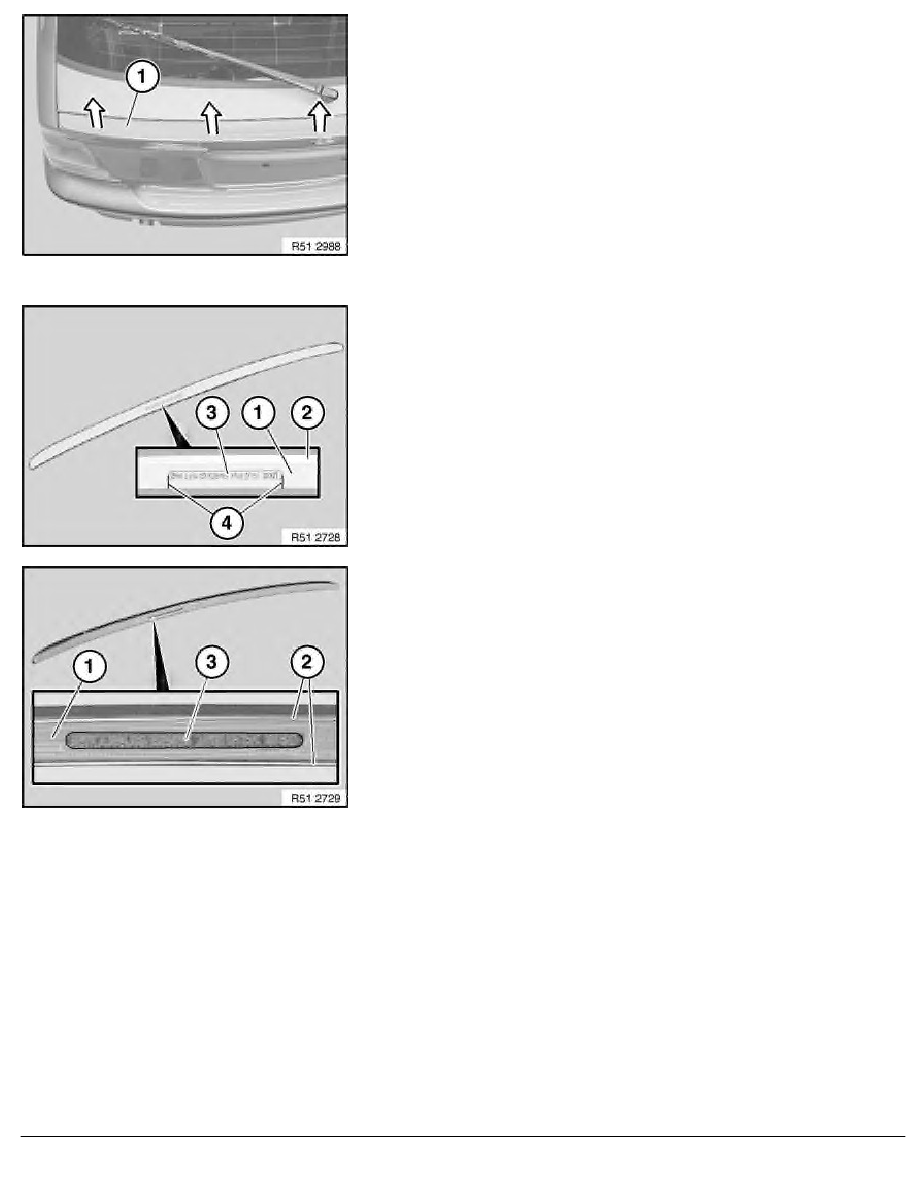
Carefully detach rear spoiler (1) from rear lid with special tool
00 9 318 and hot air blower.
Installation:
For cleaning, use a fusel-oil-free disposable cloth or a clean
cleaning cloth.
Treating bonding surface of rear lid:
-
Clean with spirit
-
Drying time at least 1 minute
-
Apply Sika Cleaner 205
-
Drying time at least 1 minute
Installation:
For cleaning, use a fusel-oil-free disposable cloth or a clean
cleaning cloth.
Clean adhesive area (1) on rear spoiler (2) with spirit.
Drying time at least 1 minute.
Adhesive tape must be cut out in area of lettering (3) (next work
step).
Therefore make a mark (4) with a water-soluble marker at end of
lettering (3).
Installation:
It is absolutely essential to prevent formation of bubbles and folds
and marked overstretching during application.
Stick adhesive tape (1) all round at distance of 3 mm onto
bonding surface (2) of rear spoiler.
Cut out adhesive tape (1) in area of lettering (3).
Caution!
Adhesive tape must not be cut through outwards.
Press on adhesive tape firmly.
The adhesion of the adhesive tape is increased considerably by
contact pressure therefore press down over the entire area with
your thumbs and backs of hands.
Pull off liner and stick rear spoiler onto rear lid as shown in
Fig. R51 2987.
* Liner is protective film for bonding surface.
Press down the rear spoiler firmly with the back of your hands over
the entire surface, especially the ends.
RA Replacing rear spoiler (compact)
BMW AG - TIS
12.02.2013 10:19
Issue status (12/2007) Valid only until next DVD is issued
Copyright
Page - 2 -