
3 Series E46 330d (M57) TOUR
For the jointing sequence of the repair work in which the tail panel
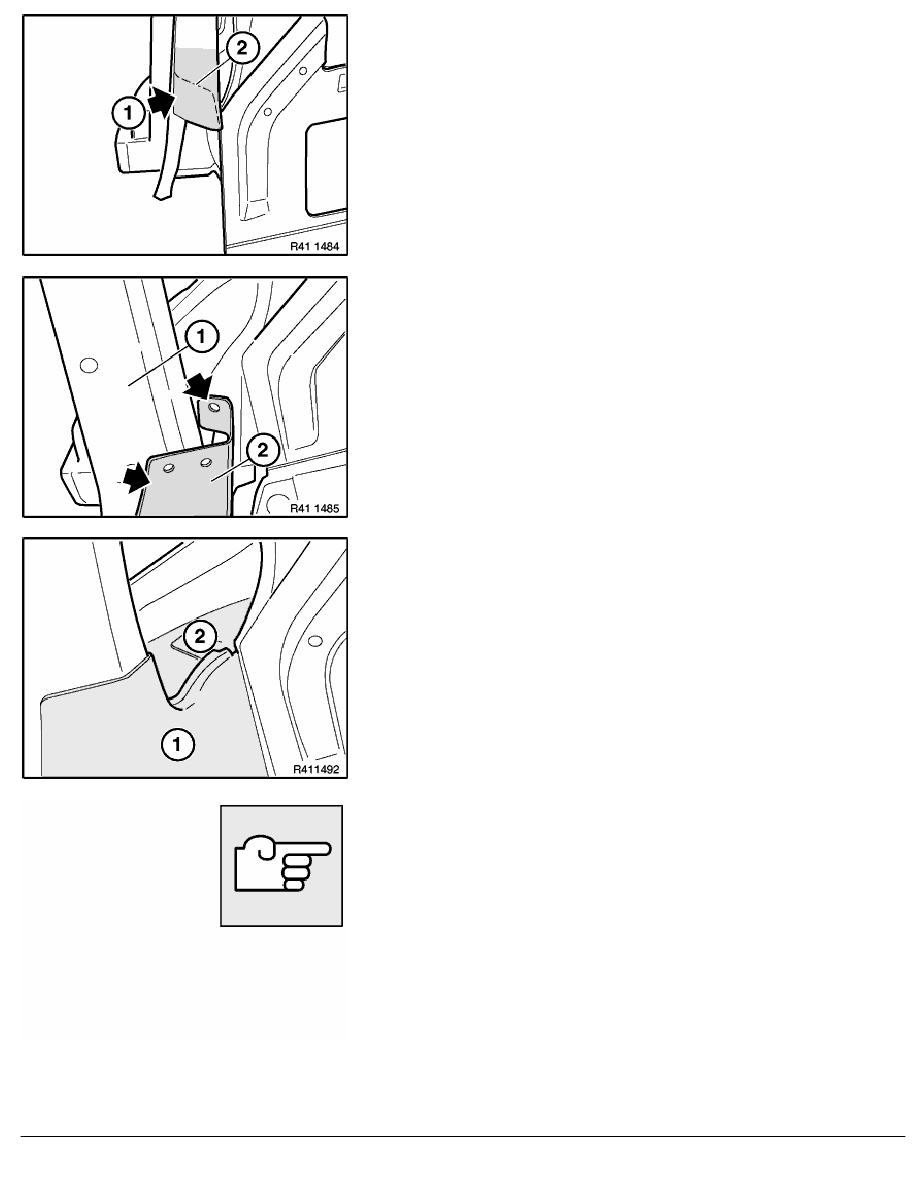
is above the D-pillar, proceed as follows:
Straighten contact surface of D-pillar (1) to tail panel (drawing in)
until contact surface is flat.
Edge (2) stepped as standard must be straightened flat (drawing
in).
Any existing bores from removing the tail panel must be resealed
by means of welding!
For the jointing sequence of the repair work in which the tail panel
is above the D-pillar, proceed as follows:
Straighten tail panel (2) (expanding) so that it can be pushed
without tension over D-pillar (1).
Installation:
Tail panel (1) is above side frame in area of rear light aperture
(2).
Note:
The conversion work ends here.
RA Replacing tail panel (E46 Touring)
BMW AG - TIS
15.02.2013 17:30
Issue status (12/2007) Valid only until next DVD is issued
Copyright
Page - 4 -