3 Series E46 M3 CSL (S54) COUPE

The oxygen sensors for cylinders 1 to 3 and 4 to 6 are
different.
Mark oxygen sensors so as not to mix sensors up at a later stage.
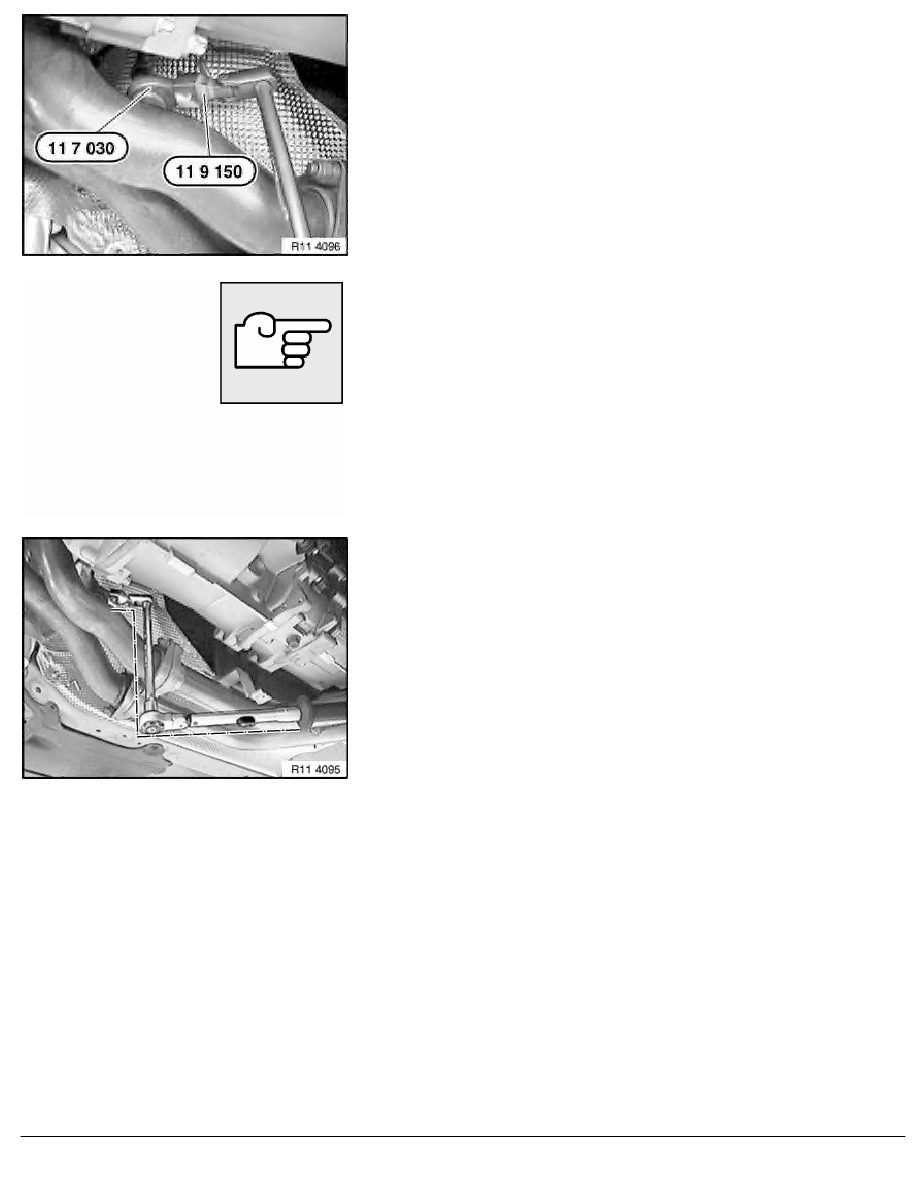
Detach oxygen sensors with special tool 11 7 030 in
conjunction with special tool 11 9 150 .
1.
Remove oxygen sensor from cylinders 1 to 3.
2.
Remove oxygen sensor from cylinders 4 to 6.
Installation:
The threads of new oxygen monitor sensors are already coated
with Never Seez Compound.
If an oxygen monitor sensor is used again, apply a thin and even
coat of Never Seez Compound (refer to BMW Parts Service)
to the thread only.
Do not clean that part of the oxygen sensor which projects into the
exhaust system branch and do not allow it to come into contact
with lubricants.
Installation:
When special tool 11 9 150 is used in conjunction with special
tool 11 7 030, 47 Nm on the dial on the torque wrench
corresponds to an actual tightening torque of 50 Nm.
For final tightening of oxygen sensors, fit torque wrench and
special tool (11 7 030 /11 9 150 ) as illustrated.
Tightening torque, 11 78 1AZ.
1.
Install oxygen sensor for cylinders 4 to 6 and tighten
down.
2.
Install oxygen sensor for cylinders 1 to 3 and tighten
down.
Cover oxygen sensors when applying underseal.
Pay attention to cable routing for oxygen sensors.
RA Replacing both oxygen control sensors (S54)
BMW AG - TIS
16.02.2013 15:47
Issue status (12/2007) Valid only until next DVD is issued
Copyright
Page - 3 -
