
3 Series E46 M3 (S54) CONVER
Important!
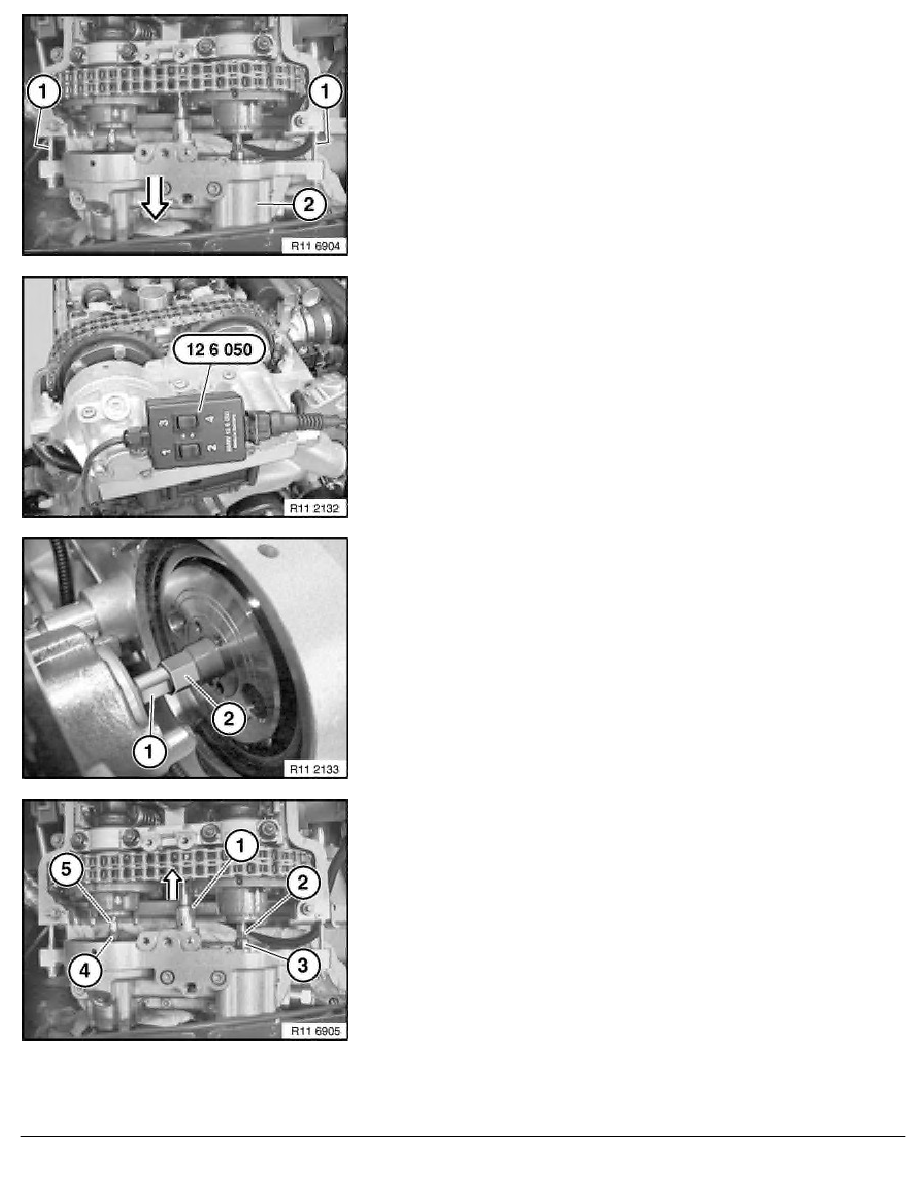
Insert two M6x60 bolts (1) to avoid damaging the VANOS
adjustment units.
Pull VANOS adjustment unit (2) towards front.
Note:
In individual cases, an air cushion may form in the VANOS
adjustment unit.
If necessary, ventilate with special tool 11 6 050 .
•
Ventilate VANOS adjustment unit.
1
Press buttons 2 and 4 on special tool
12 6 050
simultaneously. The solenoid valves are activated and the oil
chamber of the hydraulic piston is ventilated.
2
Pull off VANOS adjustment unit towards front.
Important!
CCW thread!
Grip on dihedron (1) and release at hexagon (2).
Lever out pressure control valve (1) with pliers in direction of
arrow (E85 only).
Grip on dihedron (2) and release at hexagon (3) of inlet VANOS.
Grip on dihedron (5) and release at hexagon (6) of exhaust
VANOS.
Remove two M6x60 bolts.
RA Removing and installing, sealing/replacing VANOS adjustment unit (S54)
BMW AG - TIS
16.02.2013 08:58
Issue status (12/2007) Valid only until next DVD is issued
Copyright
Page - 4 -