
3 Series E46 M3 (S54) CONVER
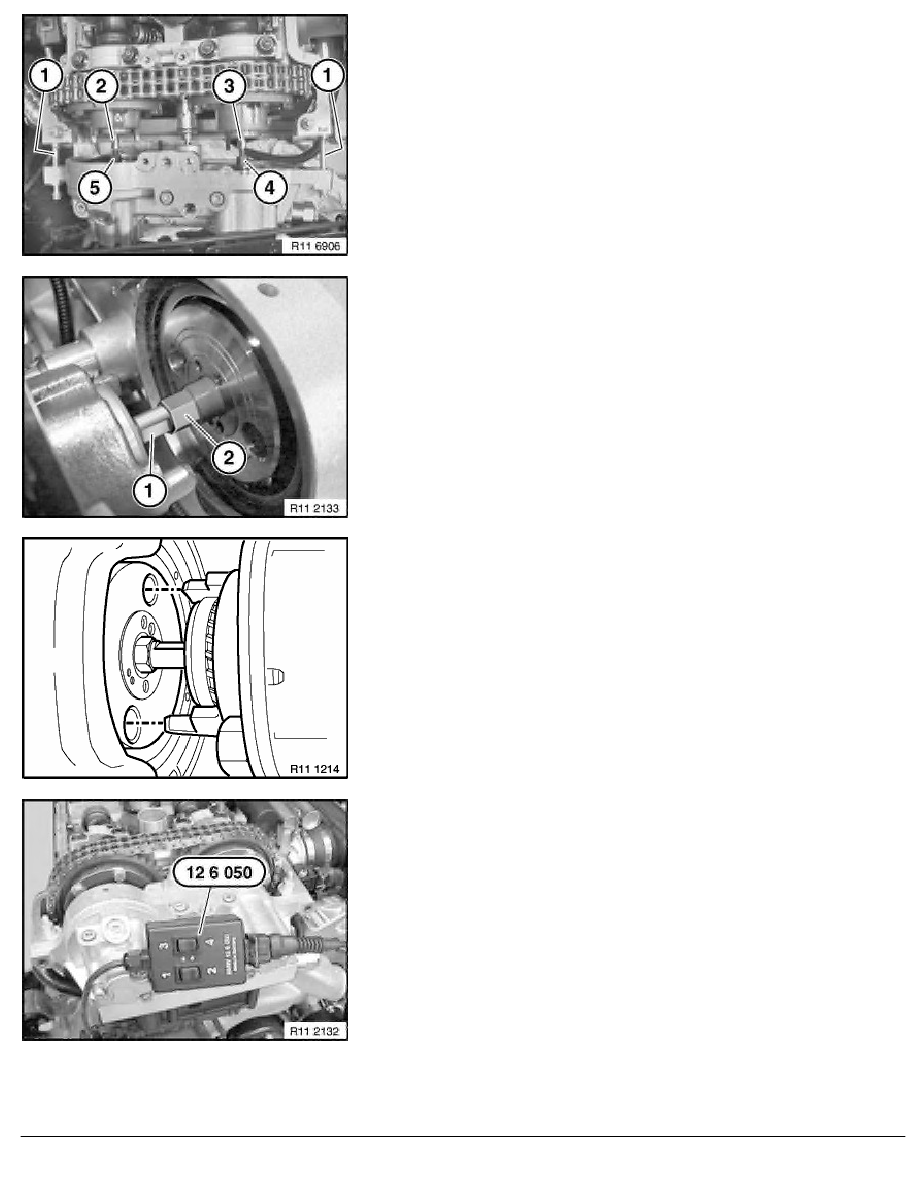
Insert M6x60 bolts (1).
Attach special tool 11 7 130 and connect a compressed air
supply of 2 to 8 bar.
Briefly actuate buttons 2 and 4 on special tool 11 6 050 .
Both axial pistons (4 and 5) on the VANOS adjustment unit
must now be extended (advanced setting).
Important!
CCW thread!
Grip on dihedron (1) and screw in at hexagon (2).
Grip on dihedron (1) and screw together at hexagon (2)
alternately between exhaust and inlet sides in 1/2 turn
increments.
Secure union nut (2) with special tool 11 7 200 .
Tightening torque 10 Nm .
Align radial piston pump to driver on spline hub.
Note:
Picture shows a schematic representation.
Press buttons 1 and 3 on special tool
12 6 050
simultaneously. The solenoid valves are activated and the air can
escape from the hydraulic pistons of the VANOS adjustment unit.
Simultaneously push on VANOS adjustment unit until it rests on
cylinder head.
Important!
If this position is not reached, check position of radial piston
pump to driver and realign if necessary.
RA Removing and installing, sealing/replacing VANOS adjustment unit (S54)
BMW AG - TIS
16.02.2013 08:58
Issue status (12/2007) Valid only until next DVD is issued
Copyright
Page - 7 -