3 Series E90 320i (N43) SAL

Important!
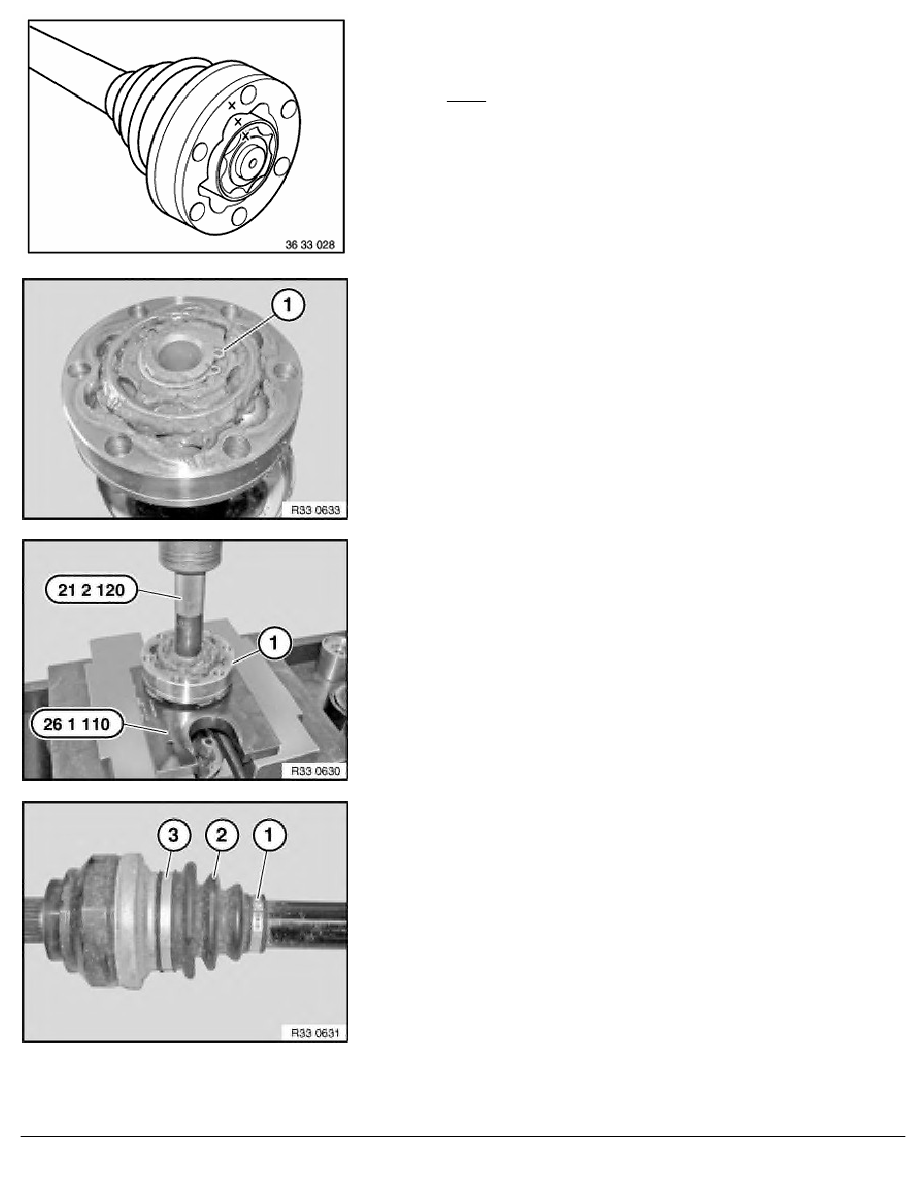
Mark positions in relation to each other of ball hub, ball cage
and joint at ends.
Note: If the joint falls apart, it can only be reassembled
correctly with the aid of the markings.
Remove circlip (1).
Grip output shaft.
Using special tool 26 1 110 and a suitable tool (for hollow
shaft 21 2 120 ), press output shaft out of joint (1).
Clean joint (1) carefully.
Note:
All traces off old grease must be removed.
Detach gaiter from output shaft.
Removing and installing outer gaiter:
Release hose clamps (1, 3) and detach gaiter (2) from output
shaft.
Clean joint and output shaft carefully.
Note:
All traces off old grease must be removed.
Check joint for damage; if necessary, replace output shaft.
Fill joint with propeller shaft grease.
Fit gaiter (2) on bellows and secure with hose clamps (1, 3).
RA Replacing gaiter on left output shaft (altered sealing cover)
BMW AG - TIS
25.01.2013 06:42
Issue status (12/2007) Valid only until next DVD is issued
Copyright
Page - 2 -
