
3 Series E90 328xi (N52K) SAL
Installation:
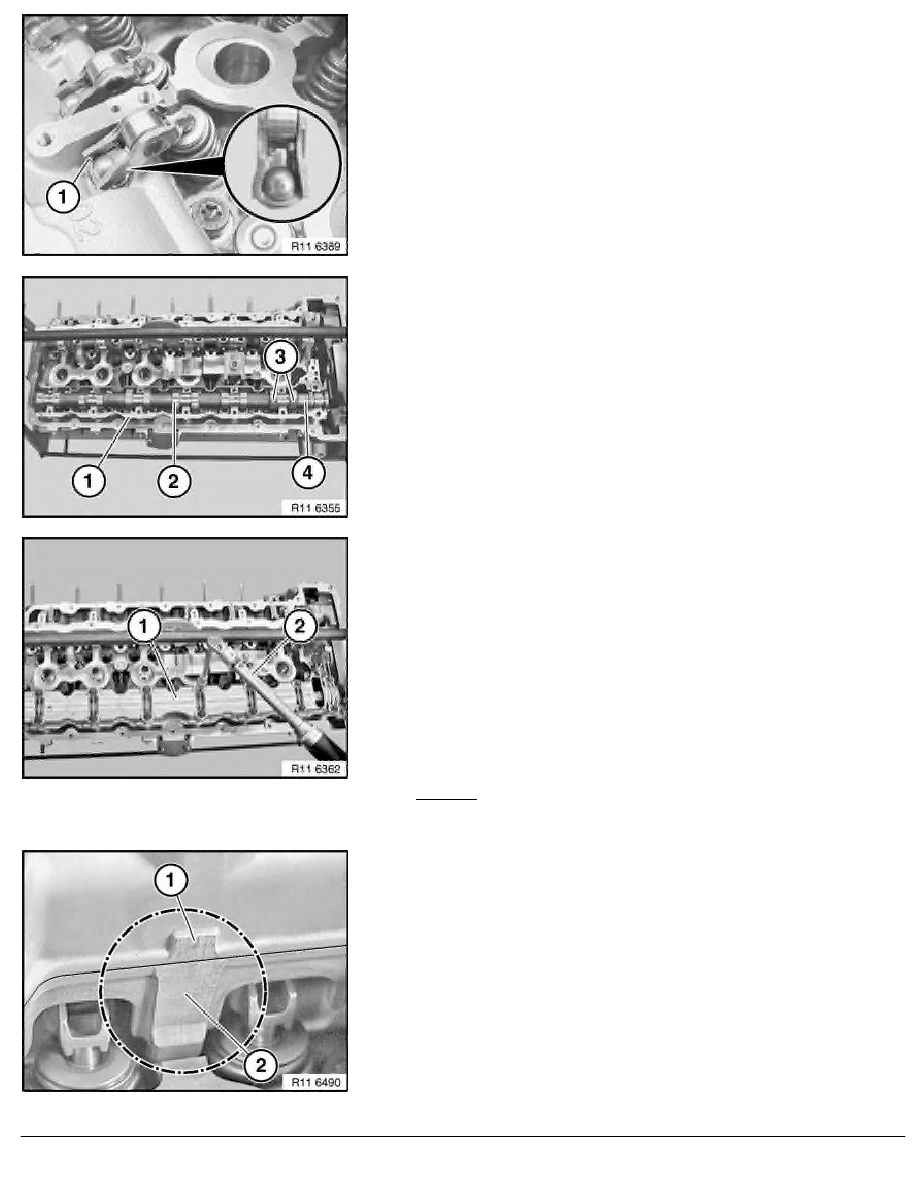
Before mounting the exhaust camshaft on the correct cam follower
seat (1), pay attention to the hydraulic valve clearance
adjustment element and the valve.
Refer to Removing and installing/replacing all cam followers.
Position lower bearing bank (1) with exhaust camshaft (2) cam
followers.
Align exhaust camshaft (2).
Cylinder nos. 2 and 4 are at valve overlap.
Cams (3) on cylinder no. 1 point upwards at an angle.
Part number (4) on twin surface of exhaust camshaft (2) points
upwards.
Important!
There must be no adhesive residues in the cylinder head
tapped holes.
Clean tapped holes.
Fit upper bearing bank (1).
Insert bolts dry.
Tension down upper bearing bank (1) with exhaust camshaft at
bearing points 3 and 5 through a 1/2 bolt turn.
Join exhaust camshaft to upper and lower bearing banks (1) with
torque wrench (2) from inside outwards to 8 Nm .
Release all screws of upper bearing bank (1) from outside
inwards by 90
°
.
Installation:
Upper and lower bearing banks must be aligned to each other at
ground surfaces (1 and 2).
Make sure that the thrust piece and the legs of special tools
11 4 461 rest on the milled surfaces.
RA Removing and installing/replacing exhaust camshaft (N52K)
BMW AG - TIS
17.02.2013 17:24
Issue status (12/2007) Valid only until next DVD is issued
Copyright
Page - 3 -