
3 Series E90 330xd (M57T2) SAL
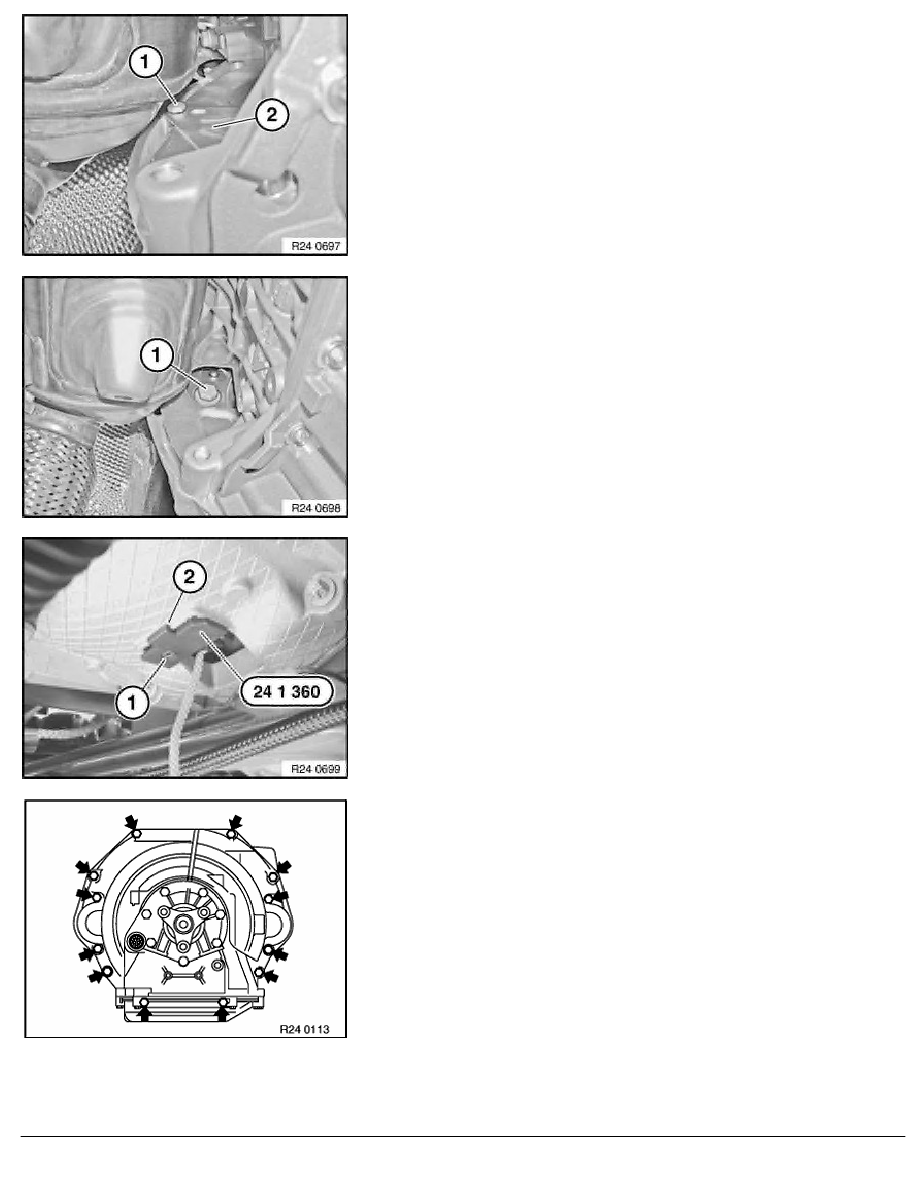
Release screw (1).
Remove metal plate (2).
Crank engine at vibration damper with special tool 11 6 480 in
direction of arrow until bolt (1) is visible in opening.
Release all 4 bolts of torque converter with special tool 24 1 110
.
Tightening torque 24 40 1AZ
.
Insert special tool 24 1 360 into opening of transmission
housing and secure with screw (1).
Note:
Check installation location.
Lug (2) must point in opposite direction to direction of travel!
Important!
Risk of damage:
Before the transmission is unflanged, the engine must be
supported at the front with a second jack! Otherwise the
engine will tilt downwards at the front.
Unfasten screws.
Tightening torque 24 00 1AZ
.
Unflange transmission.
RA Removing and installing automatic transmission (6HP26Z) AWD
BMW AG - TIS
20.02.2013 11:41
Issue status (12/2007) Valid only until next DVD is issued
Copyright
Page - 3 -