
3 Series E91 330xi (N52) TOUR
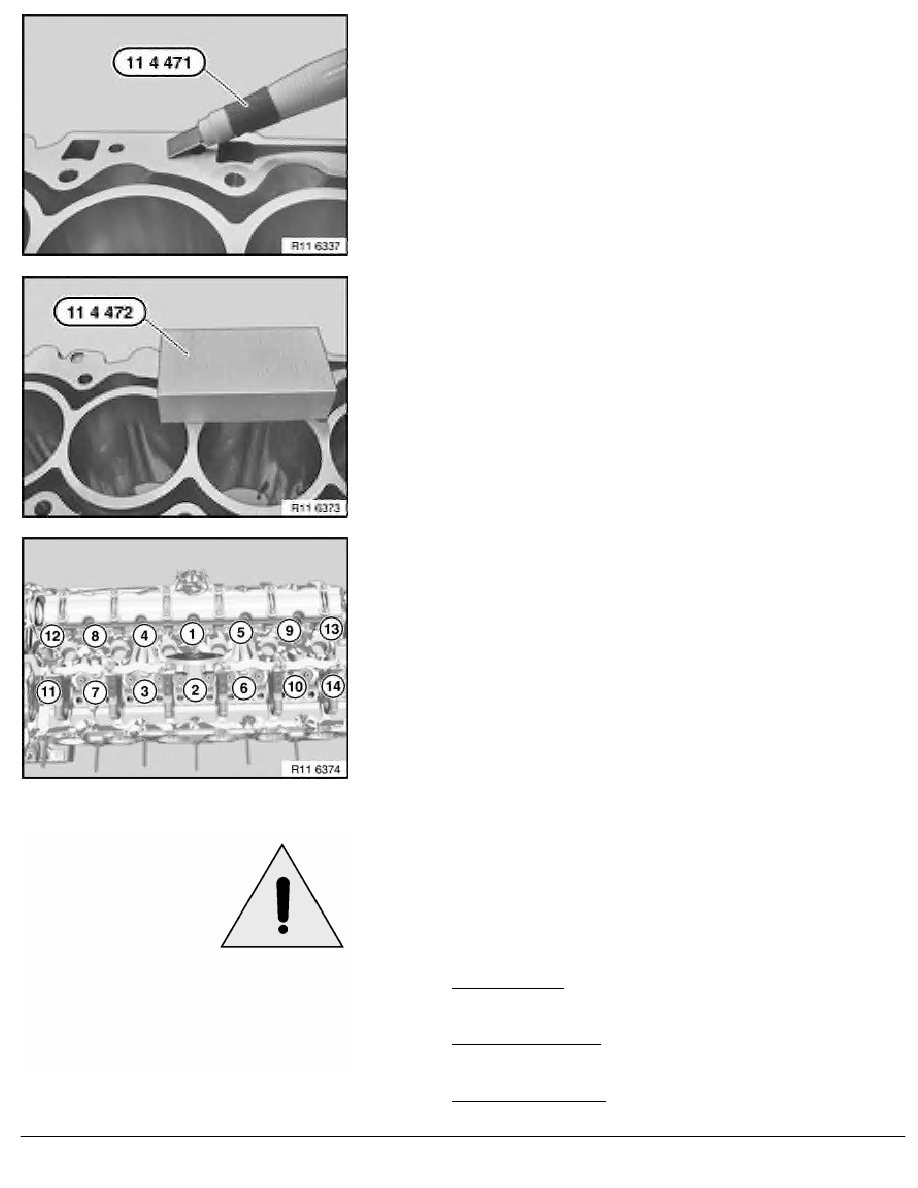
Remove coarse residues on sealing faces with special tool
11 4 471 from cylinder head and crankcase.
Important!
Do not use any metal-cutting tools.
Remove fine residues on sealing faces with special tool
11 4 472 from cylinder head and crankcase.
Important!
Do not use any metal-cutting tools.
There must be no coolant, water or engine oil in the pocket
holes.
Risk of corrosion and cracking!
Clean all pocket holes.
Replace cylinder head gasket.
Important!
Observe sequence for tightening cylinder head bolts without
fail.
Fit new cylinder head screws.
Insert cylinder head bolts (1 to 10) with special tool 11 8 580 .
Tightening torque 11 12 1AZ
.
Insert cylinder head bolts (11 to 14) with special tool 11 4 420 .
Tightening torque 11 12 2AZ
.
Note:
Picture shows inlet and exhaust camshafts removed.
Observe sequence for tightening cylinder head bolts without fail.
Important!
The 2nd torsion angle relates only to cylinder head bolts
1 to 10.
Installation:
•
Jointing torque:
All cylinder head bolts 1 to 14 to 30 Nm
•
1st angle of rotation:
All cylinder head bolts 1 to 14 to 90
°
•
2nd angle of rotation:
RA Removing and installing cylinder head (N52)
BMW AG - TIS
20.02.2013 22:40
Issue status (12/2007) Valid only until next DVD is issued
Copyright
Page - 5 -