
3 Series E91 330xi (N52) TOUR
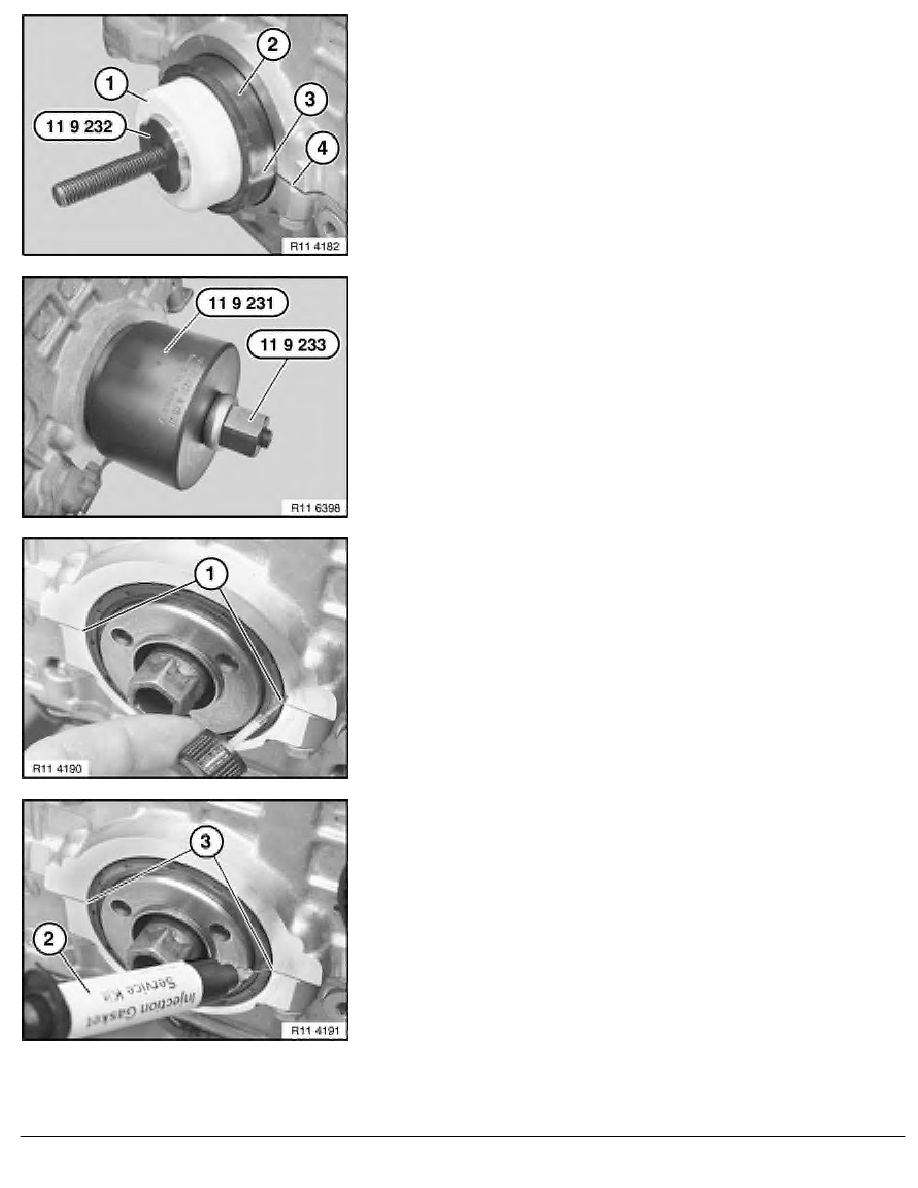
Push support sleeve (1) with crankshaft seal (2) onto special
tool 11 9 232 .
Important!
Support sleeve (1) remains on special tool
11 9 232 , until
crankshaft seal is drawn in.
Align groove (3) centrally to housing partition (4).
Coat both grooves (3) on crankshaft seal (2) with Loctite primer,
manufacturer's number 171000, and expose to air for approx.
one minute.
Draw in crankshaft seal with special tool 11 9 231 in
conjunction with special tool 11 9 233 until flush.
Before filling with sealing compound:
Insert brush with Loctite primer, manufacturer's number 171000,
as far as possible into grooves (1) on crankshaft seal and coat
housing partition on engine block.
Illustration N42.
Using injector (2), fill both grooves (3) flush with Loctite sealing
compound, manufacturer's number 128357.
Illustration N42.
RA Replacing front crankshaft seal (N52)
BMW AG - TIS
20.02.2013 22:44
Issue status (12/2007) Valid only until next DVD is issued
Copyright
Page - 4 -