
3 Series E91 330xi (N52) TOUR
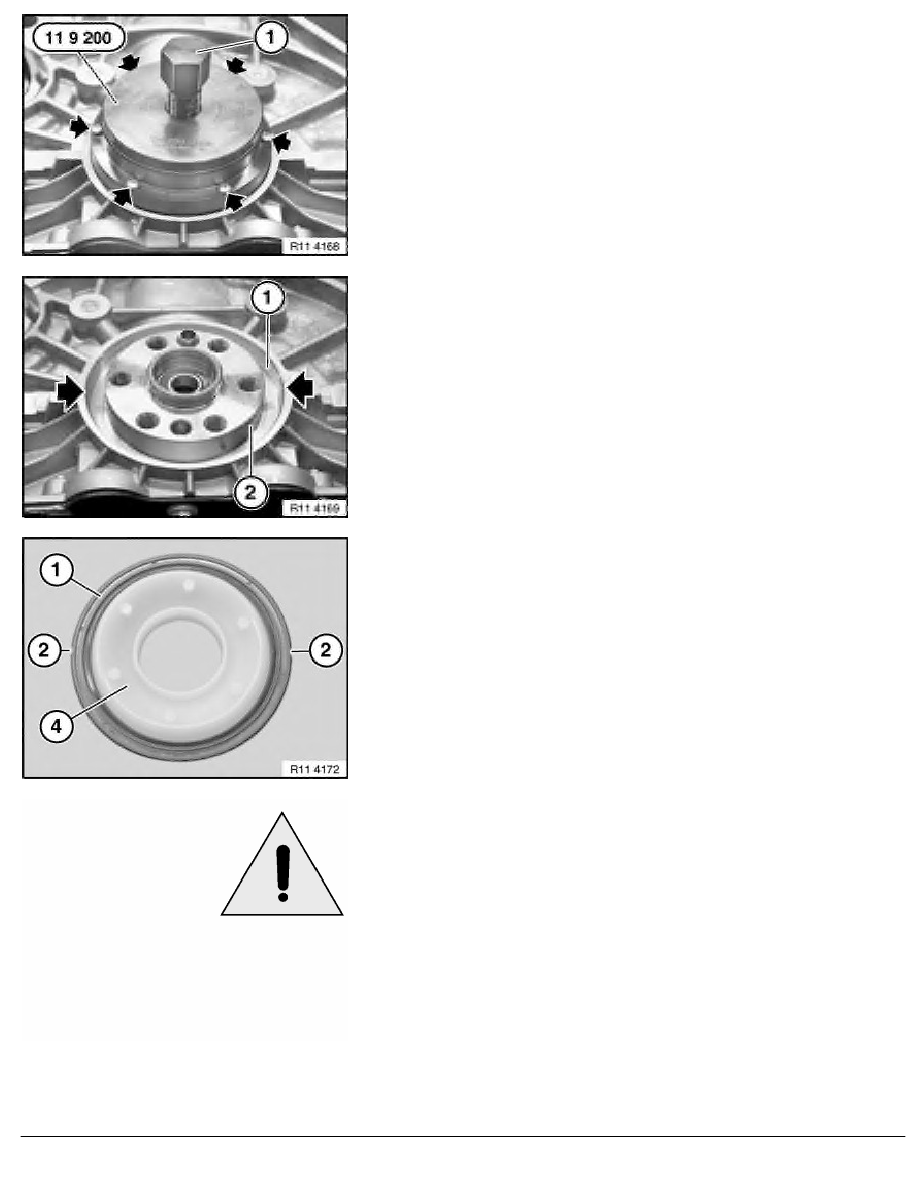
Fit special tool 11 9 200 . Insert metal screws into removal
opening of radial seal and initially tighten without play (do not
overtighten metal screws).
Screw in spindle (1) slowly and carefully and detach radial seal.
Installation:
Clean sealing surface (1) and degrease thoroughly in area of
housing partition.
Apply a light coat of oil to running surface (2) of radial shaft seal.
Note:
Support sleeve (4) is supplied with radial shaft seal (1).
When radial shaft seal (1) is installed, only support sleeve (4)
may be used as a slip sleeve.
Radial shaft seal (1) has a groove (2) on both left and right
sides.
Important!
After installation, grooves (2) must be filled with sealing
compound.
Important!
The seal between the engine block and radial seal is
described below.
The engine block will not be leakproof at the outside of the
radial seal if you fail to comply with the individual work steps
and the work sequence.
RA Replacing crankshaft radial seal (N52)
BMW AG - TIS
20.02.2013 22:45
Issue status (12/2007) Valid only until next DVD is issued
Copyright
Page - 2 -