
3 Series E91 330xi (N52) TOUR
Warning!
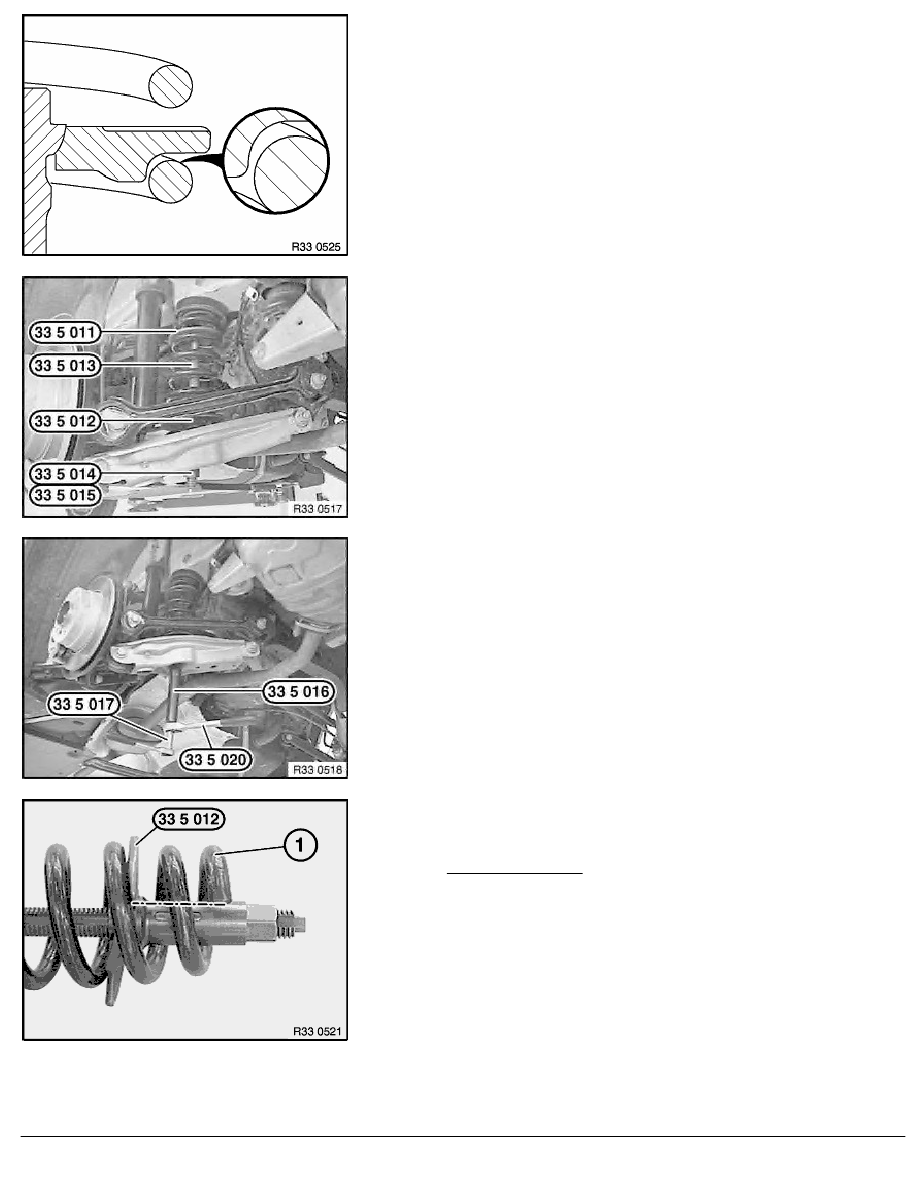
Risk of injury!
Make sure coil spring is correctly positioned in spring plates.
Important!
Align special tools 33 5 011 , 33 5 012 , 33 5 013 ,
33 5 014 , 33 5 015 centrally to obtain the biggest possible
contact surface on the coil spring.
Check installation position of special tools 33 5 011 , 33 5 012
and 33 5 013 , 33 5 014 , 33 5 015 , correct if necessary.
Tension coil spring using special tools 33 5 016 and
33 5 020 , gripping spindle of spring tensioner with special tool
33 5 017 in the process.
Remove coil spring upwards.
If necessary, relieve tension on coil spring.
Important!
Replacement only:
Bottom end of coil spring (1) must be flush with opening of
spring plate 33 5 012 (see dotted-dashed line)!
RA Removing and installing / replacing rear left or right coil spring
BMW AG - TIS
21.02.2013 05:20
Issue status (12/2007) Valid only until next DVD is issued
Copyright
Page - 3 -