
3 Series E92 325xi (N53) COUPE
51 31 021
Removing and installing/replacing rubber
frame for windscreen
Important!
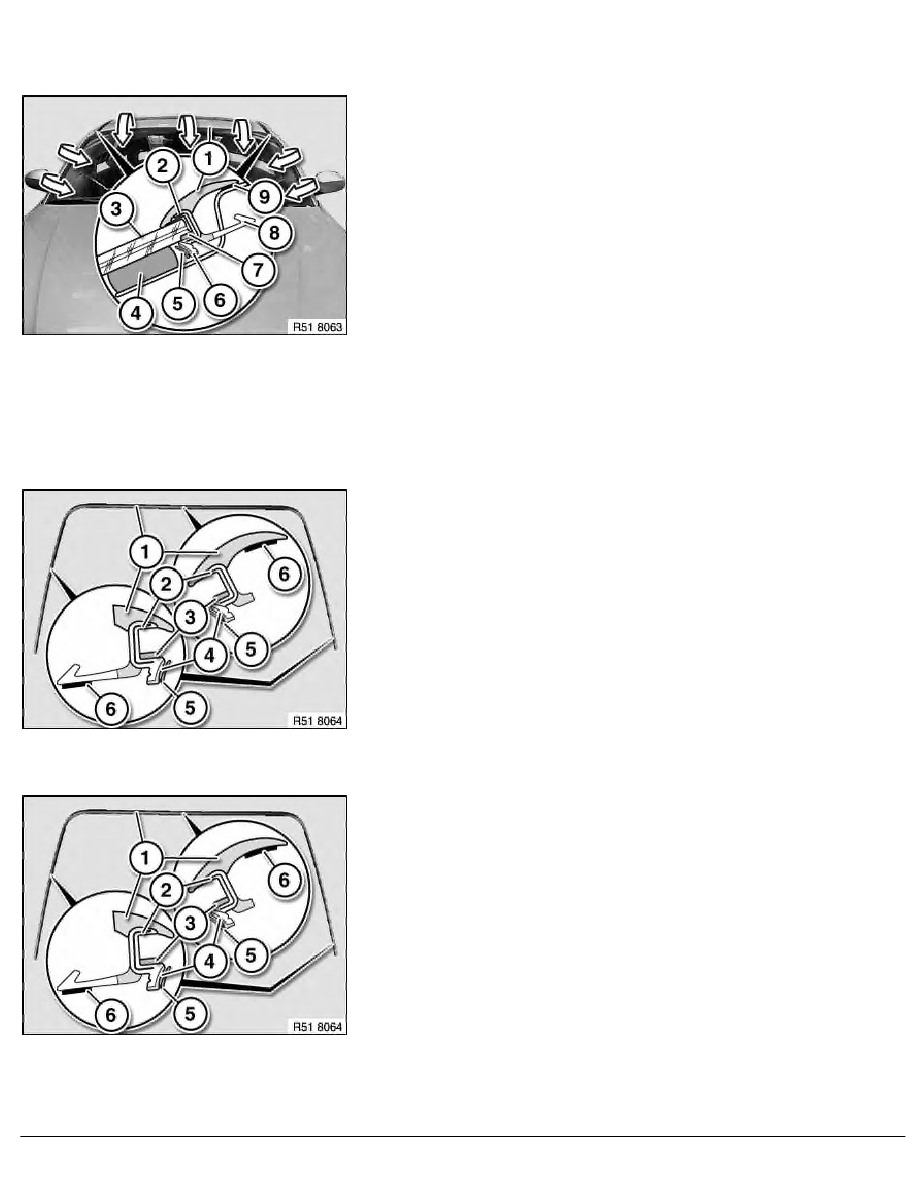
Rubber frame (1) features an aluminium section inlay (2).
Detach adhesive tape (9) between rubber frame (1) and
roof outer skin or A-pillar.
Carefully unwind rubber frame (1) (windscreen breakage).
Note:
Tear-off lip (5) may be stuck to adhesive (4).
When rubber frame (1) is removed, tear-off lip (5) can tear off
and remain in vehicle.
3
Windscreen
6
Bridge
7
Pinched butyl
8
Sealing lip fitted at side only
9
Adhesive tape
Replacement of rubber frame without windscreen removal:
Clean cutout.
Detach tear-off lip (5) from rubber frame (1).
If adhesive leaks over tear-off lip (5) at bridge (4), this area must
be cut out partially.
To facilitate installation, coat rubber frame (1) and body cutout
with water.
Fit rubber frame (1), paying attention to centre marking on rubber
frame (1) and windscreen.
If necessary, pull liner* off adhesive tape (6) and press rubber
frame (1) down firmly on roof outer skin and A-pillar.
*Liner is the protective film on the adhesive tape
Replacement of rubber frame with removed or new windscreen:
Pay attention to centre marking on rubber frame (1) and
windscreen.
Fit rubber frame (1) with tear-off lip (5).
2
Aluminium strip
3
Butyl
After installing windscreen, pull liner* off adhesive tape (6) and
press rubber frame (1) down firmly on roof outer skin and A-pillar.
*Liner is the protective film on the adhesive tape
RA Removing and installing/replacing rubber frame for windscreen
BMW AG - TIS
28.01.2013 08:59
Issue status (12/2007) Valid only until next DVD is issued
Copyright
Page - 1 -