
3 Series E92 328i (N51) COUPE
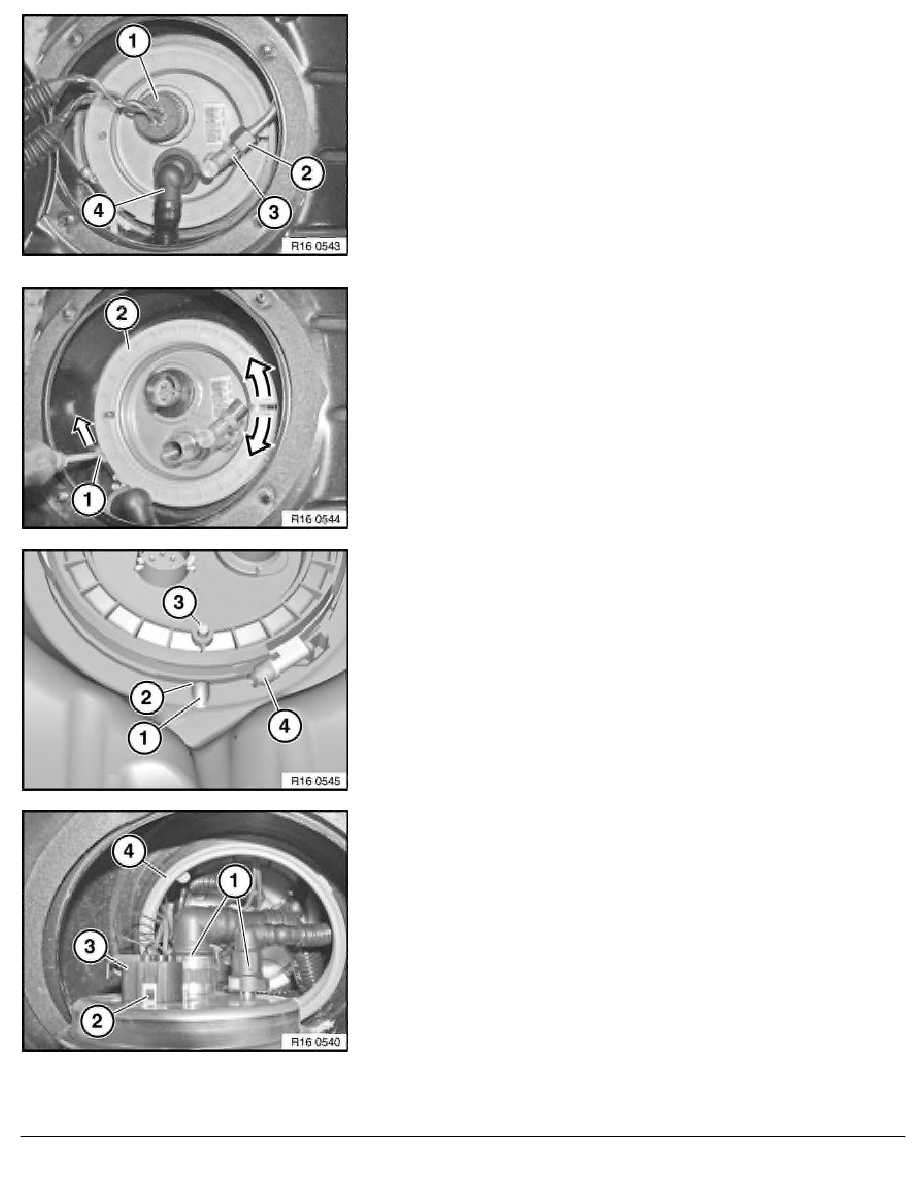
Disconnect plug connection (1).
Release union nut (2) and lay fuel feed line slightly to one side.
Important!
Always grip union nut (2) at hexagon (3).
Ensure that sealing faces are clean.
Catch escaping fuel.
Installation:
Tightening torque 16 12 3AZ
.
Unlock quick-release fastener of vent line (4) and detach.
Lever out remainder of torque breakoff head (1) (if provided) with
a screwdriver in direction of arrow.
Release hose clip of clamping ring (2) completely.
Note:
A flexible extension can be used to release the hose clamp, e.g.
special tool 00 9 252 .
Press clamping ring (2) part at open end in direction of arrow and
remove.
Installation:
Make sure that service cover is installed in correct position.
Indentation (2) on clamping ring must line up with raised
section (1) of tank.
Pin on service cover (3) must line up with indentation on
clamping ring.
Hose clip with torque breakoff head (4) must always be replaced.
Tighten hose clip until torque breakoff head (4) breaks off.
Carefully raise service cover.
Unlock and disconnect vent line and fuel feed line (1).
Unlock retaining lugs (2) on both sides of plug housing (3) and
detach plug housing (3) from service cover.
Installation:
When installing the service cover, make sure that seal (4) is
correctly situated in the tank opening.
Seal (4) must always be replaced.
Remove service cover.
RA Removing and installing/replacing fuel pump (US vehicles with N51 engines)
BMW AG - TIS
23.02.2013 12:12
Issue status (12/2007) Valid only until next DVD is issued
Copyright
Page - 2 -