
3 Series E92 M3 (S65) COUPE
Important!
Use only approved special tools.
Risk of damage to the HVCA guide.
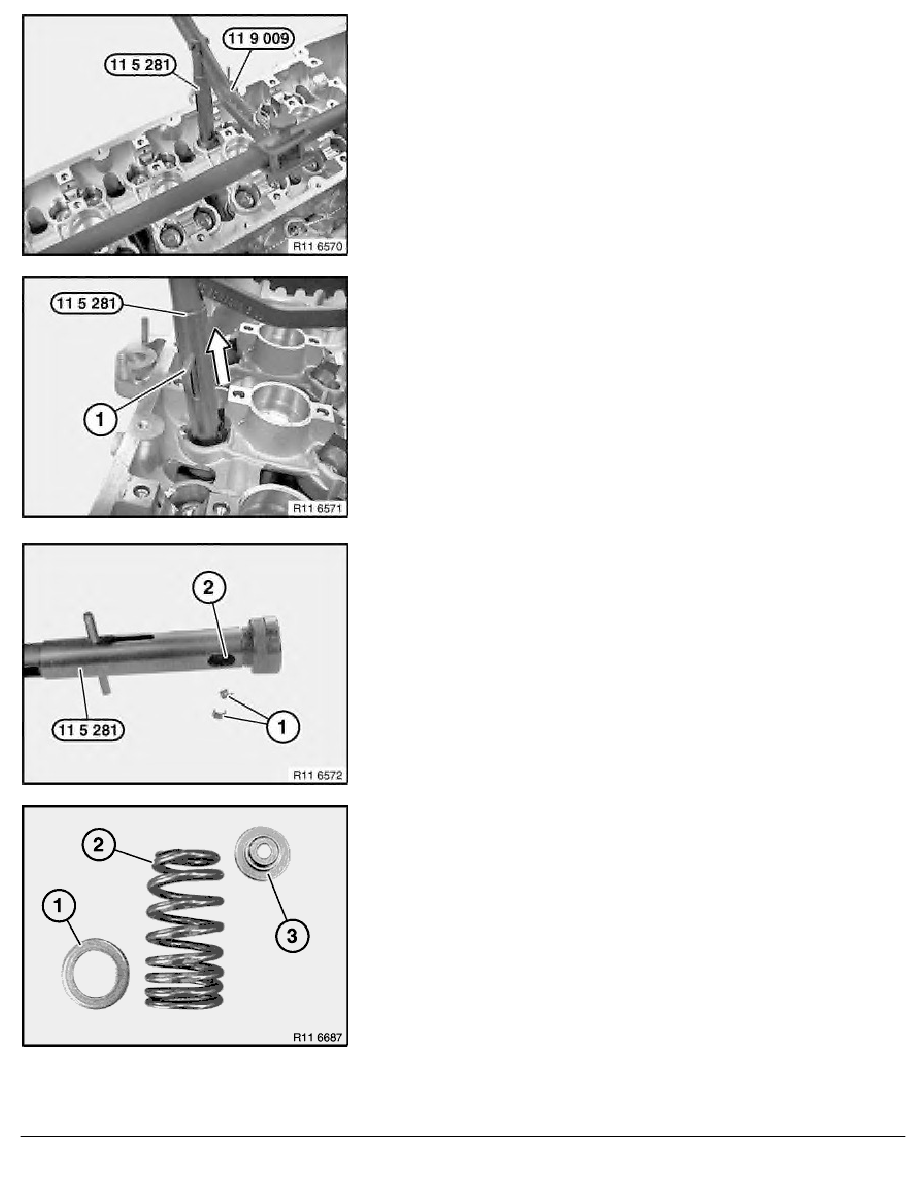
Adjust special tool 11 9 009 so that special tool 11 5 281 can
press vertically onto the valve spring.
Note:
Lever (1) on special tool 11 5 281 is tensioned with a spring.
Press down valve spring with special tool 11 5 281 and keep
pressed.
Pretension lever (1) in direction of arrow.
Release lever (1) in tensioned position.
The valve keys still installed are thus forced out and drop into the
working chamber of special tool 11 5 281 .
Repeat the operation several times if necessary until all the valve
keys are forced out.
Pull back lever on special tool 11 5 281.
Valve keys (1) can now be ejected from the working
chamber (2).
Note:
Lower spring plate (1).
Progressive valve spring (2).
Upper spring plate (3).
Installation:
Incorrect installation is not possible.
RA Replacing all valve springs (S65)
BMW AG - TIS
21.02.2013 18:35
Issue status (12/2007) Valid only until next DVD is issued
Copyright
Page - 4 -