
3 Series E92 M3 (S65) COUPE
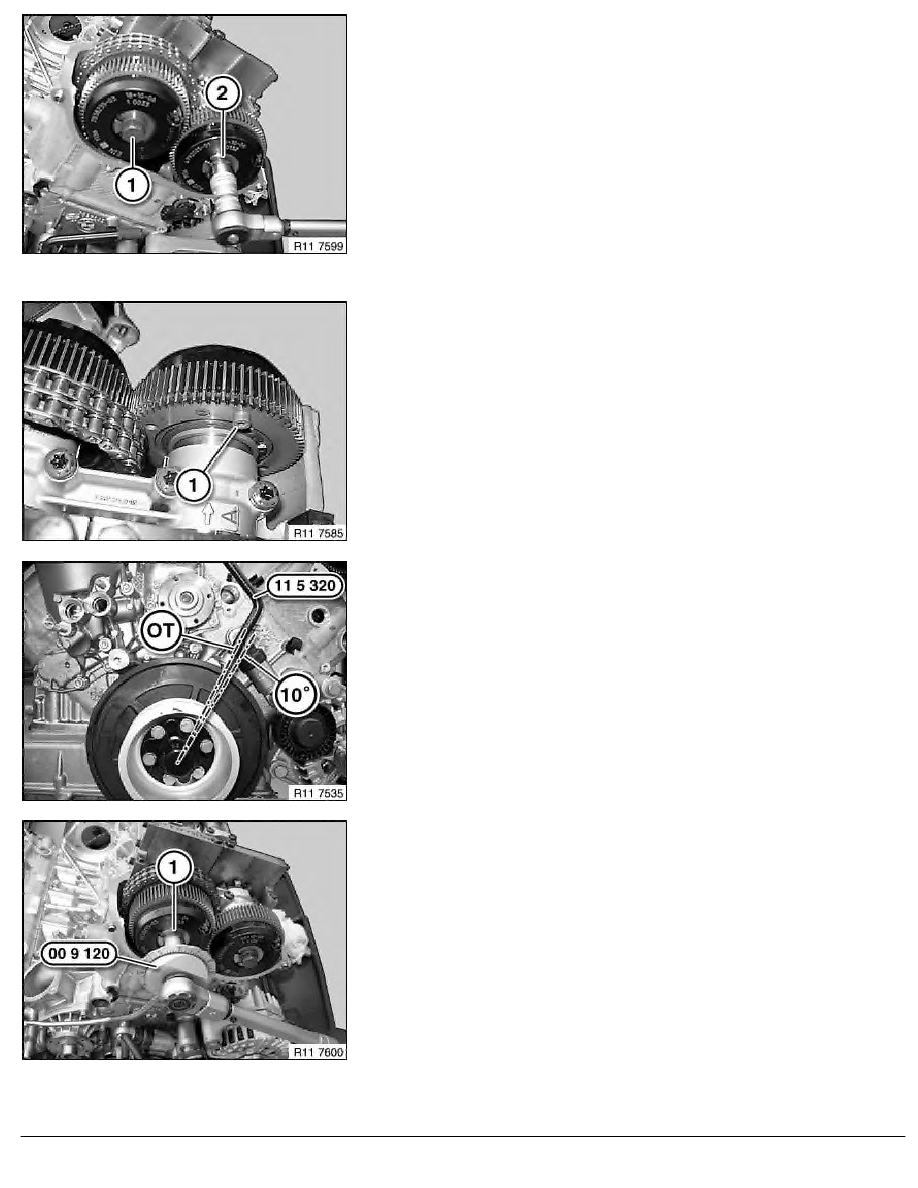
Position VANOS adjustment unit on camshaft.
Hexagon socket screw points upwards.
Insert central bolts (1 and 2) and screw with special tool
00 9 120 .
1.
Joining 10 Nm
2.
Joining 20 Nm
3.
Settling torque 80 Nm
4.
Torsion angle 200
°
5.
Unscrew central bolt.
6.
Joining 10 Nm
Remove hexagon socket screw (1) or special tool 11 5 370 .
Note:
Picture shows cylinders 1-4.
Camshafts, cylinders 5-8, remain secured with special tool
11 9 970 .
Release special tool 11 5 320 and continue barring engine at
central bolt 10
°
to firing TDC position of cylinder no. 1 .
Installation:
This minimizes timing chain and gearwheel play.
Secure crankshaft with special tool 11 5 320 .
Cylinders 5 to 8:
Always start screwing on the inlet side.
Secure central bolt (1) with special tool 00 9 120 .
Important!
Central bolt final tightening.
1.
Joining 20 Nm
2.
Settling torque 80 Nm
3.
Torsion angle 200
°
RA Removing and installing/replacing left exhaust VANOS gear (S65)
BMW AG - TIS
21.02.2013 18:37
Issue status (12/2007) Valid only until next DVD is issued
Copyright
Page - 5 -