
3 Series E92 M3 (S65) COUPE
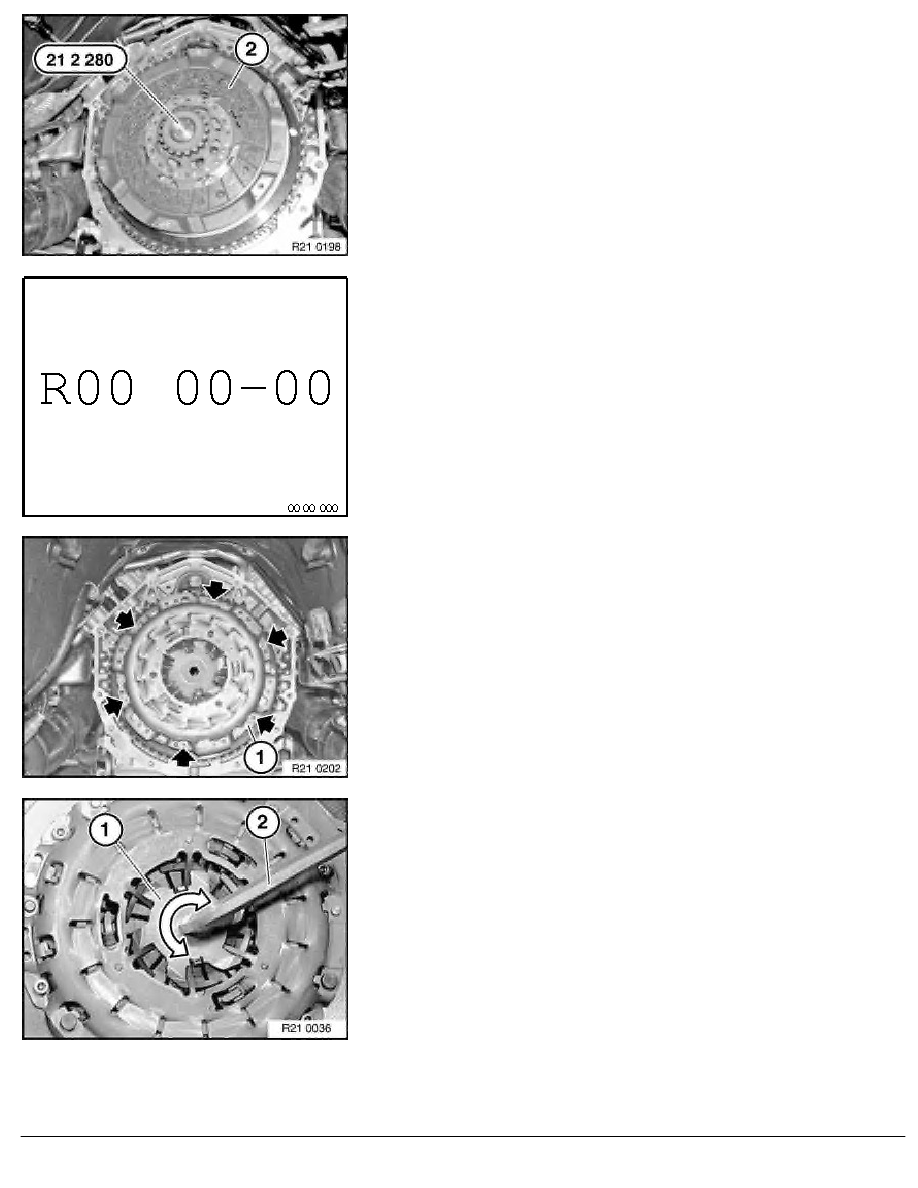
Centre clutch plate (2) with special tool
21 2 280 on flywheel.
Important!
Install clutch plate in correct position.
Note designation for "engine side" / "transmission side".
Handle clutch plate with care. Do not touch surfaces of friction
linings.
Pressure plate and dual-mass flywheel are balanced together.
Line markings (1) on dual-mass flywheel and pressure plate must
line up.
Fit clutch to flywheel.
Tightening torque 21 21 1AZ
.
Important!
Clutch must be secured by way of dowel pins (1).
Carefully unscrew locking piece (1) clockwise or
counterclockwise with a 14 mm WAF hexagon socket wrench (2).
Note:
A slight snapping of the plate spring while unscrewing the lock is
possible.
RA Removing and installing/replacing clutch (GS6-53BZ) S65
BMW AG - TIS
21.02.2013 20:39
Issue status (12/2007) Valid only until next DVD is issued
Copyright
Page - 5 -