
3 Series E93 320i (N46T) CONVER
Release screws (1).
Release screw (2) with special tool 00 4 430 .
Tightening torque: 54 37 01AZ
.
Pull seal off roof shell at rear.
On-the-job safety:
-
Comply with the relevant safety regulations
Remove remnants of adhesive from roof shell.
Clean adhesive area with Isohexane.
Air drying time:
≥
1 minute
Important!
Adhesive area must be dry and free from dust and grease.
Once it has been cleaned, do not touch the adhesive area
with bare hands.
Use 4 mm dia. butyl bead (see BMW Parts Service).
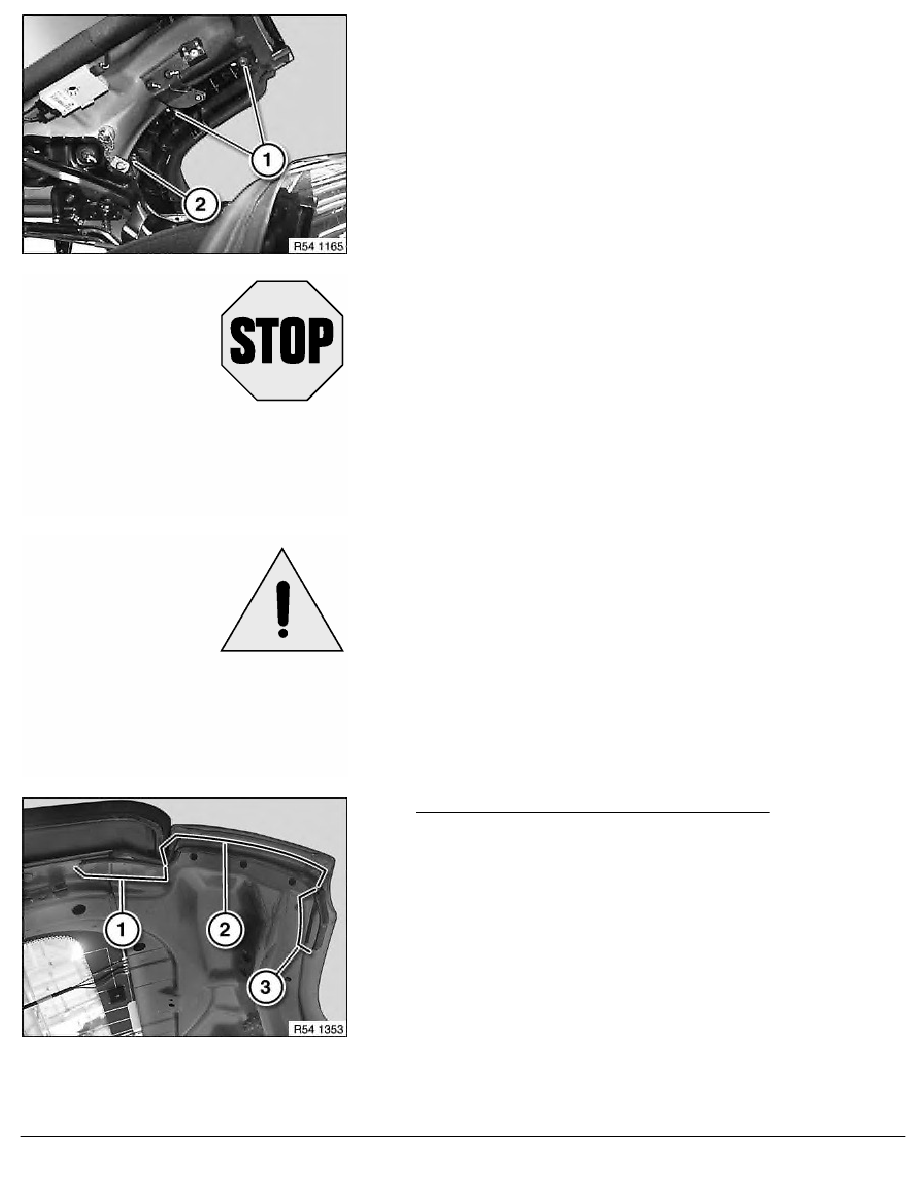
Overview of butyl bead laying on roof shell, front:
1.
Apply butylene bead with dia. 4 mm
±
1 mm with a length of
at least 40 mm in sheet metal bead.
2.
Apply butylene bead with dia. 4 mm
±
1 mm above push pin
bores.
3.
Apply butylene bead with dia. 4 mm
±
1 mm with a length
of 70 mm in centre of flange to roof shell.
RA Replacing rear roof shell seal
BMW AG - TIS
24.01.2013 01:49
Issue status (12/2007) Valid only until next DVD is issued
Copyright
Page - 2 -