
3 Series E93 325d (M57T2) CONVER
1
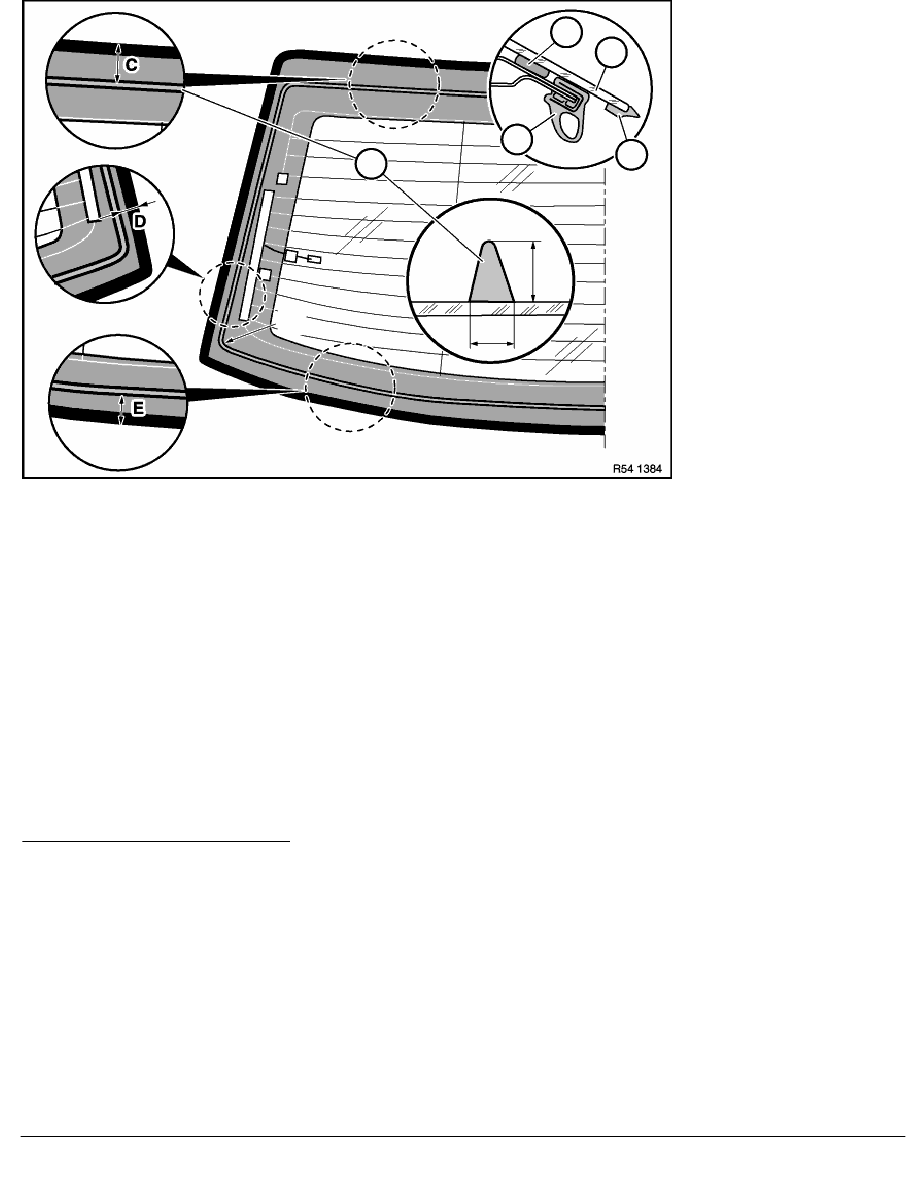
Glue bead
A
8
±
1 mm (width of cement bead)
2
Seal, roof shell
B
8
±
1 mm (height of adhesive bead)
3
Cosmetic lip
C
60
±
1 mm (centre of adhesive bead to outer
edge of cosmetic lip)
4
Rear window
D
20
±
1 mm (centre of adhesive bead to outer
edge of cosmetic lip)
E
45
±
1 mm (centre of adhesive bead to outer
edge of cosmetic lip)
R
approx. 10 mm radius
Attach special tool 51 3 010 twice to tool trolley. Moisten suction surfaces and secure rear window from outside.
If reusing the removed rear window, remove the adhesive residue with a blunt scraper or knife.
Observe treatment of adhesive area in body-cutout and on rear window, see Instructions on window cementing
Position and width of adhesive bead:
•
Overlapping and closed
•
Not visible from outside and inside
•
The contact point becomes noticeable through an increase in the adhesive volume (approx. 1.5 - 2 x bead width
after crushing).
Position adhesive bead only where the glass ceramic material offers a sufficient overlap and the body flange
offers sufficient space.
•
The adhesive bead is not permitted in the window radii and in the cowl panel area
•
Spread adhesive bead with special tool 00 9 322
RA Removing and installing/replacing rear window
BMW AG - TIS
26.01.2013 03:40
Issue status (12/2007) Valid only until next DVD is issued
Copyright
Page - 4 -