
3 Series E93 330i (N53) CONVER
Join exhaust camshaft to lower and upper bearing strips with
torque wrench from inside outwards to 8 Nm .
Release all screws of bearing bank (1) from outside inwards by
90
°
.
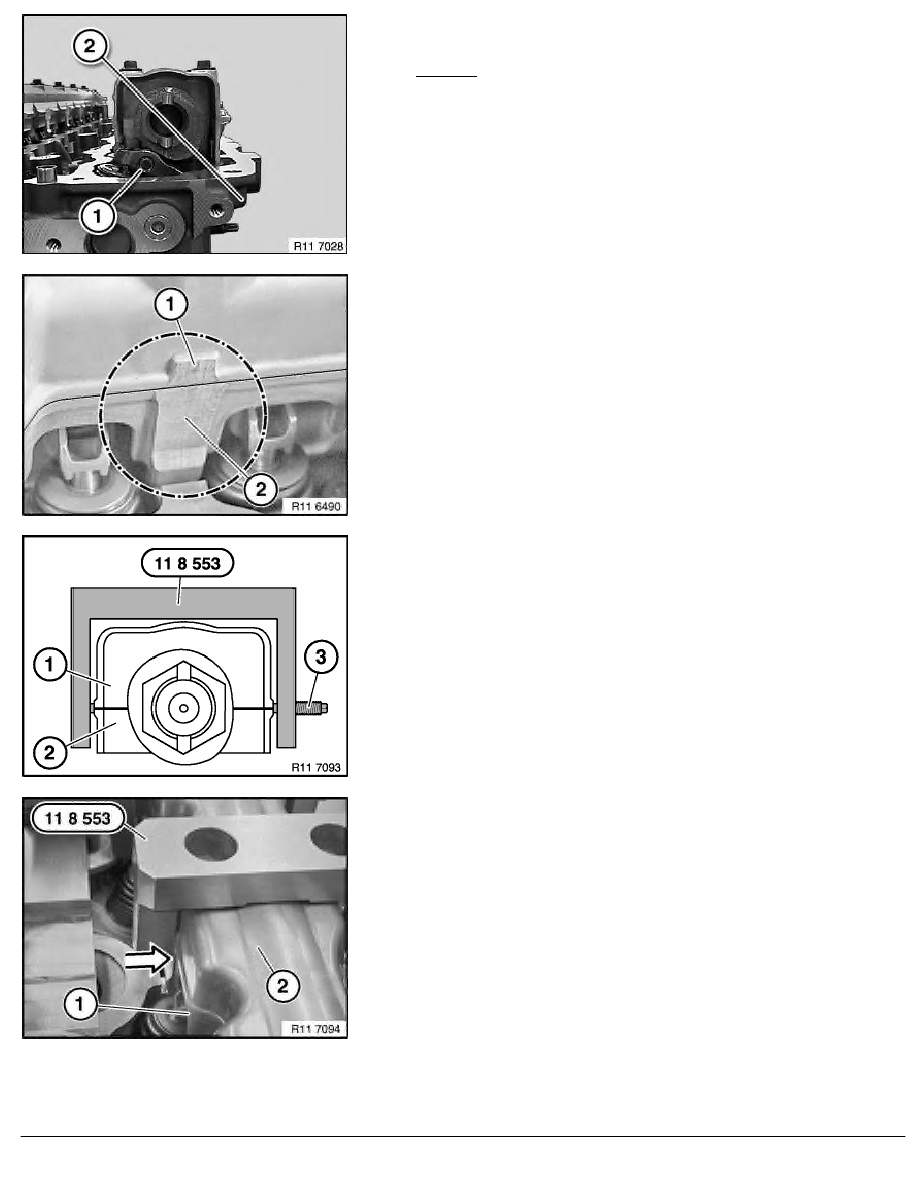
Check position of exhaust camshaft (2) at 6th cylinder.
Roller cam follower (1) is not actuated.
Installation:
Lower and upper bearing banks must be aligned to each other at
ground surfaces (1 and 2).
Bring thrust piece and legs of special tool 11 8 553 into contact
at milled surfaces.
Note:
Schematic depiction of special tool 11 8 553 at lower bearing
bank (2) and upper bearing bank (1).
Important!
Tighten screw (3) on thrust piece to 2 Nm.
Position special tool 11 8 553 over screw connection of bearing
banks.
Make sure that legs come into exact contact on ground surfaces,
lower bearing bank (1) and upper bearing bank (2).
RA Removing and installing or replacing exhaust camshaft (N53)
BMW AG - TIS
10.02.2013 12:26
Issue status (12/2007) Valid only until next DVD is issued
Copyright
Page - 4 -