
3 Series E93 335i (N54) CONVER
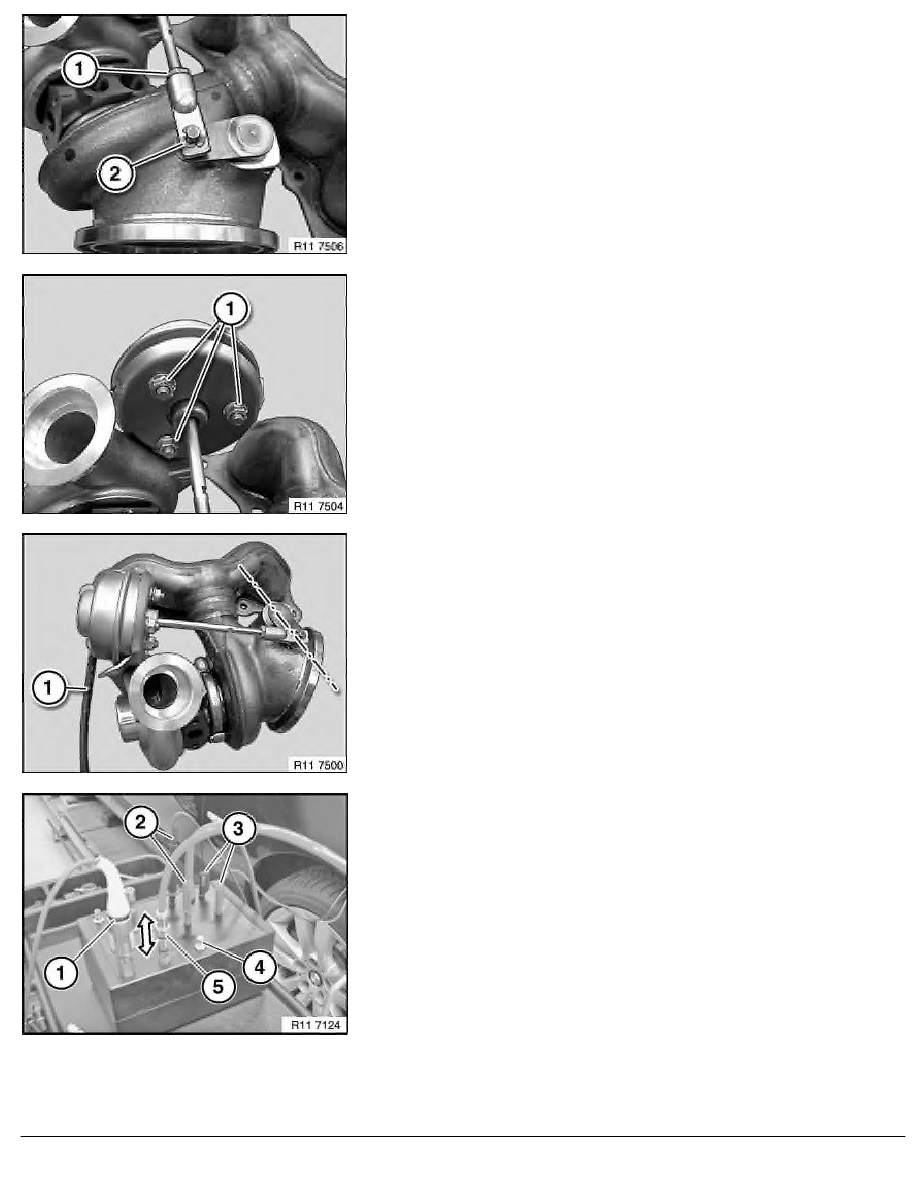
Release locking clip (2).
Disengage linkage of vacuum unit (wastegate).
Unscrew nuts (1).
Tightening torque: 11 65 9AZ
.
Replace vacuum unit (wastegate).
Adjusting vacuum unit (wastegate) linkage:
Initial position of vacuum unit wastegate (linkage) depressurized.
Connect red vacuum line (1) to vacuum unit (wastegate).
Vacuum pressure measurement:
Prepare BMW diagnosis system on vacuum diagnosis unit.
1.
Screw in pressure sensor.
2.
Connect 12V battery cables (2) to vehicle battery positive and
negative.
3.
Connect 12V battery cables (3) to vehicle battery positive
and negative (pump operation max. 3 mins.).
4.
Controller for vacuum connection.
5.
Vacuum connection (Red).
RA Replacing vacuum unit (wastegate) (N54)
BMW AG - TIS
12.02.2013 01:39
Issue status (12/2007) Valid only until next DVD is issued
Copyright
Page - 2 -