
5 Series E34 525tds (M51) TOUR
Note:
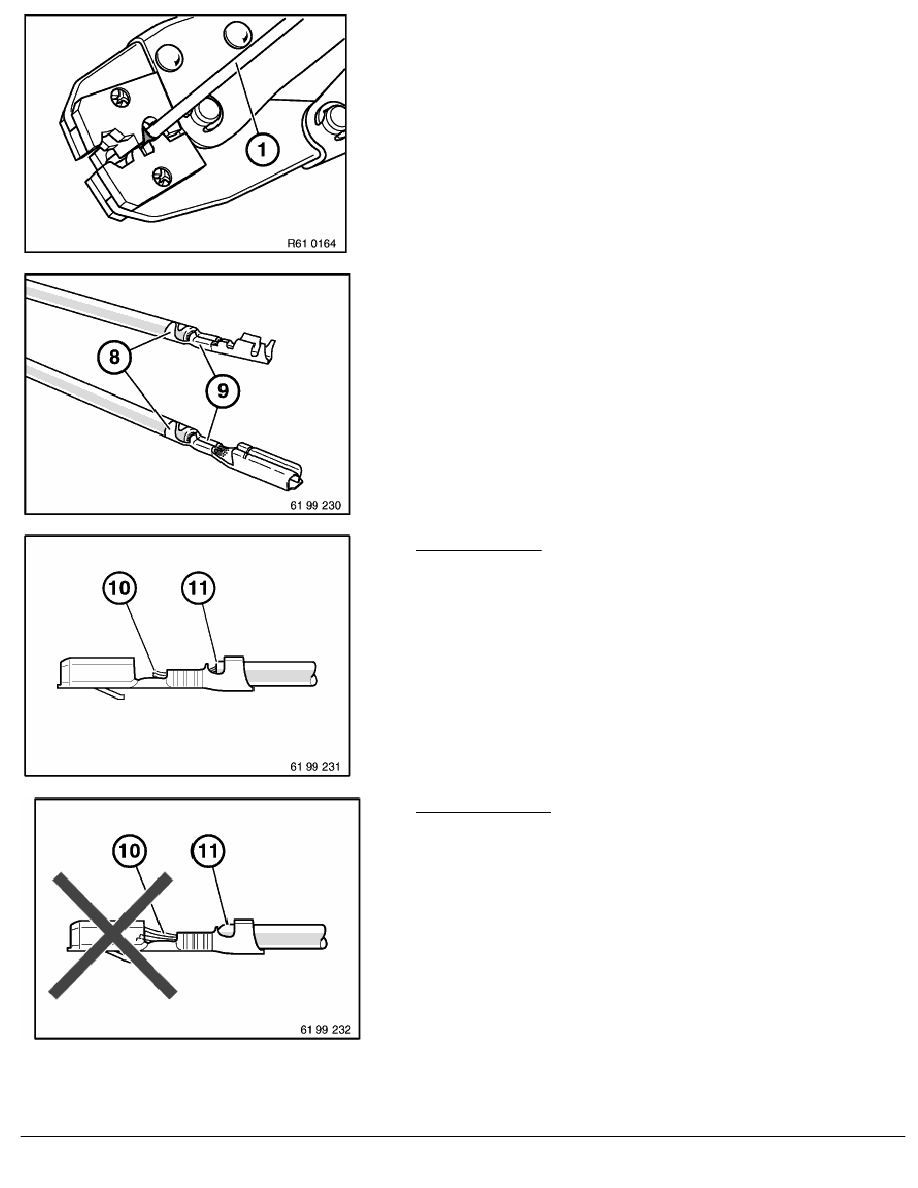
Follow procedure for cutting and stripping insulation from cables.
Insert stripped end of wire (7) in the contact. Ensure insulation and
stripped wire end are correctly laid in contact.
Compress crimping tool as far as it will go.
Crimping tool unlocks automatically.
Take contact out of crimping tool.
4. Checking crimping
Check insulation crimp (8) and wire crimp (9) against following
illustrations to ensure crimps are correctly located.
Note:
Illustration shows butt connectors and contact sleeves for fan
connectors knocked on one side. The crimping procedure is
identical here.
Correct crimping:
Visible conductor end (10).
Visible insulation end (11).
Incorrect crimping:
Conductor end (10) inserted too far.
Insulation end (11) in wire crimp.
If necessary, repeat crimping with a new contact.
RA Crimping stop parts
BMW AG - TIS
24.01.2013 11:56
Issue status (12/2007) Valid only until next DVD is issued
Copyright
Page - 3 -