
5 Series E39 520i (M52TU) TOUR
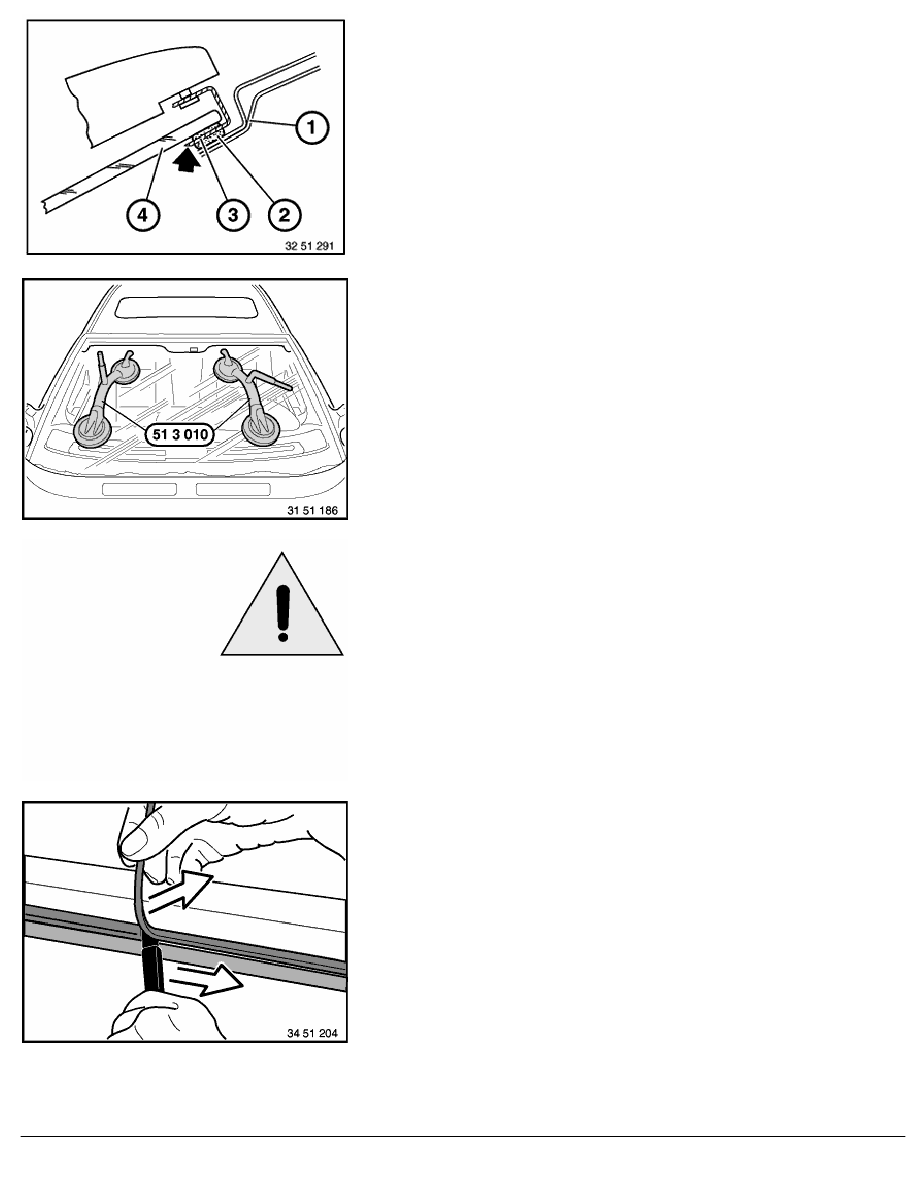
Cut through glue bead all around and as close as possible to
windscreen glass.
1.
Body opening
2.
Glue bead
3.
Knife
4.
Windshield
Lift out the windscreen using special tool 51 3 010.
Pull off adhesive tapes all round.
Caution!
To ensure long-term corrosion protection, it is absolutely
essential to repair paintwork damage (scratches and large-
surface damage),
refer to 51 31 ...
Immediately before installing windshield:
Remove glue residue in body cutout
to approx. 0.5 mm.
To avoid damaging paintwork in body cutout,
carefully remove glue residue with a scalpel.
Caution!
Clean freshly cut residual bead with 2-Propanol only,
do not under any circumstances use Sika bonding agent
205/5.
RA Removing and installing front windscreen
BMW AG - TIS
06.02.2013 22:28
Issue status (12/2007) Valid only until next DVD is issued
Copyright
Page - 4 -