
5 Series E39 520i (M52TU) TOUR
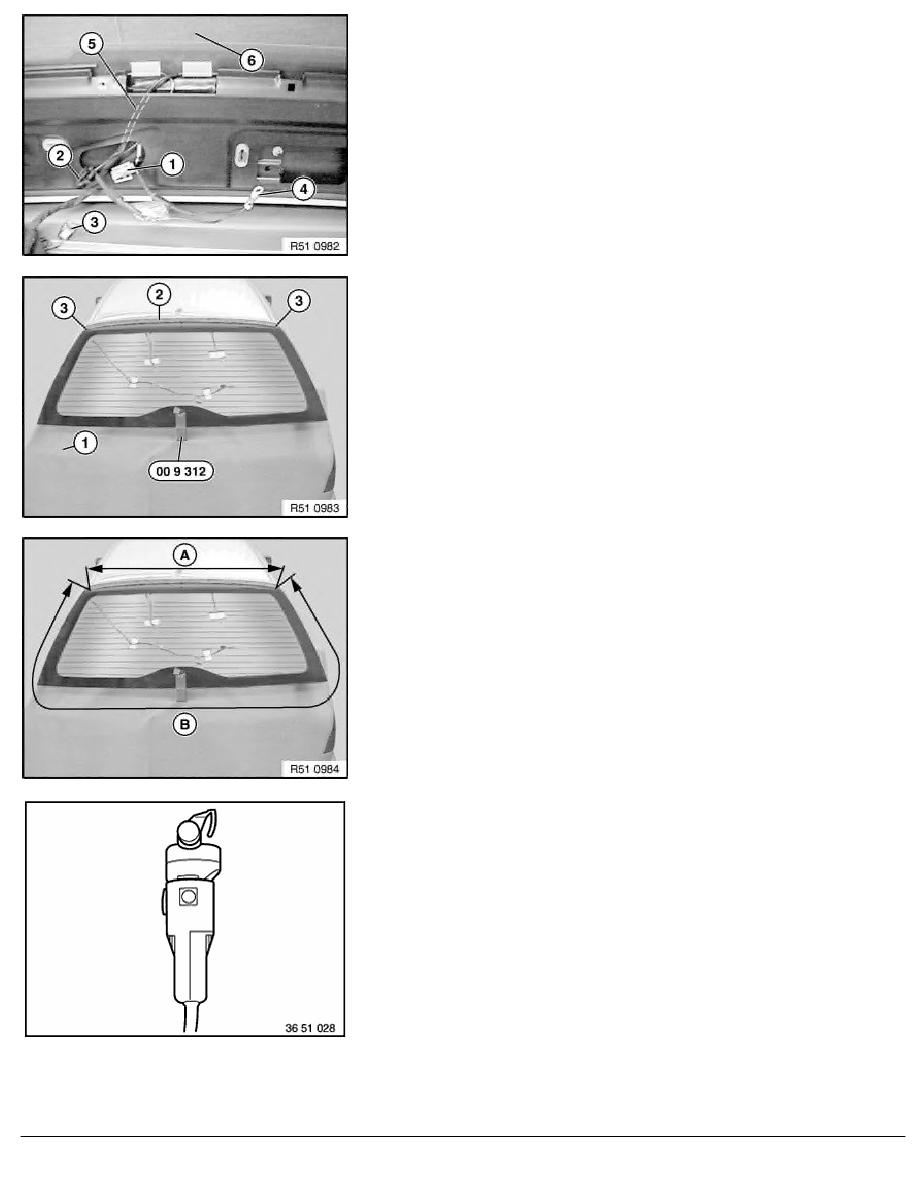
Withdraw connector (1 ... 4) from rear window frame (5) and
secure to rear window with adhesive tape (6).
Open tailgate.
Slide protective cover (1) between rear window frame and body
and secure with adhesive tape.
Place a support between rear window frame and trunk lid (e.g.
special tool 00 9 312) and secure it with adhesive tape.
Attach fabric adhesive tape (2) at top between rear window and
rear window frame. Attach fabric adhesive tape to the edges (3) at
three points.
The rear window is cut out with two different lengths of blade (risk
of damage).
(A) Length of blade 24 mm at top
(B) Length of blade 36 mm along side and bottom
Note:
First of all, cut at the top (A).
Fit knife (24 mm blade length, sourcing reference: BMW Parts
Service) to the tool.
Note:
Sharpen knife blade before every use on a running machine
with a grinding stone (even with new knife blade).
RA Removing and installing rear window (touring)
BMW AG - TIS
06.02.2013 22:29
Issue status (12/2007) Valid only until next DVD is issued
Copyright
Page - 2 -