
5 Series E39 523i (M52) TOUR
51 24 150
Removing and installing/replacing hydraulic
unit for rear lid actuation
(electrohydraulic/fully automatic) (Touring)
Follow instructions for automatic rear lid actuation
(electrohydraulic).
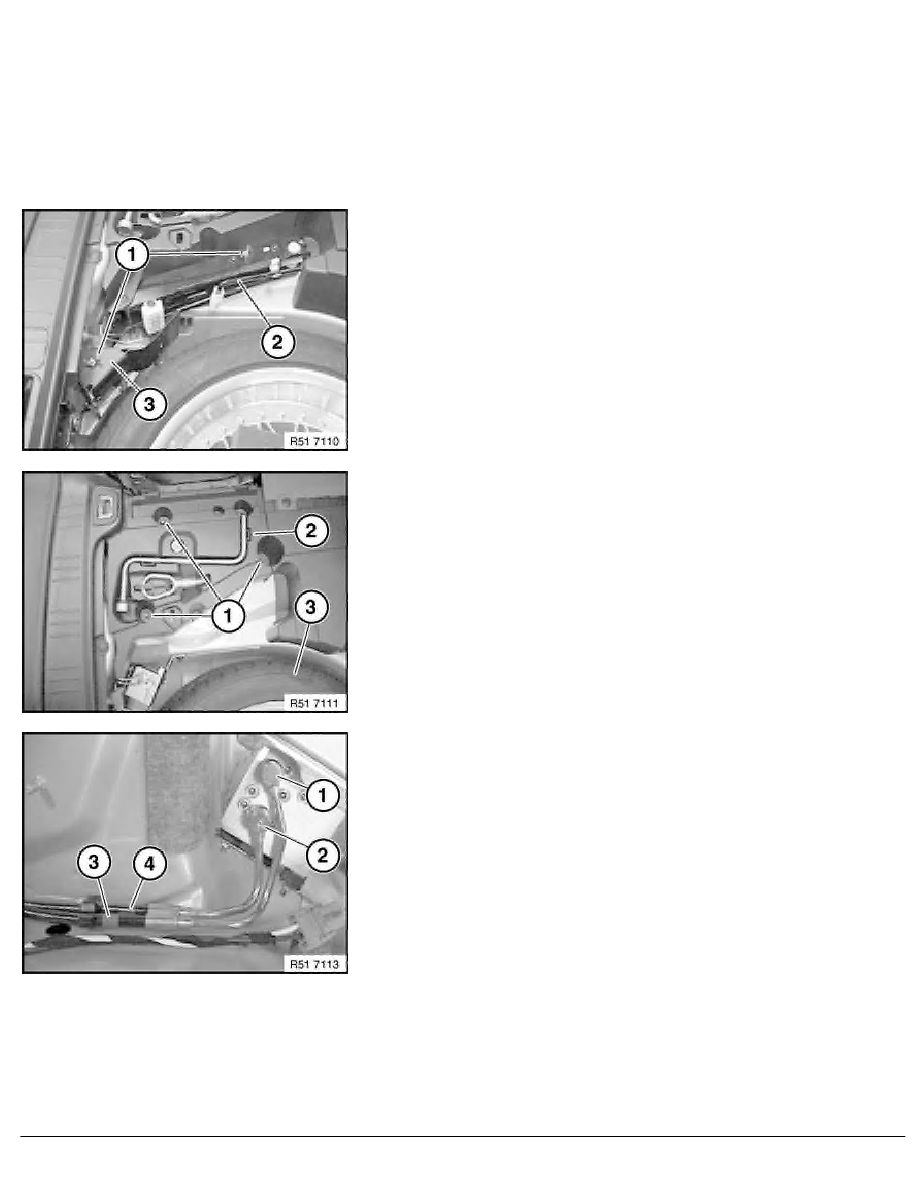
Remove luggage compartment floor trim panel.
Unscrew nuts (1).
Remove car jack (2) and wedge (3).
Unscrew nuts (1).
Remove storage tray (2).
Remove spare wheel (3).
Caution!
Catch emerging fluid with a cleaning cloth.
Remove hollow union bolts (1) and (2).
Installation:
1
Banjo bolt on hydraulic unit "RED"
2
Banjo bolt on hydraulic unit "BLUE"
3
Hose marking is "red"
4
Hose marking is "blue"
Tightening torque, 51 24 1AZ.
Note:
If the hydraulic unit is replaced or remains removed for an
extended period of time, it is essential to seal the bores on the
hydraulic unit and the hose connections for hydraulic cylinders.
RA Removing and installing/replacing hydraulic unit for rear lid actuation (electro
BMW AG - TIS
12.02.2013 21:30
Issue status (12/2007) Valid only until next DVD is issued
Copyright
Page - 1 -