
5 Series E39 530d (M57) SAL
Place removed active seat unit on a clean surface.
Turn hydraulic bubble (1) over and cut through clips (2) with side
cutting pliers.
Remove left tray in same way as right tray.
Installation:
Fit new clips (2).
Installation:
Place tray (1) as illustrated under hydraulic bubble and
connect with new clips.
Connect left tray in mirror image fashion.
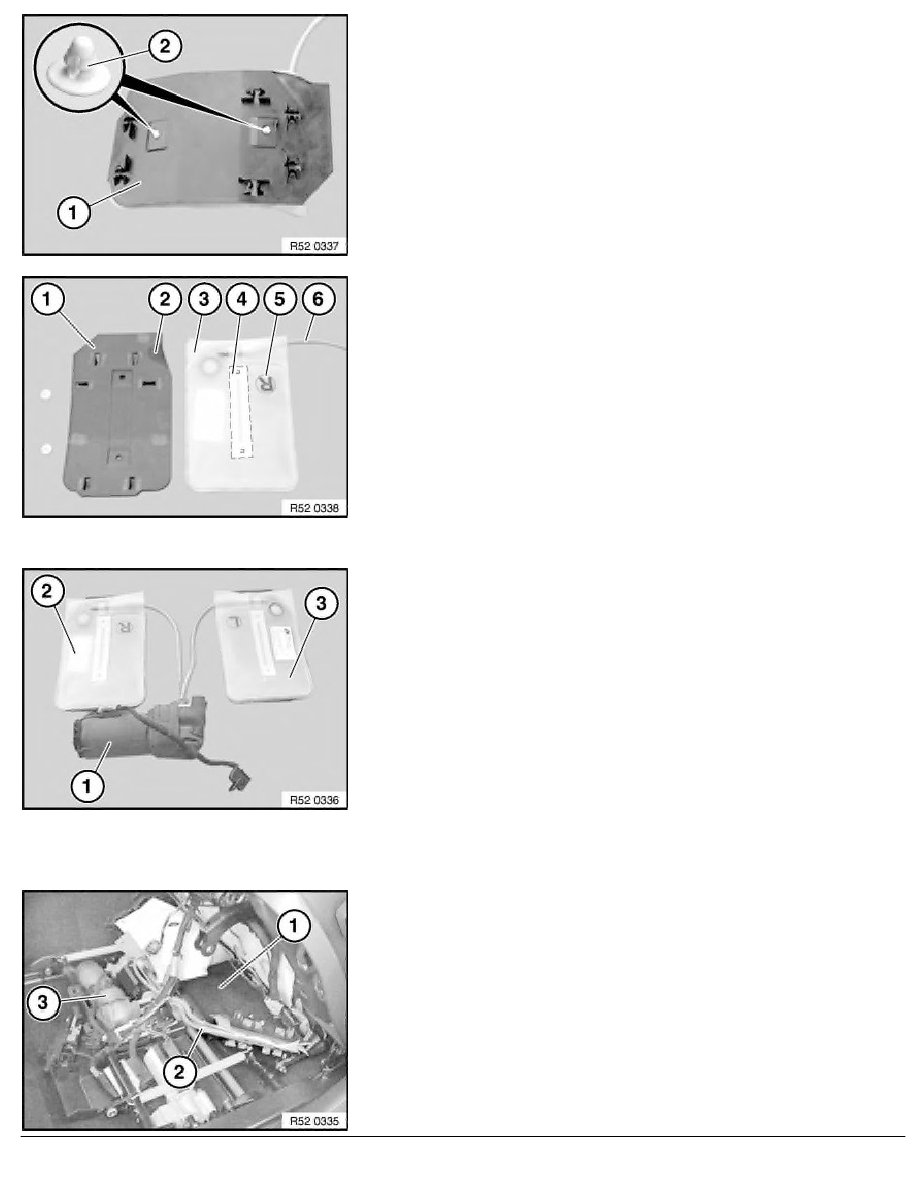
1.
Tray
2.
Opening for hydraulic hose (6)
3.
Hydraulic bubble (R), right
4.
Retaining lug on underside of hydraulic bubble
5.
Designation of hydraulic bubble (R), right (direction of travel)
6.
Hydraulic hose
Installation:
After installing hydraulic bubbles (2) and (3) with trays, place
active seat unit on a clean surface.
Check all components for damage.
The hydraulic bubbles (2) and (3) must rest on the surface
without torsion (as shown in illustration); turn hydraulic bubble
if necessary.
For assembly, fold hydraulic bubbles together and place in
seat subframe.
1.
Pump
2.
Hydraulic bubble (R), right
3.
Hydraulic bubble (L), left
Installation:
Feed in trays (1) and (2) that have been fitted together with
pump (3).
RA Removing and installing/replacing drive for active seat, left or right
BMW AG - TIS
20.02.2013 20:44
Issue status (12/2007) Valid only until next DVD is issued
Copyright
Page - 4 -