
5 Series E39 530d (M57) TOUR
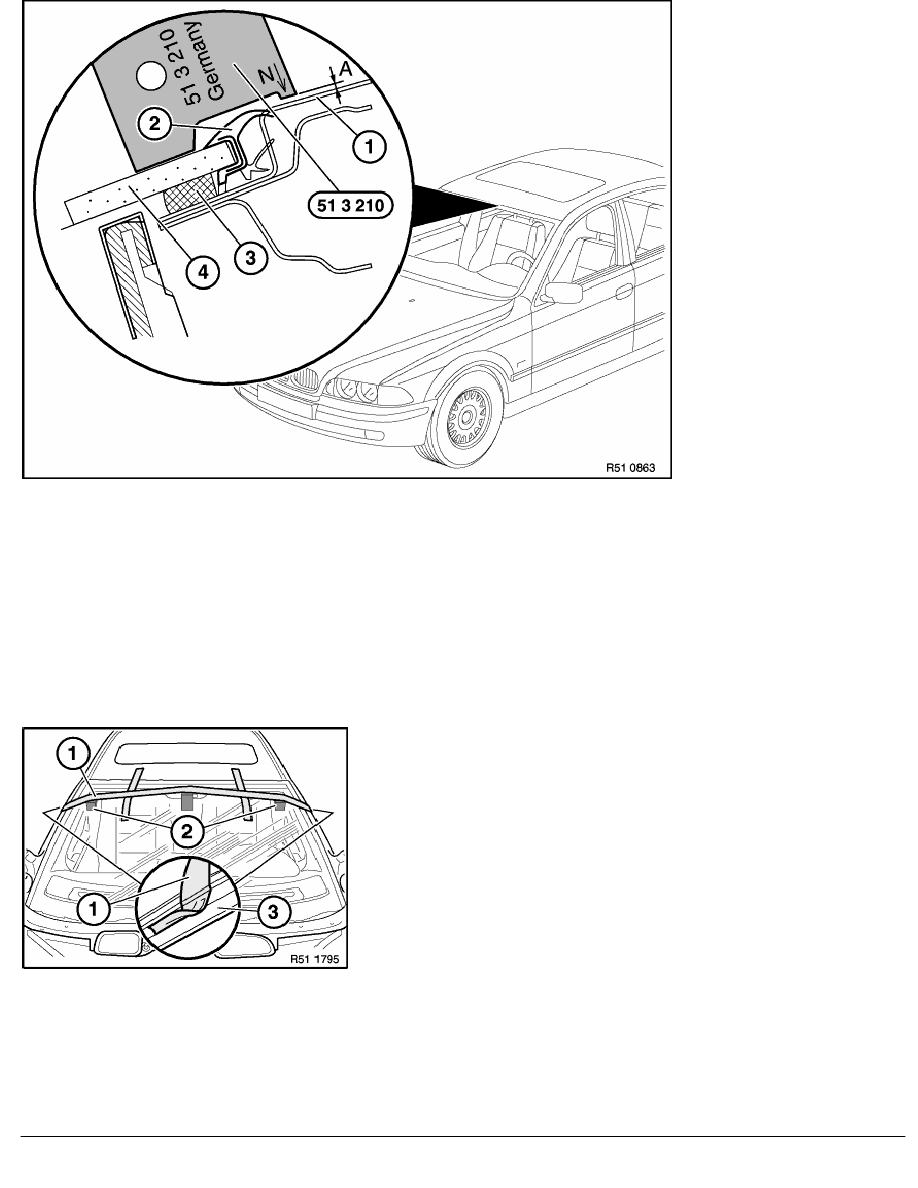
When installing windshield (4), make sure that it lies lower to roof outer skin (1). This is the only way of ensuring
sufficient preload between the sealing lip (2) and the roof (prevention of wind noise). Check installation position of
windshield (4) in middle of vehicle with special tool 51 3 210; a clearance (A) is permitted.
Dimensions:
Standard windows = designation "N":
(A) = 0 - 1.5 mm
Anti-theft windows = designation "S":
(A) = 0 - 0.6 mm
Open both front doors.
Secure HR foam blocks (2) with plastic adhesive tape (1) (Tesa).
Pretension windshield with plastic adhesive tape (1) (Tesa) until it
is correctly positioned at top (see previous work step).
Note:
Do not stick plastic adhesive tape (1) above A-pillar
finisher (3) or ITS head airbag.
RA Removing and installing front windscreen
BMW AG - TIS
20.02.2013 21:29
Issue status (12/2007) Valid only until next DVD is issued
Copyright
Page - 9 -