
5 Series E39 530d (M57) TOUR
Caution!
To provide long-term corrosion protection, always touch up
damage to paintwork (scratches and large areas of damage),
refer to 51 31 ...
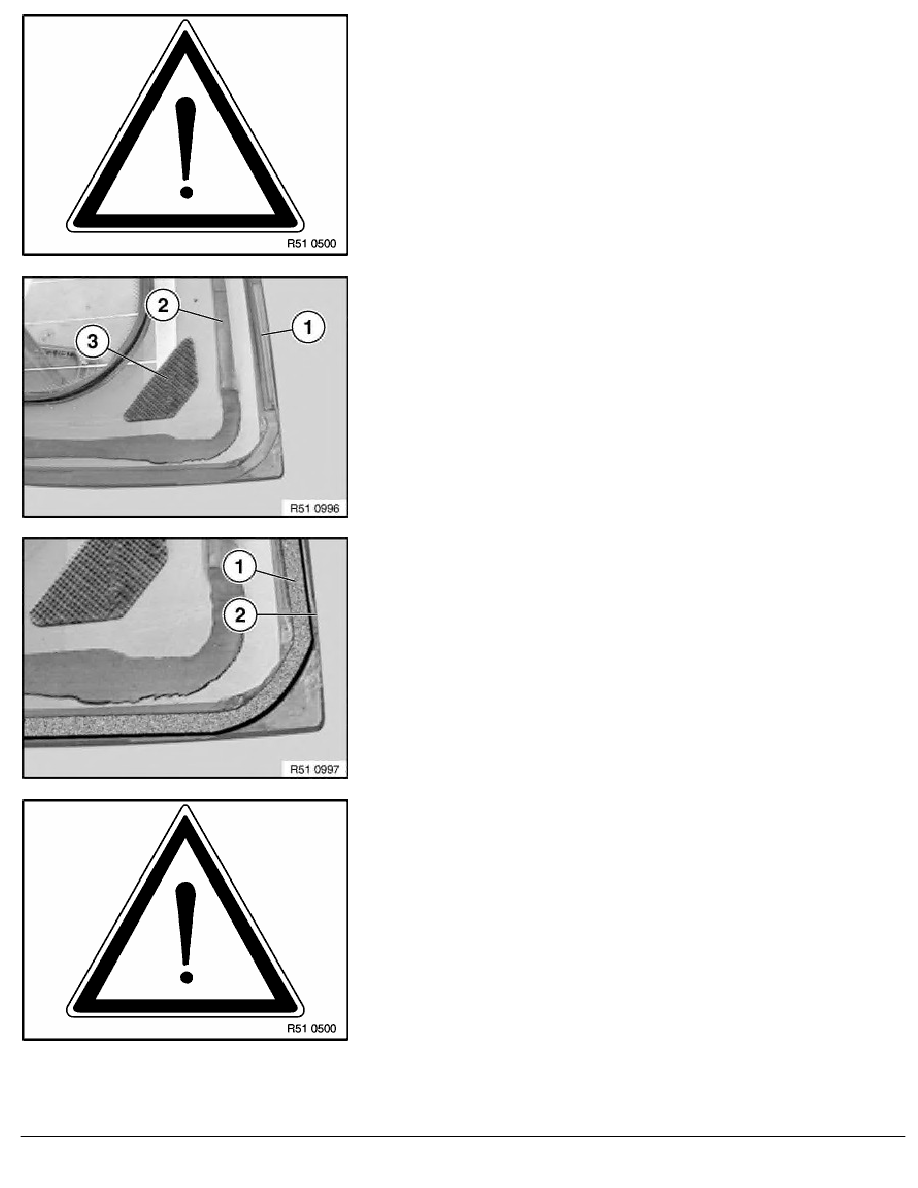
Only if rear window is reused:
Cut away residue of external seal (1) and cement bead (2) on the
rear window to a thickness of approx. 0.5 mm.
To avoid damage to the rear window, carefully cut away cement
residue with scalpel.
If defective, attach new burr tape (3) (Dual-Lock tape) to the
edges.
Only if rear window is reused:
Attach soft rubber (sourcing reference BMW Parts Service) to
chamfer (4) at sides and bottom of rear window.
Secure wires for rear window heating and antenna with adhesive
tape.
Caution!
The basic filler must have hardened!
Treat rear window and body beside cemented area with BMW-
approved materials (repair kit, sourcing reference: BMW Parts
Service),
refer to 51 31 ...
Note:
Note ventilation time!
RA Removing and installing rear window (touring)
BMW AG - TIS
20.02.2013 21:31
Issue status (12/2007) Valid only until next DVD is issued
Copyright
Page - 5 -